
In computer terms ISO refers to a mirror image. In other words, it refers to an optical disk image of what is available in your system. ISO converts all the system files into binary format and makes exact copy of stored data. It saves the files with the “.iso” extension. With the help of ISO image file, disk optical image can be carried without losing data structure.
ISO image can be created with simple commands or by using third party software. This educational material provides a procedure to create an ISO image from the current Ubuntu Installation through terminal and third-party tool (brasero).
How to Create an ISO from Current Installation in Ubuntu 22.04
ISO converts all of the files from the system disk into a single file without losing its structure. If you want to run your system files on other machines, create an iso optical image file with “.iso” extension and feel free to use. Additionally, it also compresses your data in a small size. This section provides the methods to create ISO using terminal and third-party apps.
How to create an ISO image from the current installation in Ubuntu 22.04 via terminal
Linux distributions including Ubuntu 22.04 provide a well-equipped terminal to run commands. In Ubuntu 22.04, the following commands will be executed from the terminal to create an ISO image file from the current installation.
By using the following procedural steps, an ISO image can be created from current installation in Ubuntu 22.04.
Step 1: Locate Present Working Directory
Set your path before you start creating an ISO file. First, locate your Present Working Directory by using the pwd command.
$ pwd
As output, you will be returned your present directory/folder. See the above screenshot for the reference.
Step 2: List the Directory Files
List your files by running the command ls from your terminal.
$ ls
Step 3: Change Directory
You can change your directory by using the cd command. The example is given below.
$ cd Documents
Step 4: Making New Directory/Folder
Once you enter a new directory, make a new folder like BackupFolder with the mkdir command.
$ mkdir BackupFolder
Step 5: Enter into Directory/Folder
Repeat the cd command to go inside the BackupFolder directory.
$ cd BackupFolder
Step 6: Creating ISO File via Terminal
Now you are in the safe zone to create the ISO file from the current Installation in Ubuntu 22.04. mkisofs helps to generate binary images of your directory tree and save them in ISO file.
$ mkisofs -o ubuntu22.iso ~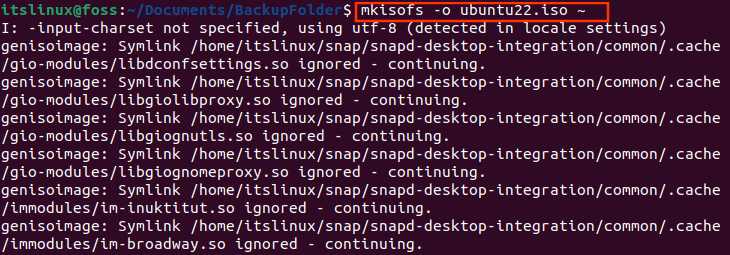
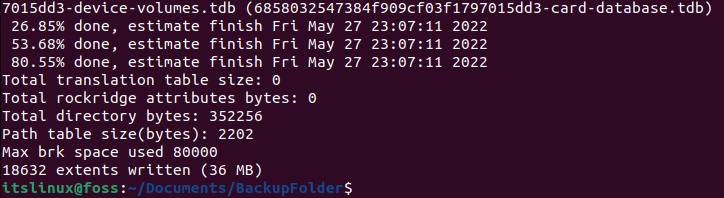
After the process completion, you will find that an ISO file is created with a 36MB size.
Step 7: Verify the ISO File with “ls”
Just confirm whether the ISO file is created or not by using the ls command:
$ ls
Great work done! All the above steps are performed successfully.
How to create an ISO image from the current Installation in Ubuntu 22.04 via Brasero
Brasero is an application used for creating/burning disks. With a simple and user-friendly graphical user interface, it allows you to create audio and video CD/DVDs as well as ISO image files. Additionally, with the help of Brasero you can load ongoing project files and erase them from CD/DVDs. Brasero is available for everyone without any pricing plan under the GNU General Public License (GPL).
The following few steps can be performed to create an ISO file from your current installation in Ubuntu 22.04:
Step 1: Update System Repository
Open your terminal window (Ctrl+Alt+T) and run the update command for latest system files updates.
$ sudo apt update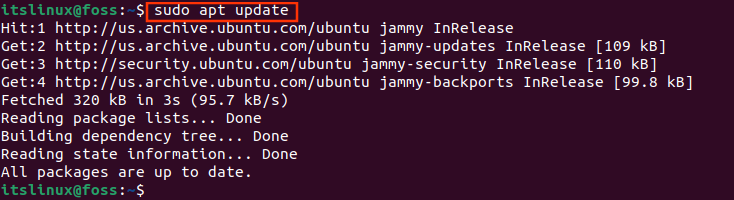
Step 2: Install brasero with apt Package Manager
After updating the core libraries of Ubuntu, install the brasero package following the below syntax.
$ sudo apt install brasero -y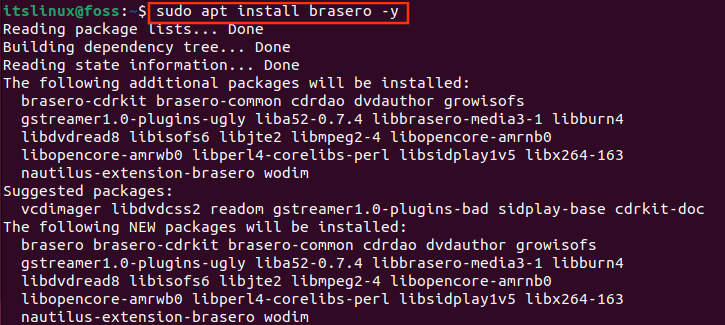

Note: “-y” is used to give prior permission.
When all the packages are installed, a message with brasero (3.12.3-1) will appear as output which shows that the brasero 3.12.3 version is installed successfully.
Step 3: Open brasero via Terminal
You can open brasero application both from ubuntu Activities or direct from the terminal like type brasero and press enter key to continue.
$ brasero 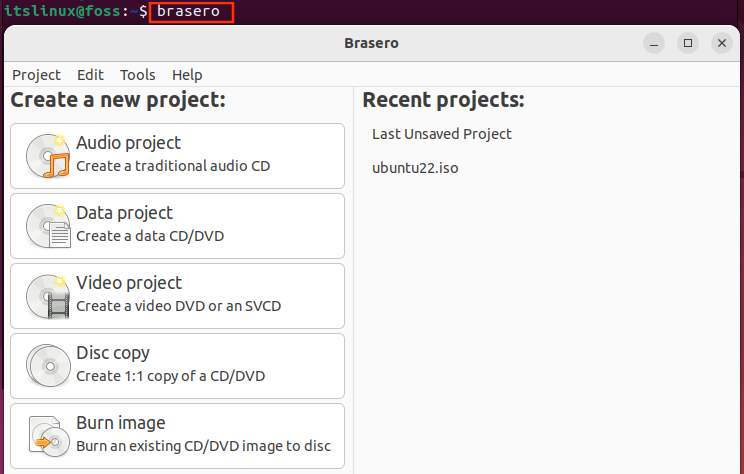
Step 4: Create New ISO Project
Click on Data project (see in the red box) to create a new ISO image.

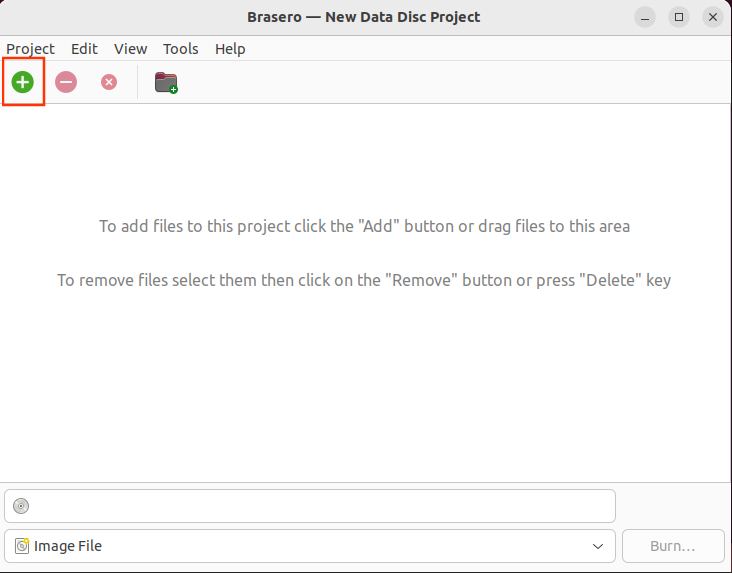
Step 5: Adding File to Project
Click on the add button in green denoted with plus “+”.
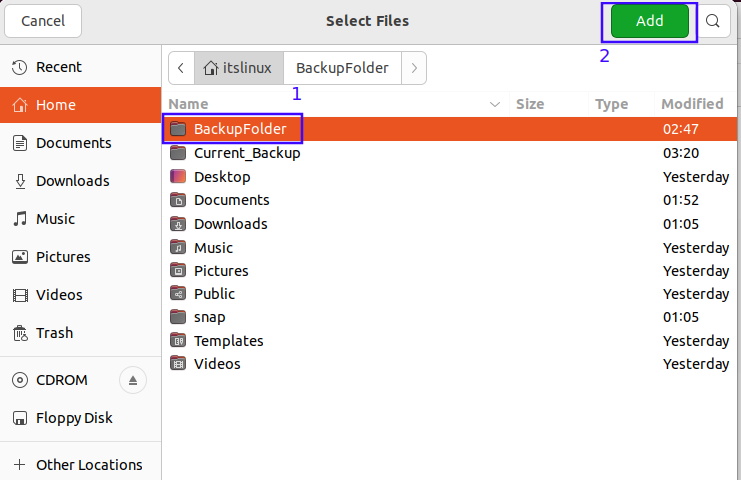
Step 6: Locate Project Directory
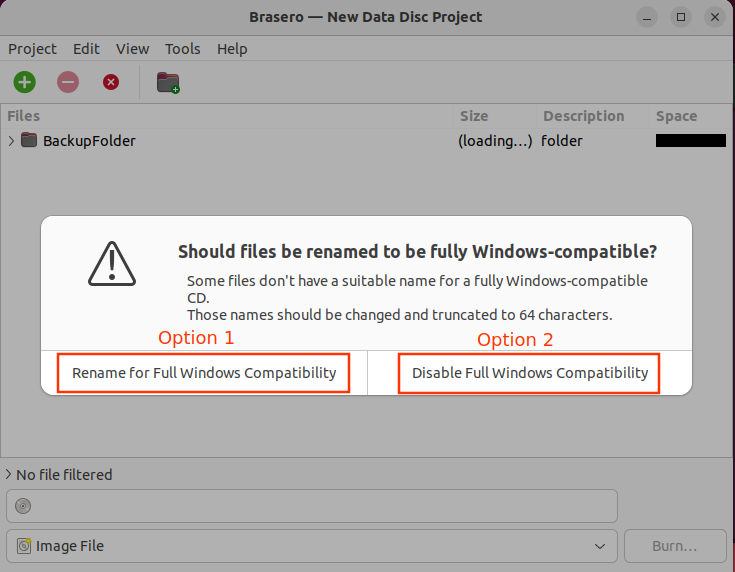
After Clicking the add button, a new window will appear in front of you (as shown in the below screenshot). Locate your directory where the files are saved. The Add button in green will add all the backup files.
After doing so, you have two options to proceed. The “Option 1” refers to Rename for Full Windows Compatibility and “Option 2” points towards Disable Full Windows Compatibility.
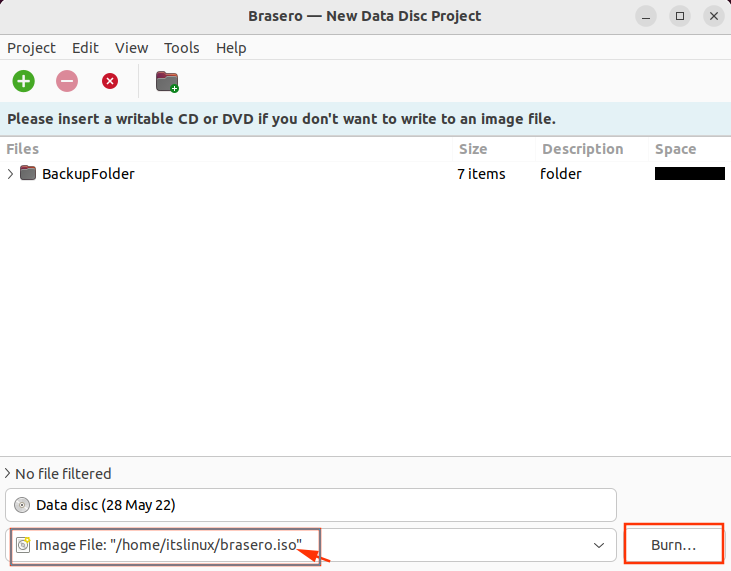
Step 7: Select the File Extension (*.iso)
Confirm the file extension with (*.iso) and click on Burn:
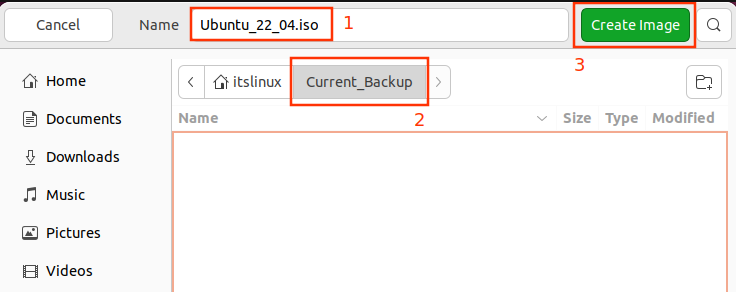
Step 8: Creating ISO Image
You can create an ISO image with proper image name and path.
Finally, click on the Create Image button.
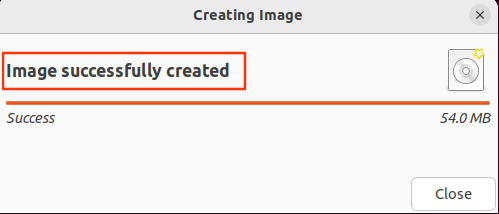
The below status of completion will be displayed with the message “Image successfully created”,
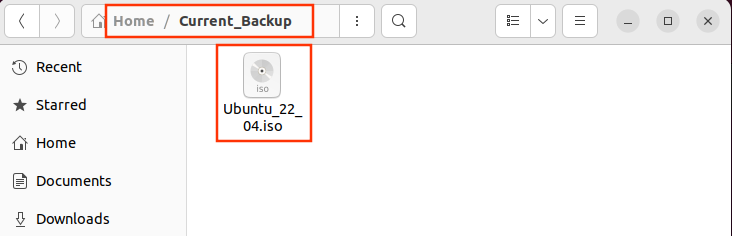
Step 9: Check the Availability of ISO Image
Go to file path and check whether your iso image is created or not. The below screenshot shows that all the steps were performed successfully.
Here you go!
You have created the ISO file from the current installation in Ubuntu 22.04.
Conclusion
It is possible to create an ISO image from the current installation in Ubuntu 22.04 either using CLI or third-party applications like brasero. ISO is an optical image of a disk which creates an image of your disk sector by sector. This educational content illustrates various methods to create an ISO image from the current installation in Ubuntu 22.04.

Saryia is a technology entrepreneur and digital publisher specializing in Linux, open-source technologies, and developer education.