Postfix is a commonly used open-source utility for sending email over the internet. It is compatible with Unix and Linux platforms, including Ubuntu 22.04. Postfix supports a command-line interface that can be used to send emails. It is a faster, easier to manage, and more secure mail transfer agent. At this moment, Postfix is used by around 33% of internet mail servers.
The complete procedure for installation and configuration will be elaborated in the following post.
Postfix Installation on Ubuntu 22.04
Follow up the below-given procedure for installing and configuring Postfix.
Step 1: Update packages
First, we need to update the Ubuntu packages. To do so, open up the terminal using “CTRL+ALT+T” and execute the below-given command:
$ sudo apt update
Step 2: Install Postfix
For installation of Postfix, execute the below-mentioned command. Also, specifying the priority level “DEBIAN_PRIORITY” as “low” will allow us to configure Postfix after its installation:
$ sudo DEBIAN_PRIORITY=low apt install postfix
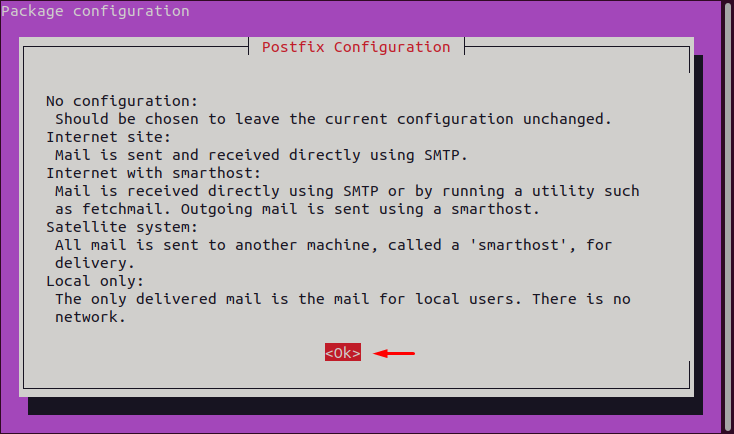
After executing the installation command, a “Postfix Configuration” window will appear on your screen. Select the “Ok” option to continue:
Step 3: General mail configuration
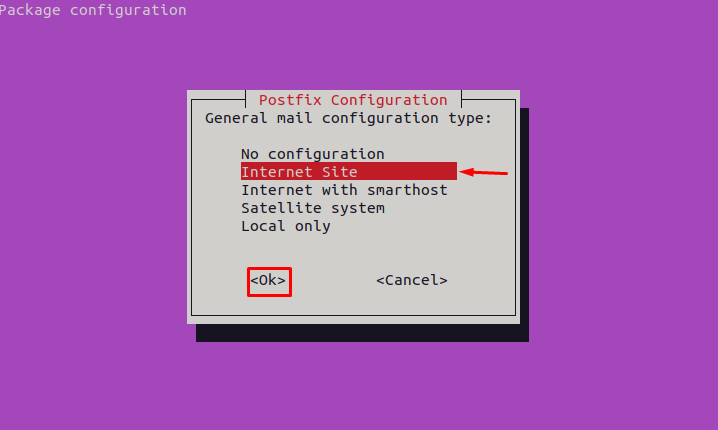
Now the opened configuration window will ask you to set “General mail configuration type”. Select “Internet Site” then press “Enter” or you can also continue with the “Ok” option:
Step 4: Set system mail name
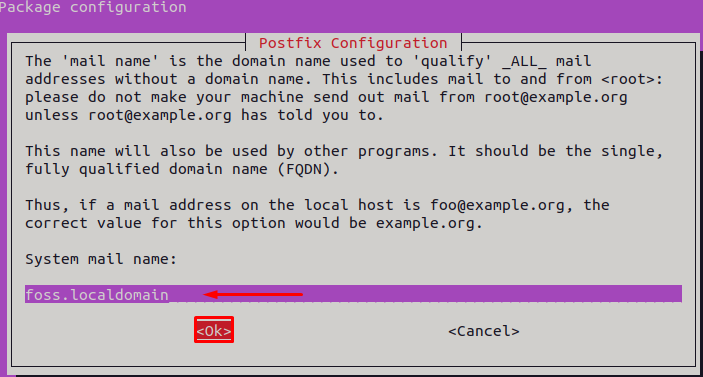
After performing the general mail setting, set the “System mail name” according to your preferences and click on “Ok” option:
Step 5: Setting up Postmaster mail and Root name
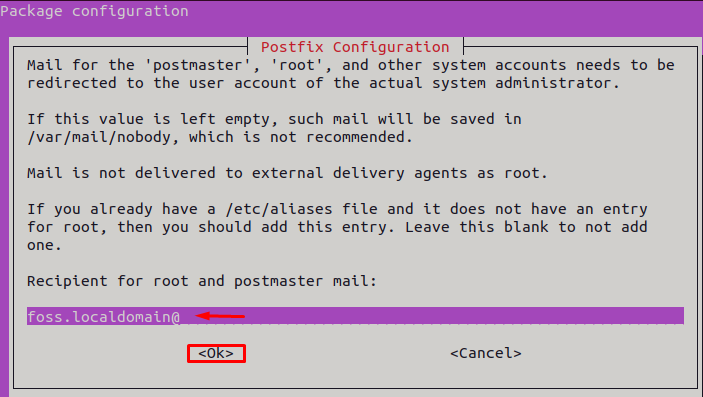
Now we have to specify the name for Postmaster mail and Root:
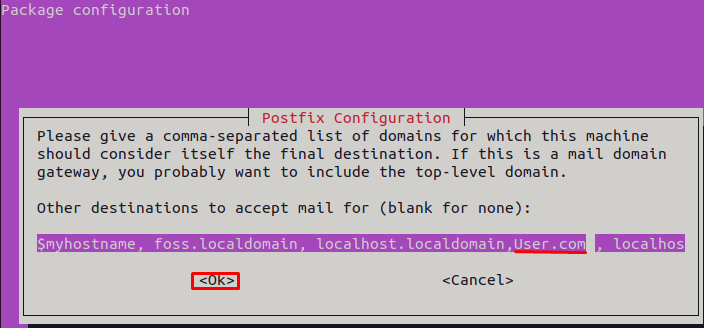
Step 6: Add destination domain
Now, we will set the destination domains. Here, you can provide a list of domain names as destinations for accepting mail:
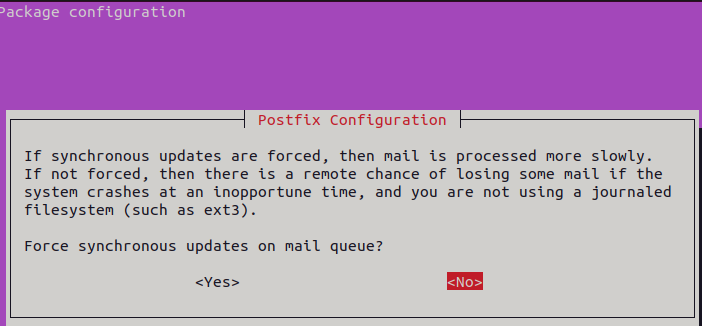
While configuring Postfix, you will be asked whether you want to “Force synchronous updates” or not. In our case, we will go with the “No” (default) option:
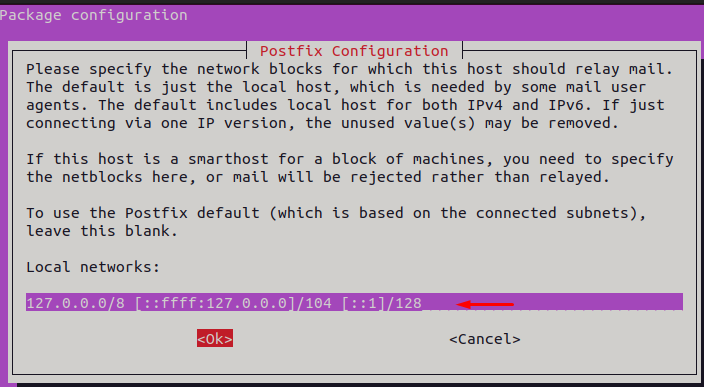
Step 7: Setting up local network
After performing the previous step, add your Local networks address and click “Ok”:
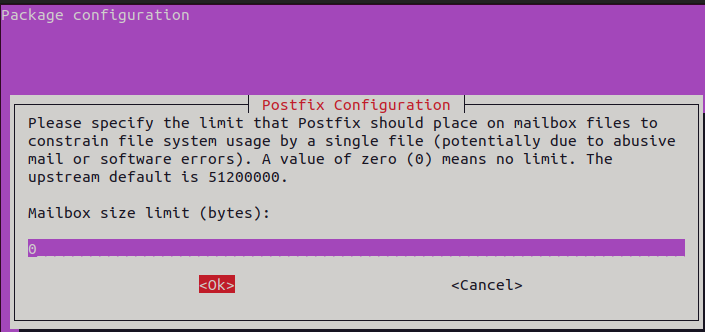
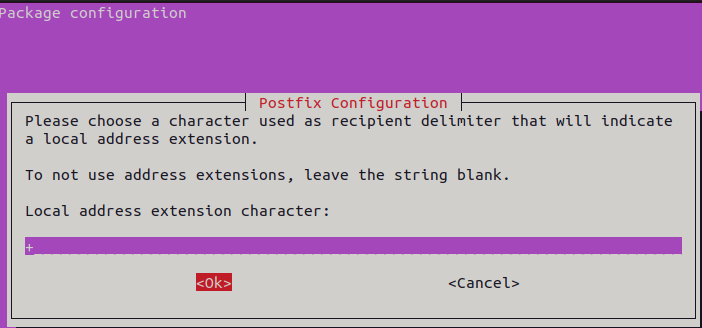
Step 8: Set mail size and address extension
Then, set the “Mailbox size limit” as “0” and press “Enter”:
After doing so, enter “+” as “Local address extension character”and select “Ok”:
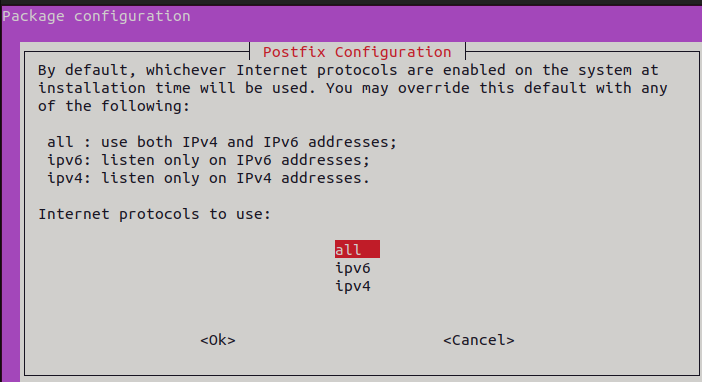
Step 9: Set internet protocol
In the following step, you need to set Internet protocols. Select “all” from the given options to use both “ipv6” and “ipv4”, and press “Enter”:
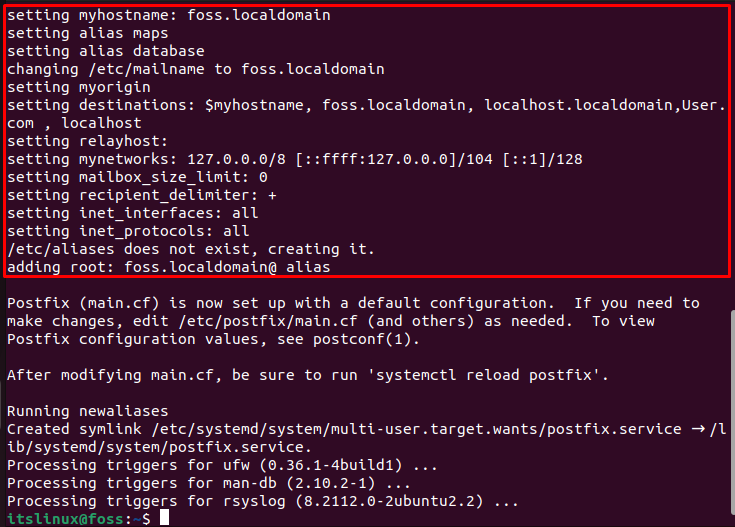
At this point, we have successfully completed Postfix installation on our Ubuntu 22.04, and the below-given output displays its configured settings:
Step 10: Check Postfix status
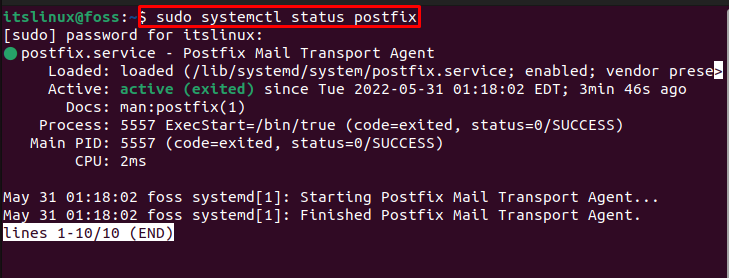
To check Postfix status, use the following command:
$ sudo systemctl status postfixAs you can see, Postfix is currently active and running on our Ubuntu 22.04 system:
We have covered all the required steps involved in the installation and configuration of Postfix on Ubuntu 22.04.
Conclusion
On Ubuntu, to install and configure Postfix, you have to execute the “$ sudo DEBIAN_PRIORITY=low apt install postfix” command on the terminal, and it will automatically open up the configuration window. Then, set the System mail name, Root and Postmaster mail name, Destination domain, and localhost address, according to your preferences. This article has completely elaborated the procedure for Postfix installation and configuration on Ubuntu 22.04.

TUTORIALS ON LINUX, PROGRAMMING & TECHNOLOGY