
Adobe Acrobat Reader is an application which is popular for reading, manipulating and printing the documents in PDF. Adobe Acrobat Reader allows editing and crop PDF pages.
Digital signs can also be added on PDF documents using Acrobat utility. Additionally, It has the feature to Read Out Loud through which you can hear your text from the page. Acrobat Reader is compatible with Windows, macOS, Linux and Android devices.
In this article, the complete installation process of Adobe Acrobat Reader will be explained step by step.
How To Install Adobe Acrobat Reader on Ubuntu 22.04
In the world of technology, everything is shifted to digital form and the same is happening with books. Adobe Acrobat Reader software is one of the key advancements in digitalization of documents.
The following steps refers to installing Adobe Acrobat Reader on Ubuntu 22.04.
Step 1: Update System Cache
Updating your system cache is very essential before doing any installation. Update your Ubuntu’s 22.04 cache via the following command:
$ sudo apt update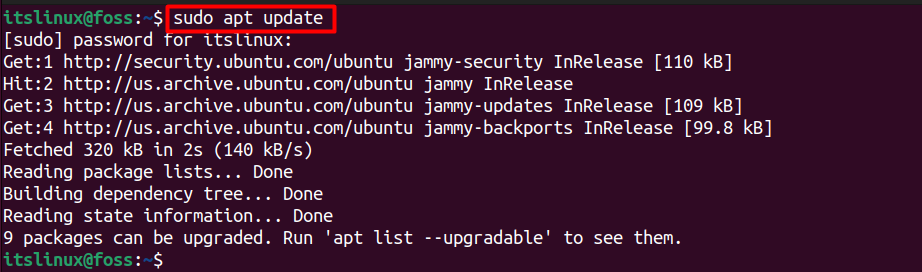
Step 2: Download the Acrobat Reader Package (deb) using Link
First of all, you need to download the package file (.deb) from the adobe link. The (.deb) files can be used on Ubuntu as well as on other Debian based distributions.
$ wget ftp://ftp.adobe.com/pub/adobe/reader/unix/9.x/9.5.5/enu/AdbeRdr9.5.5-1_i386linux_enu.deb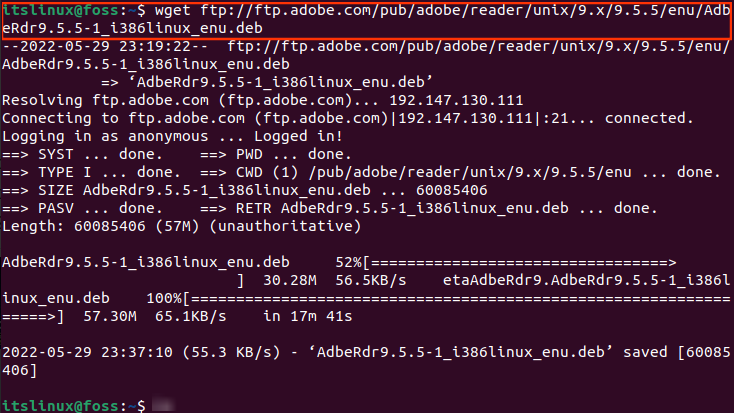
At the end of the above output, It can be observed that the Adobe Reader package is downloaded 100%.
Step 3: Add Architecture i386 (32-bit)
Now it’s time to add architecture i386. This architecture basically refers to a 32-bit version of the package. The below command will add i386 architecture in your system.
$ sudo dpkg --add-architecture i386
Run the apt update command in Ubuntu terminal to update your system cache.
$ sudo apt update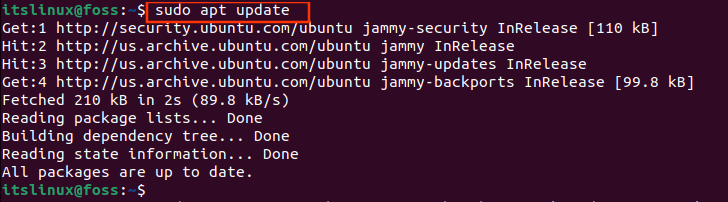
Now, your system is up to date with all packages and dependencies.
Step 4: Install Required Dependencies/Libraries
There are some required dependencies you need to install. Copy the command below, paste in your terminal and hit enter.
$ sudo apt install libatk-adaptor:i386 libxml2:i386 gtk2-engines-murrine:i386 libcanberr-gtk-module:i386 libgdk-pixbuf-xlib-2.0-0:i386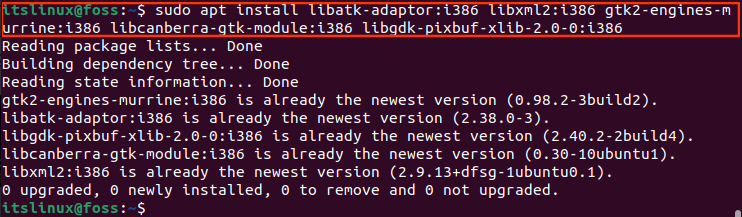
Step 5: Check the Availability of Package File
Run the following command to see the “.deb” file in your directory.
$ ls
Step 6: Install the Adobe Acrobat with Package Manager (dpkg)
Finally, it’s time to install the Adobe Acrobat Software. To do so, make use of the following command:
$ sudo dpkg -i AdbeRdr9.5.5-1_i386linux_enu.deb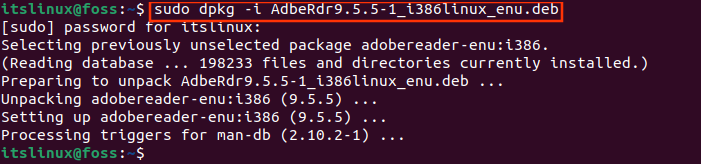
Great! All done successfully.
Step 7: Open Adobe Acrobat Reader
Run acroread commandfrom your terminal to open Adobe Acrobat Reader.
$ acroreadUpon successful execution of the command, the Adobe Acrobat will be initiated as shown below.


Click on Open from the File menu, add your ePub (electronic publications) files and enjoy reading.
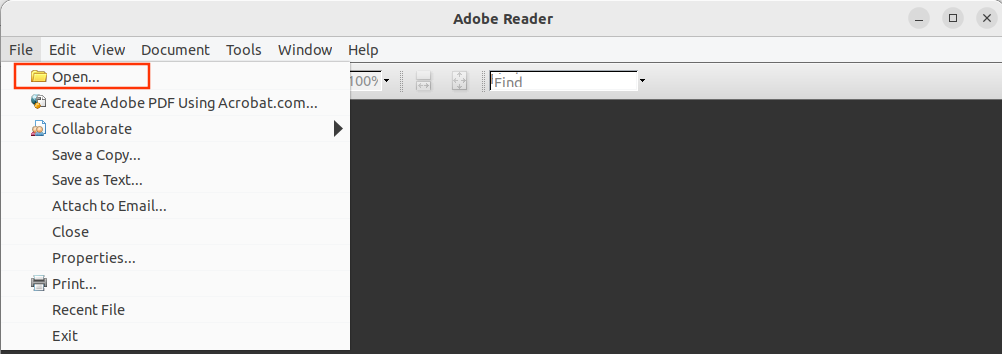
Here you go! The Adobe Acrobat Reader is now ready to use.
How to remove Adobe Acrobat Reader from Ubuntu 22.04
Adobe acrobat is a useful utility for reading purposes. However, you can delete it from your Ubuntu 22.04 with the below command.
$ sudo apt purge adobereader-enu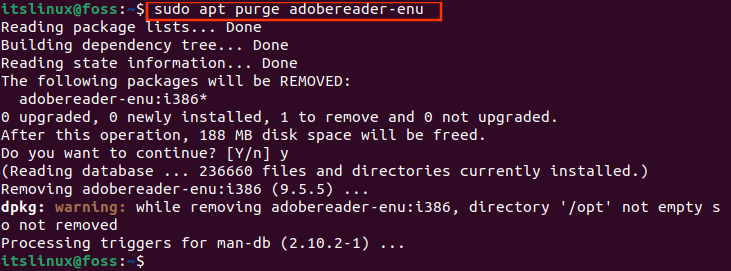
Conclusion
The Debian package file of Adobe Acrobat Reader can be used to install it on Ubuntu 22.04. Adobe Acrobat Reader requires some dependencies that are also provided here. This learning article practically demonstrated the complete process of installing Adobe Acrobat Reader in Ubuntu 22.04. Adobe Acrobat Reader is a third-party application not only used to read PDFs but also useful for converting and manipulating documents.

Saryia is a technology entrepreneur and digital publisher specializing in Linux, open-source technologies, and developer education.