
Hadoop is the software library that is used for storing a large volume of the web application’s data. Thousands of machines can be managed using a single server with the help of Hadoop. It is an open-source and reliable software library developed by the Apache development team.
Hadoop provides a number of libraries and tools to increase its functionality. Popular tools of Hadoop are Apache Hbase and Apache Flink. This post demonstrates the installation and configuration of the Hadoop on Ubuntu Jammy Jellyfish.
What is the Installation Method of Hadoop on Ubuntu?
Use the source package of Hadoop to install it on Ubuntu 22.04 by following the below-mentioned instructions.
Step 1: Open the Terminal
First, open and launch the terminal of Ubuntu:
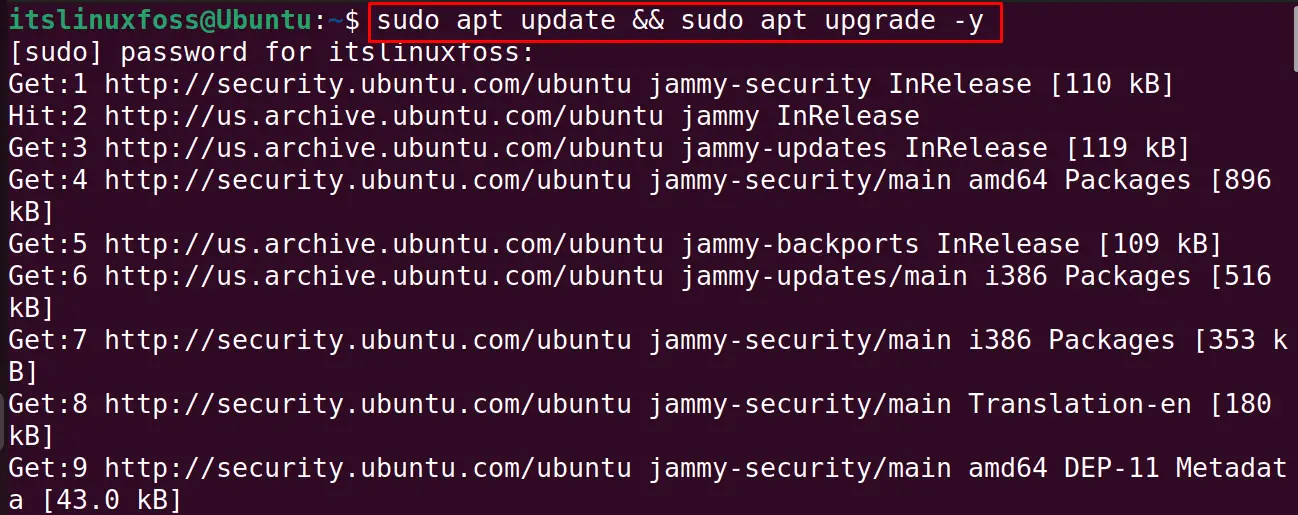
Step 2: Update Ubuntu’s Packages
Next is to upgrade all the packages to their recent update using the command:
$ sudo apt update && sudo apt upgrade -y
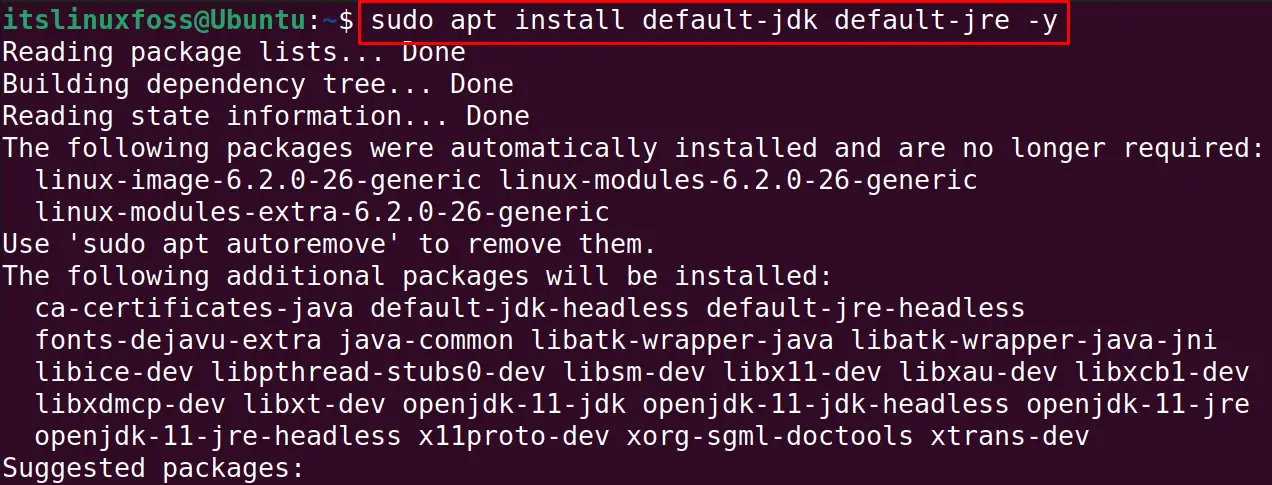
Step 3: Install the Java
Install the Java package as it is required for the installation of the “Hadoop” with the below-mentioned command:
$ sudo apt install default-jdk default-jre -y
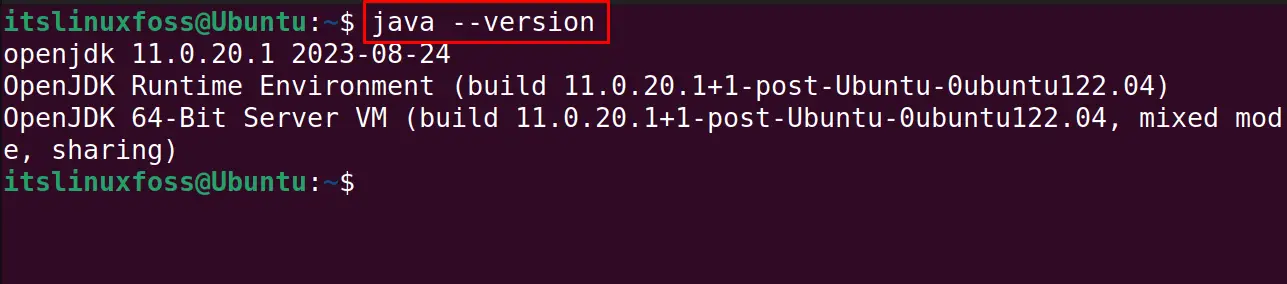
Verify the installation by displaying the Java version:
$ java --version
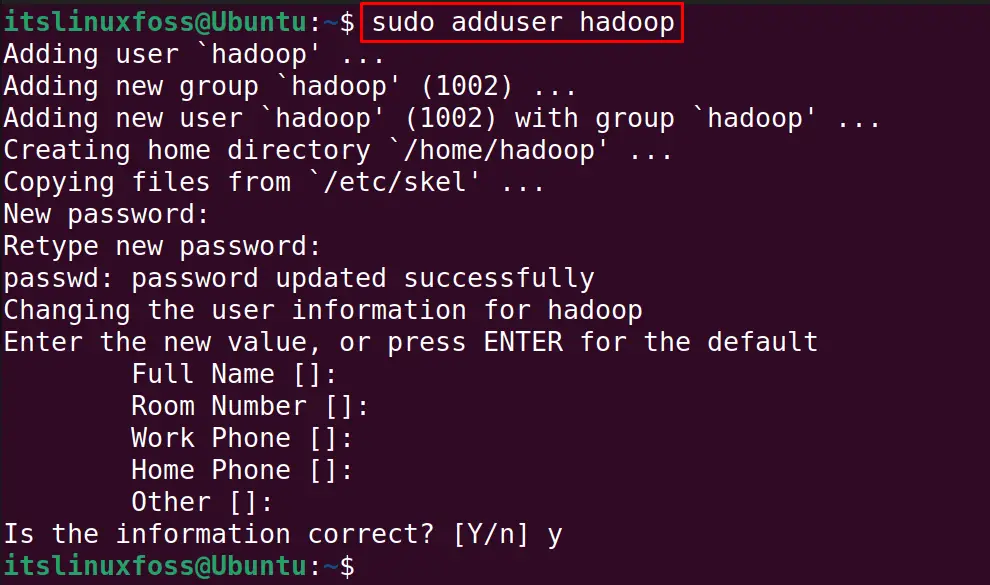
Now for the ease we will create a separate user “hadoop” for running the hadoop with the command:
$ sudo adduser hadoop
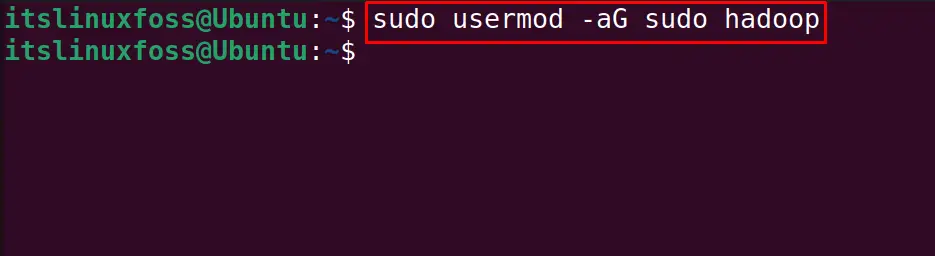
Add the hadoop user to the sudo group with the command:
$ sudo usermod -aG sudo hadoop
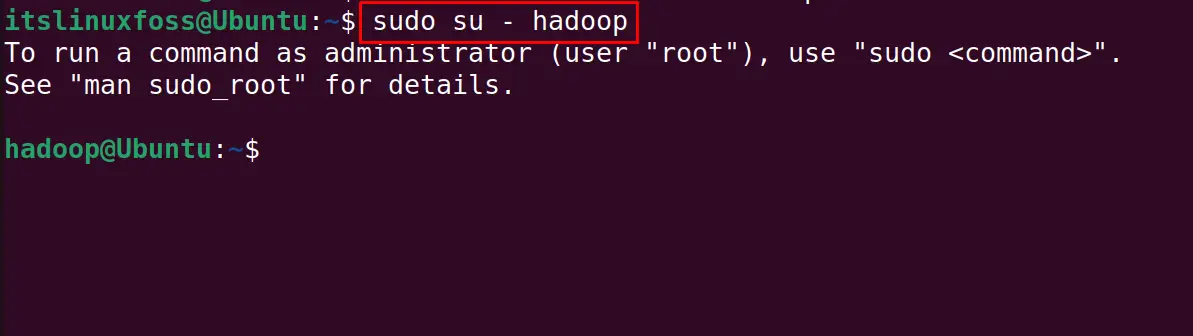
Finally switch to the hadoop user staying in the terminal with the command:
$ sudo su - hadoop
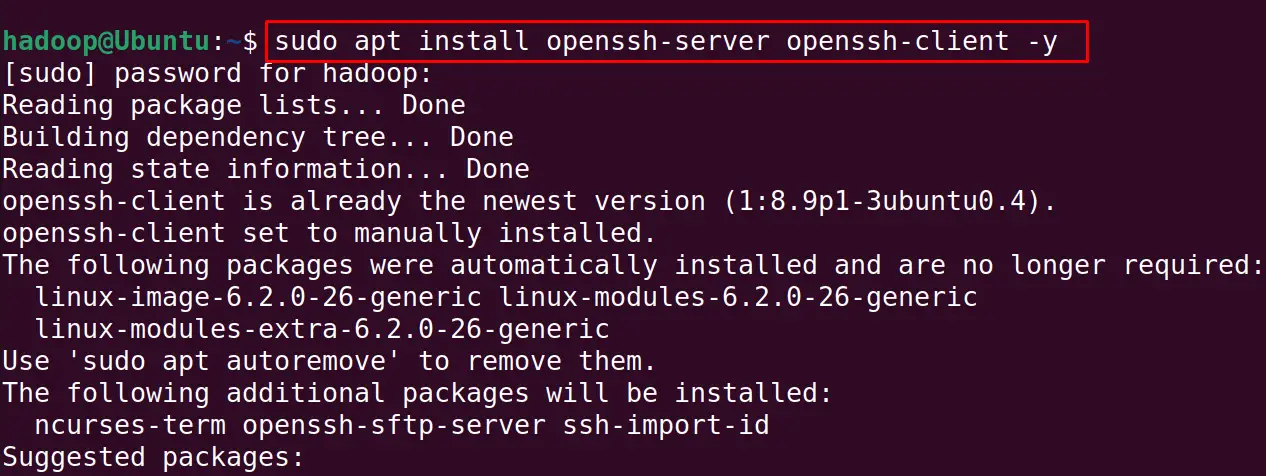
Also, Install the openssh and its client server after switching to the new user that is hadoop:
$ sudo apt install openssh-server openssh-client -y
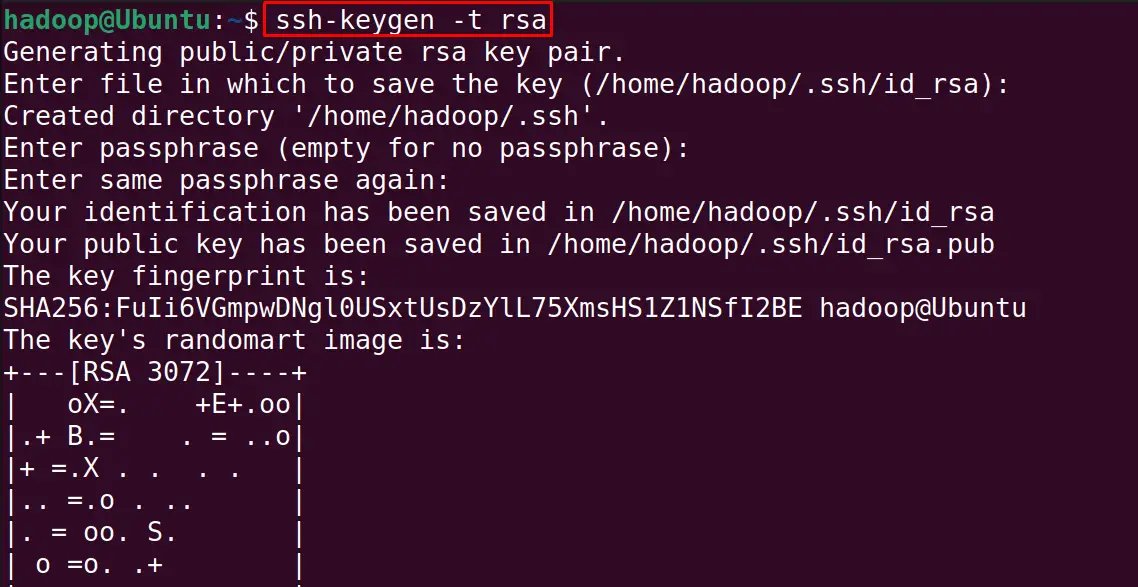
Generate the private and public key with the ssh-keygen:
$ ssh-keygen -t rsa
Run the next mentioned command to add the public keys to “authorized_keys”:
$ cat ~/.ssh/id_rsa.pub >> ~/.ssh/authorized_keys

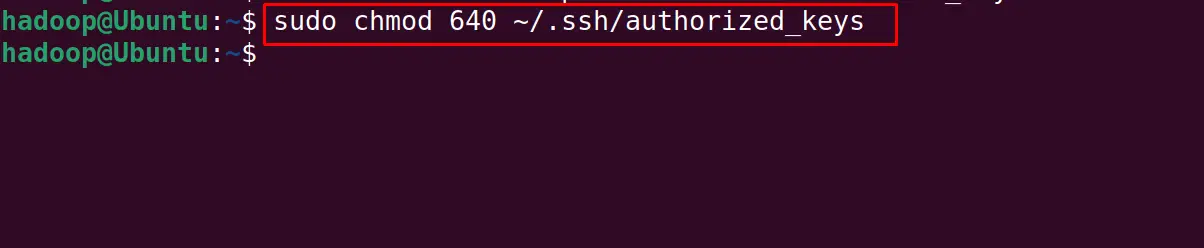
Change the file permission of the authorized_keys:
$ sudo chmod 640 ~/.ssh/authorized_keys
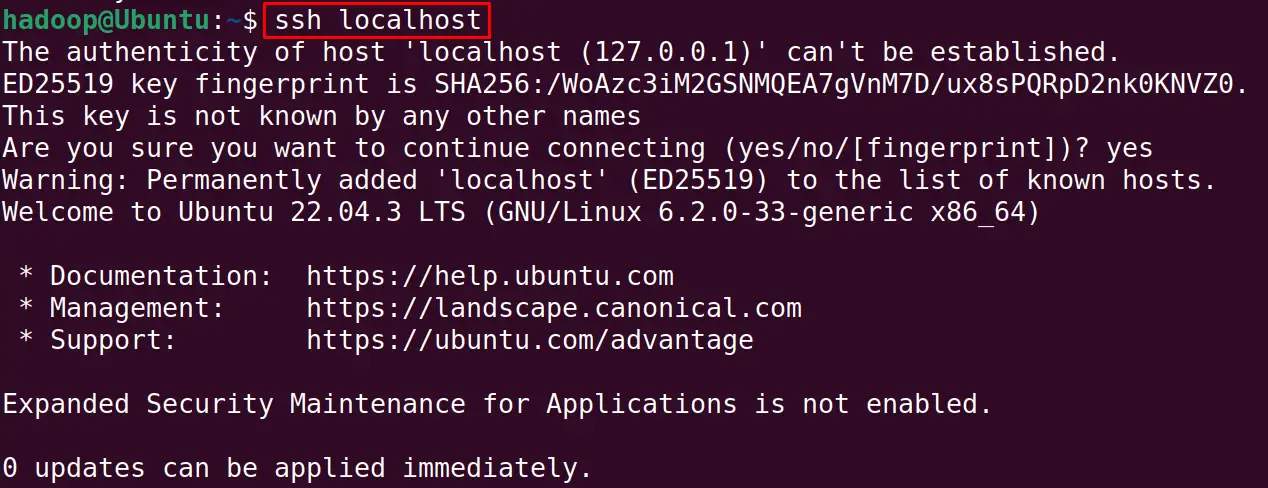
Verify the configuration of SSH:
$ ssh localhost
Step 4: Download the tar Package of Hadoop
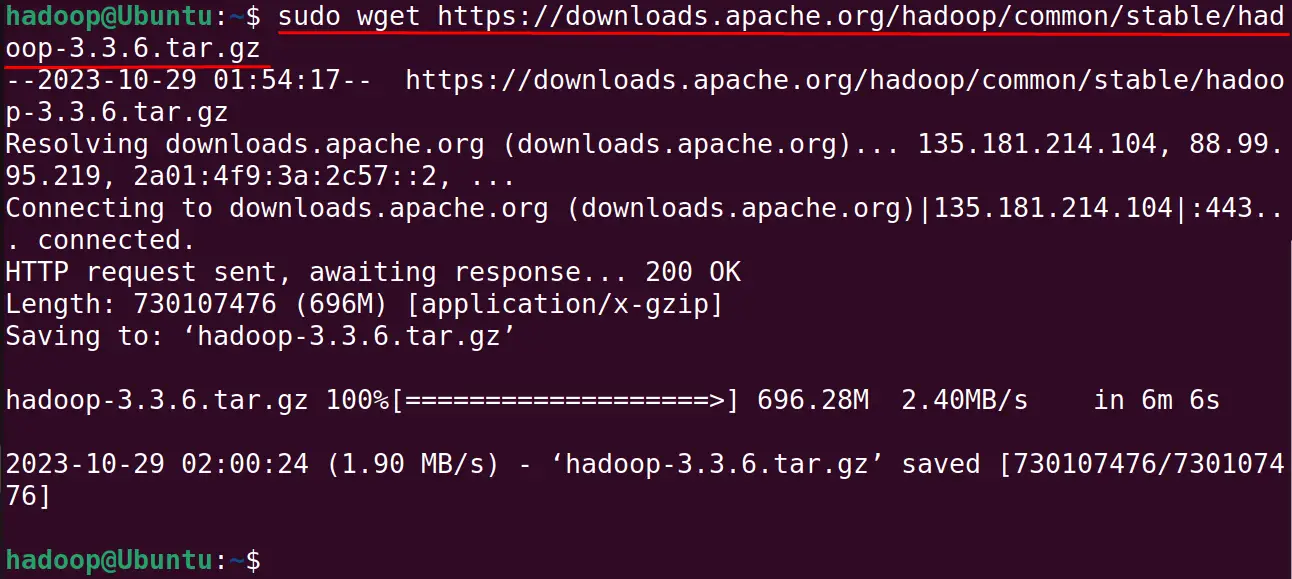
When the upgradation is completed, download the tar package of the Hadoop with the wget command from its official website:
$ sudo wget https://downloads.apache.org/hadoop/common/stable/hadoop-3.3.6.tar.gz
Step 5: Extract the Compressed tar Package of Hadoop
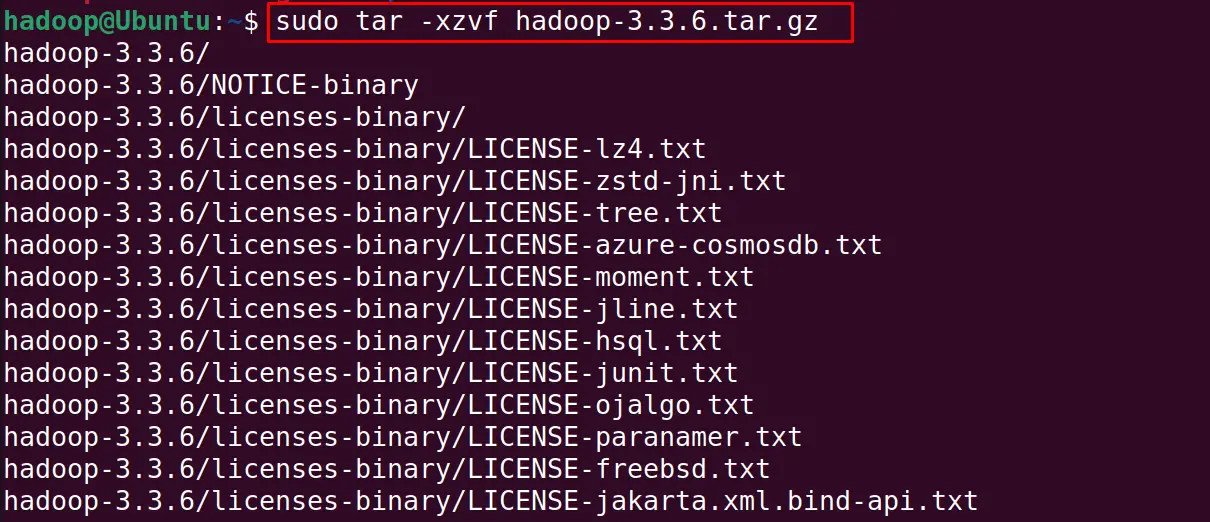
Extract the downloaded tar package with the below-mentioned command at /usr/local/ directory:
$ sudo tar -xzvf hadoop-3.3.6.tar.gz
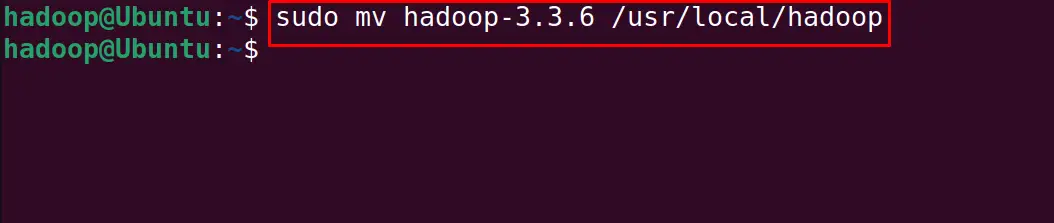
Move the extracted folder to the “/usr/local/hadoop” with the cd command:
$ sudo mv hadoop-3.3.6 /usr/local/hadoop
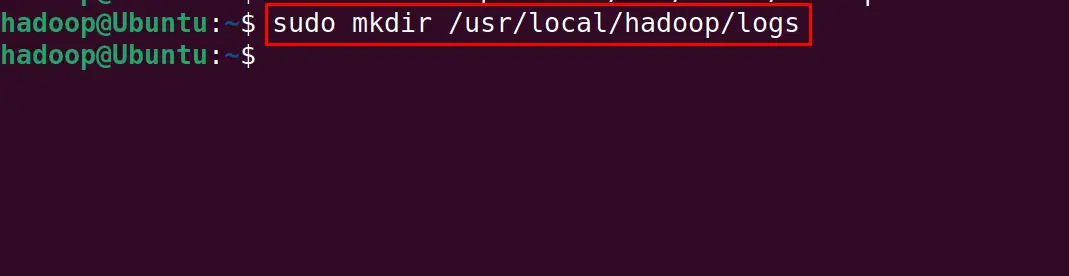
Create a new directory for saving the logs while using the hadoop:
$ sudo mkdir /usr/local/hadoop/logs
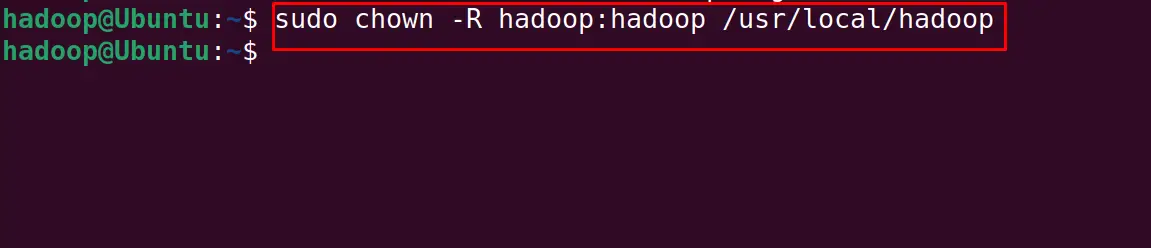
Change the permissions of the hadoop directory:
$ sudo chown -R hadoop:hadoop /usr/local/hadoop
Step 6: Configure Java Environment Variables
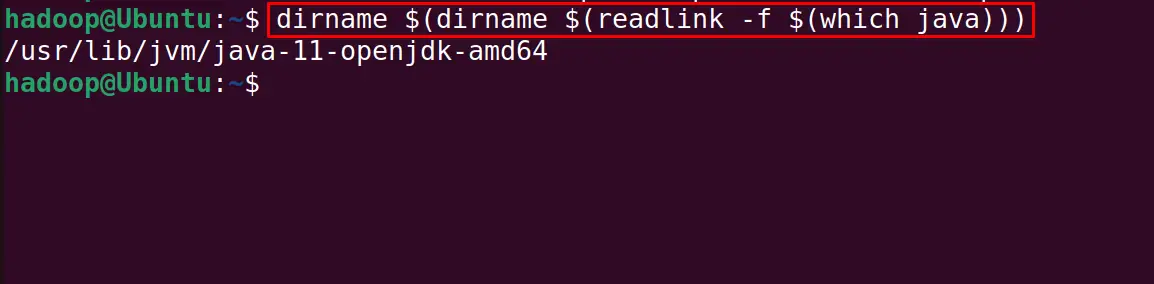
Before the configuration of the Java Environment Variables, find the location of the installed Java package:
$ dirname $(dirname $(readlink -f $(which java)))
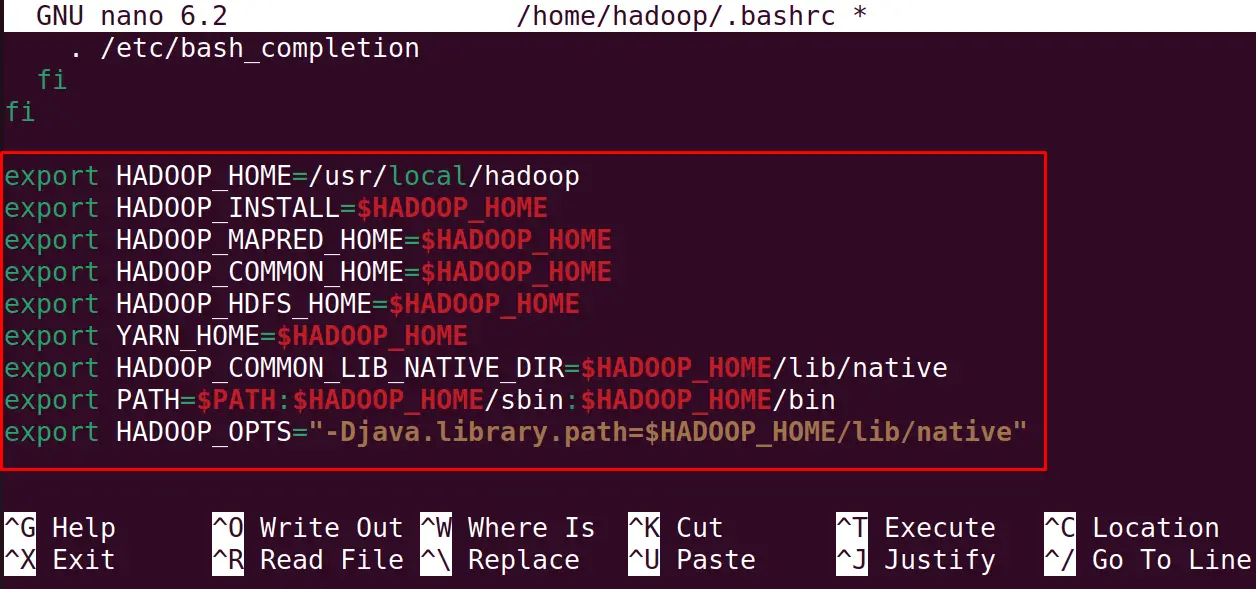
Open the bashrc file with the nano text editor (you can also use anyother text editor as well):
$ nano ~/.bashrc

Copy-paste the below-mentioned lines in the opened file to configure the hadoop:
export HADOOP_HOME=/usr/local/hadoopexport HADOOP_INSTALL=$HADOOP_HOMEexport HADOOP_MAPRED_HOME=$HADOOP_HOMEexport HADOOP_COMMON_HOME=$HADOOP_HOMEexport HADOOP_HDFS_HOME=$HADOOP_HOMEexport YARN_HOME=$HADOOP_HOMEexport HADOOP_COMMON_LIB_NATIVE_DIR=$HADOOP_HOME/lib/nativeexport PATH=$PATH:$HADOOP_HOME/sbin:$HADOOP_HOME/binexport HADOOP_OPTS="-Djava.library.path=$HADOOP_HOME/lib/native"
Then using the shortcut keys of CTRL+S to save the changes of the file and CTRL+X to exit the nano text editor, reload the bashrc file with the command:
$ source ~/.bashrc

Step 7: Configure the Environment Variable of Hadoop
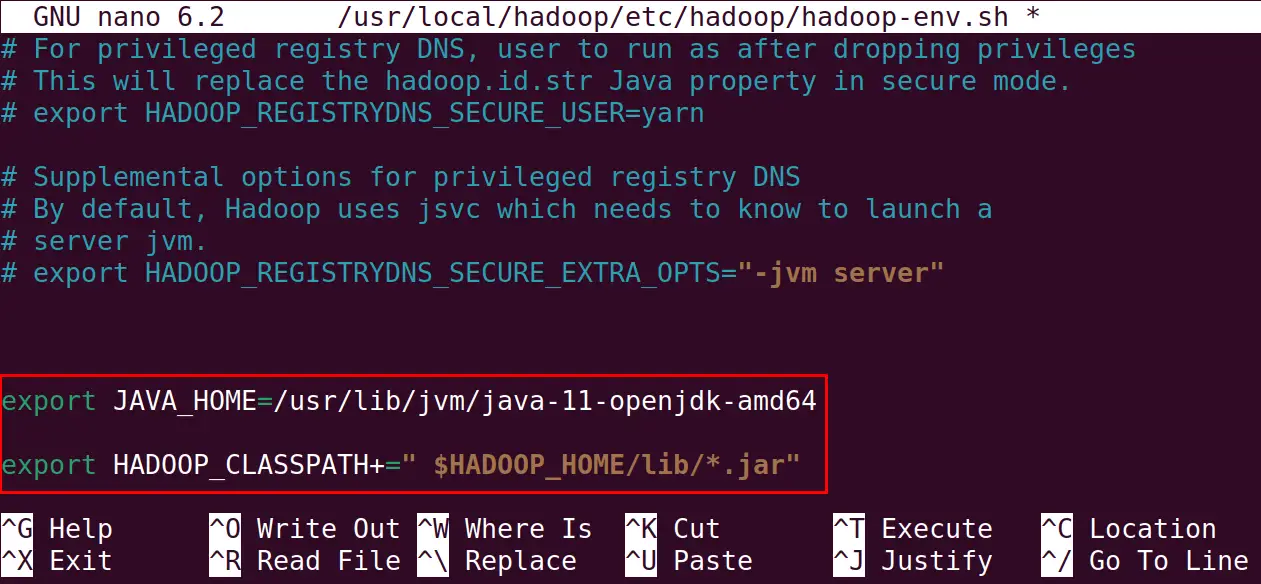
Using the nano text editor, configure the Hadoop environment variable:
$ sudo nano $HADOOP_HOME/etc/hadoop/hadoop-env.sh
For setting the Java_HOME variable type the below mentioned lines in the end of the file:
export JAVA_HOME=/usr/lib/jvm/java-11-openjdk-amd64

export HADOOP_CLASSPATH+=" $HADOOP_HOME/lib/*.jar"
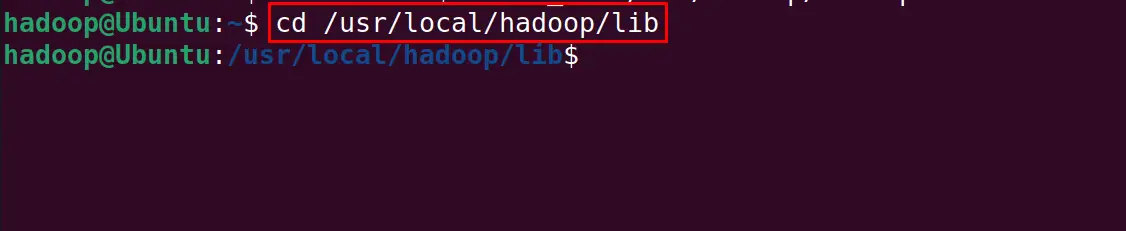
Save the file and exit the nano text editor, also navigate to the hadoop directory:
$ cd /usr/local/hadoop/lib
Now download the activation key of the hadoop using the command:
$ sudo wget https://jcenter.bintray.com/javax/activation/javax.activation-api/1.2.0/javax.activation-api-1.2.0.jar

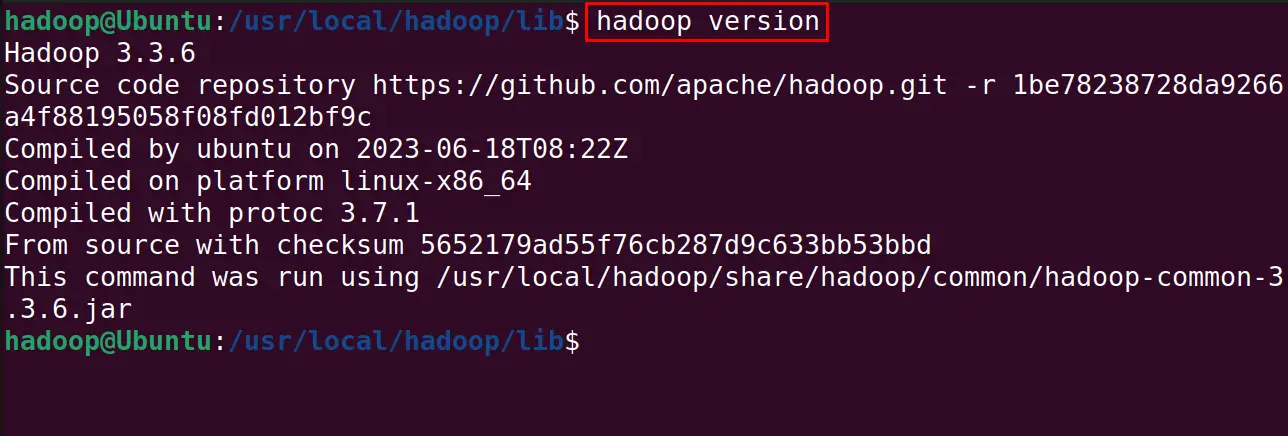
Confirm the installation of the hadoop by displaying its version:
$ hadoop version
How to Configure the Hadoop on Ubuntu 22.04?
First, create two different directories of the datanode and namenode with the mkdir command:
$ sudo mkdir -p /home/hadoop/hdfs/{namenode,datanode} && sudo chown -R hadoop:hadoop /home/hadoop/hdfs

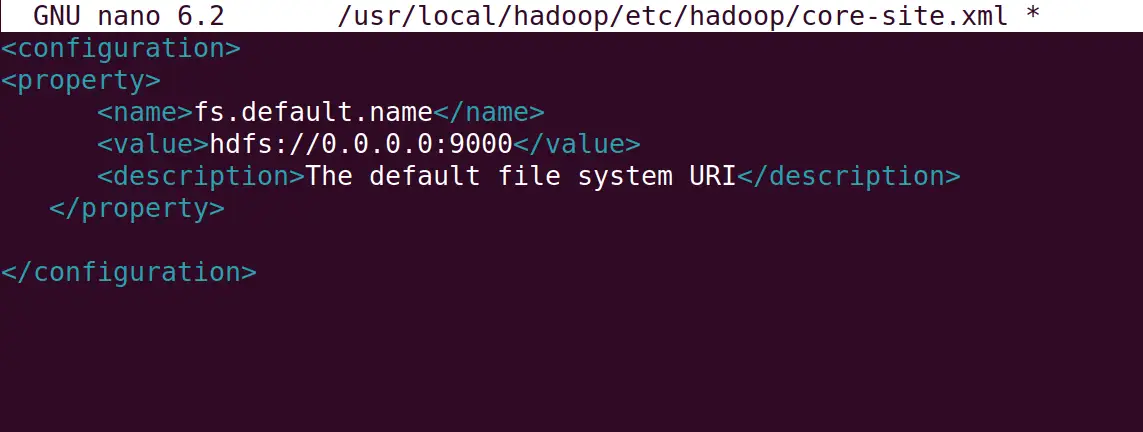
After this open the core-ste.xml file with the command:
$ sudo nano $HADOOP_HOME/etc/hadoop/core-site.xml

Add the following lines, replacing the “ubuntu” with your machine hostname:
<property>
      <name>fs.default.name</name>
      <value>hdfs://0.0.0.0:9000</value>
      <description>The default file system URI</description>
  </property>
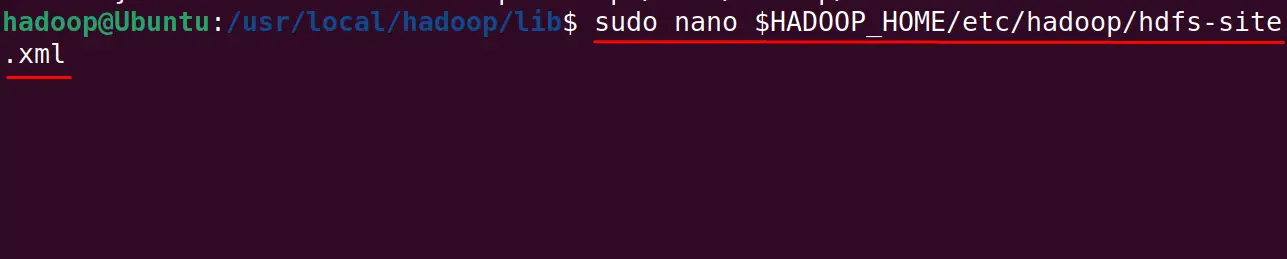
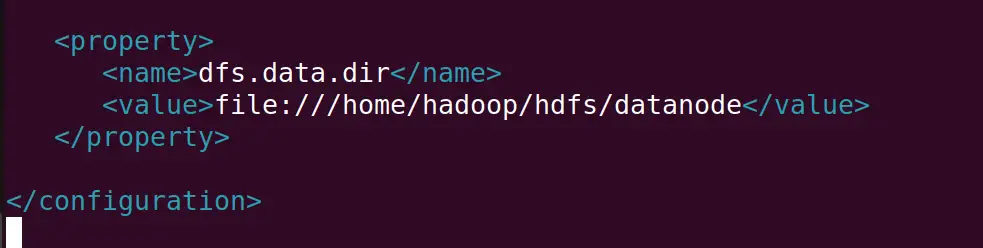
Update the path of namenode and datanode directories in the hdfs-site.xml file:
$ sudo nano $HADOOP_HOME/etc/hadoop/hdfs-site.xml
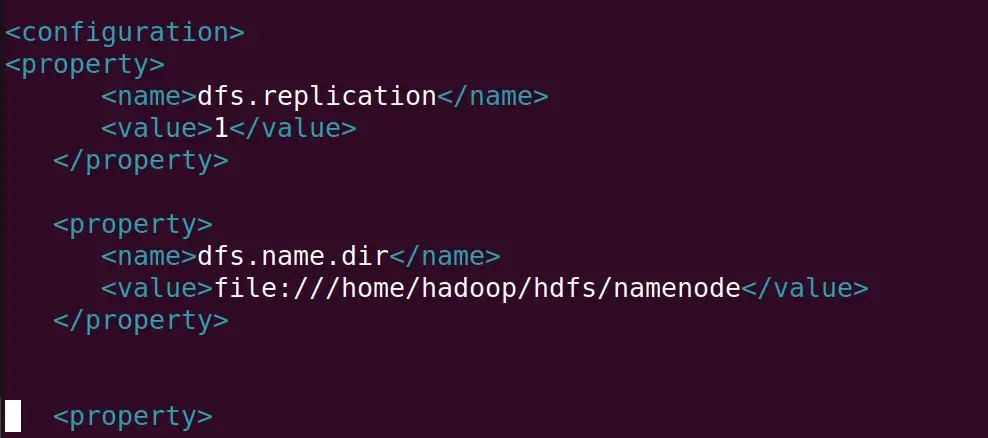
Copy and paste the below-mentioned lines into the new file:
<property>
      <name>dfs.replication</name>
      <value>1</value>
  </property>

  <property>
      <name>dfs.name.dir</name>
      <value>file:///home/hadoop/hdfs/namenode</value>
  </property>

  <property>
      <name>dfs.data.dir</name>
      <value>file:///home/hadoop/hdfs/datanode</value>
  </property>
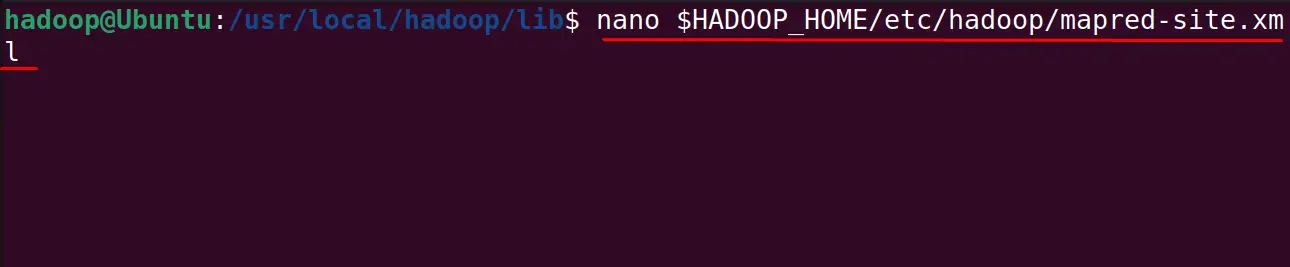
Close the file by saving the edited file and open the mapred-site file:
$ nano $HADOOP_HOME/etc/hadoop/mapred-site.xml
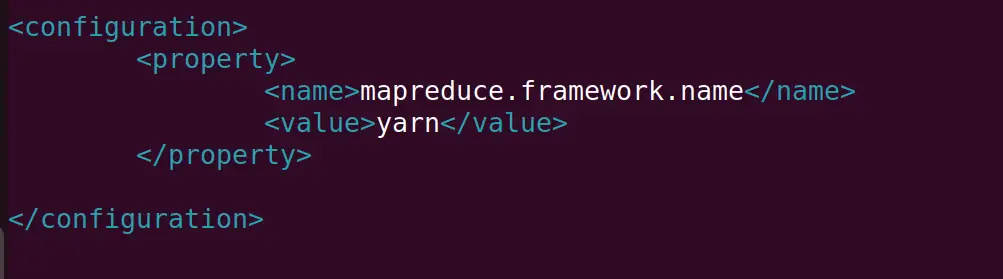
Paste the following lines and save the file:
<property>
                <name>mapreduce.framework.name</name>
                <value>yarn</value>
        </property>
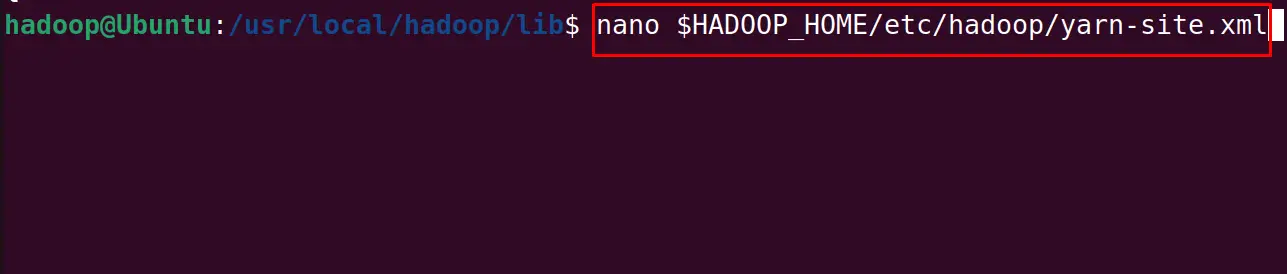
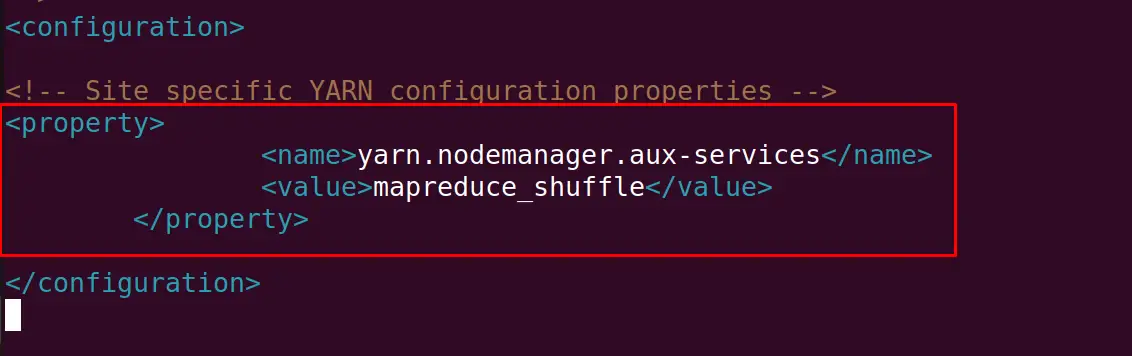
The last file to be edited is yarn-site with the nano text editor:
$ nano $HADOOP_HOME/etc/hadoop/yarn-site.xml
Write the following lines in the new file and save it before exiting the text editor:
<property>
                <name>yarn.nodemanager.aux-services</name>
                <value>mapreduce_shuffle</value>
        </property>
Format the namenode directory to start the “Hadoop Cluster” for the operation of Hadoop:
$ hdfs namenode -format
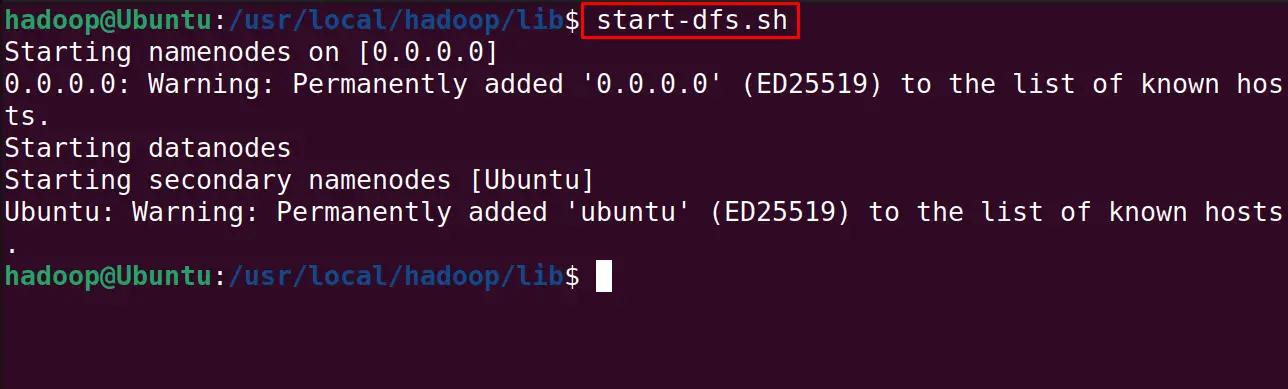
Start the Hadoop cluster:
$ start-dfs.sh
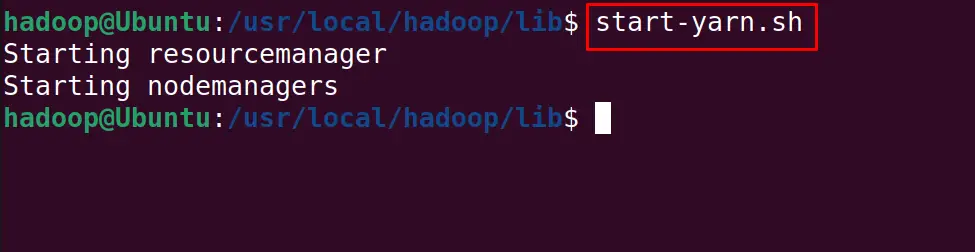
Also, start the yarn service with the command:
$ start-yarn.sh
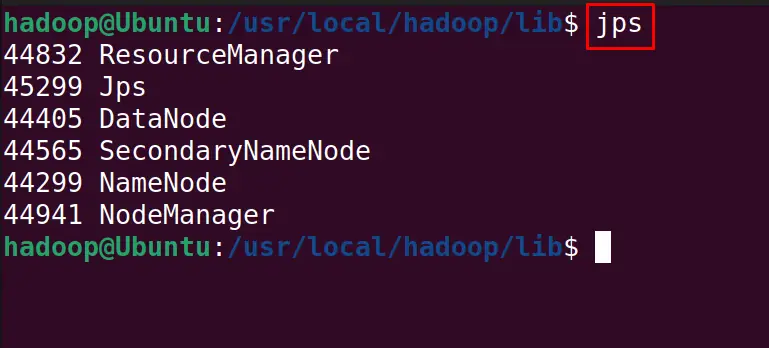
To display all the services of Hadoop, execute the command:
$ jps
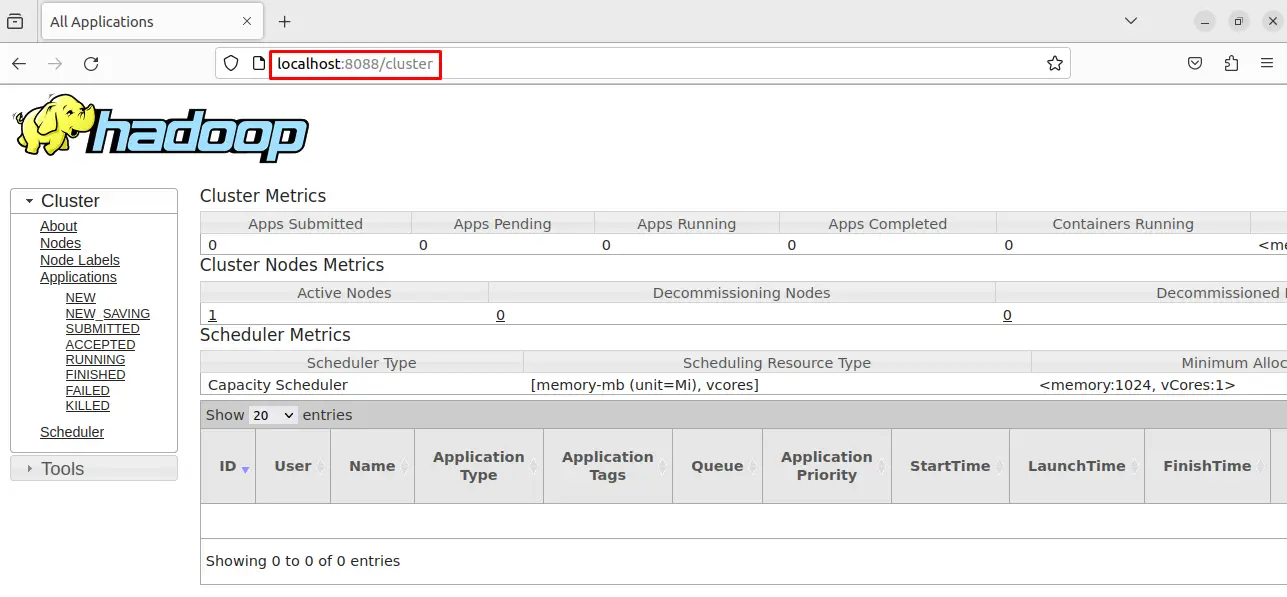
Allow t8088 for the operation of the Hadoop service and open the browser then type the URL “localhost:8088”:
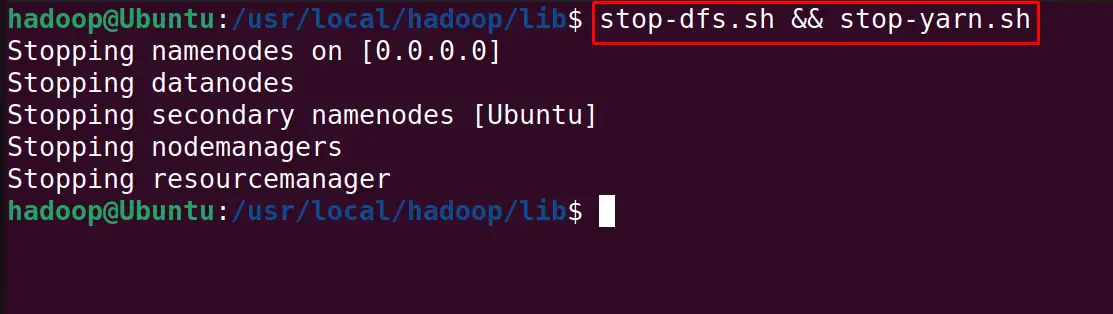
To stop the service of the yarn and Hadoop, use the command:
$ stop-dfs.sh && stop-yarn.sh
This is all about the installation and configuration of the Hadoop on Ubuntu.
Conclusion
Hadoop can be installed on Ubuntu by downloading its package from the Download section of its official website. It can be installed by setting up the environment variables. This post explained all the installation and configuration steps of the Hadoop on Ubuntu.
