Linux distributions are mostly managed by using the different command utilities. Likewise, we can manage the running processes on the Linux computer by running the ps command in the terminal. This tutorial is about the usage of the ps command with its aux options in Linux and also provides some knowledge of the below-mentioned:
- What is the ps Command Utility in Linux?
- How to Use the ps aux Command Utility in Linux?
- How to Use the ps Command Utility With the ‘a’ Option?
- How to Use the ps Command Utility With the ‘u’ Option?
- How to Use the ps Command Utility With the ‘x’ Option?
- What is the Usage of the ps Command Utility With the aux Options in Linux?
- Conclusion
Let’s start with the tutorial!
What is the ps Command Utility in Linux?
The ps command displays the information on the active processes in Linux. This command is useful when you want to manage any process, and prior information to that process is required.
The syntax of the command is provided below:
$ ps <OPTIONS>
The functionality of the “ps” command mainly relies on the number of options supported by it. These options are described below:
| UNIX Options | These are the grouped options and start with the dash (-), for example, (-v). |
| BSD Options | These are not the grouped options and also do not start with any characters, for example, help. |
| GNU Options | These options always start with the double dash (–), for example, the –version. |
There are different options that can be displayed by using the command:
$ man ps

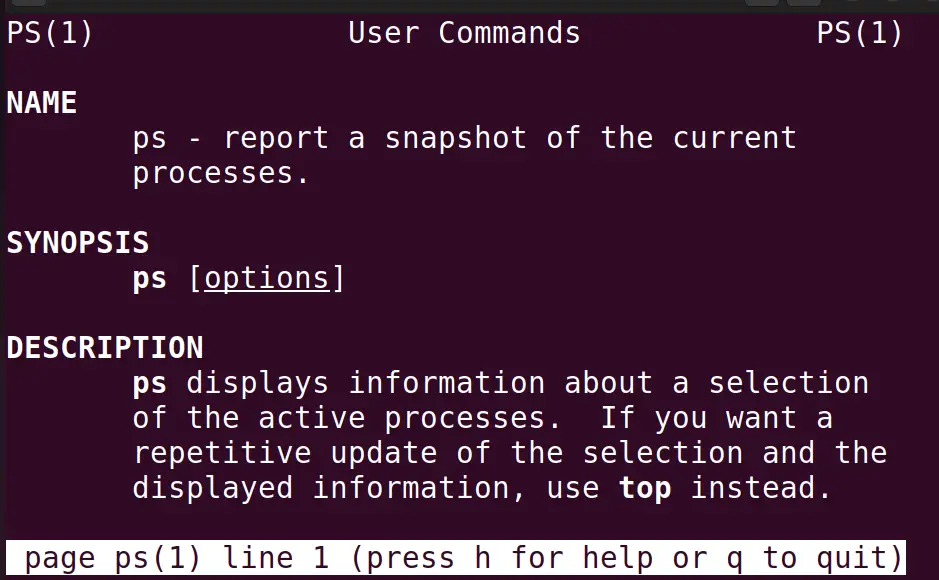
The above-mentioned command will display the manual of the ps command.
How to Use the ps aux Command Utility in Linux?
First, we will learn the usage of the ps command in Linux we know that the ps command displays the active processes in Linux and can be executed with the command:
$ ps

In the output above, we can see a few things whose details are mentioned below:
| PID | This display the process id of the running processes |
| TTY | This option will displays the terminal screen to which the running process is associated |
| TIME | This displays the time which the process has consumed of CPU in its execution |
| CMD | The full command by which the process has been spawned |
The options mentioned above are displayed about the running process when a simple ps command is executed. There are different options that can be used with the ps command, as can be explored following the manual or the link of the ps command article.
In this tutorial, we are focused on the usage of three options with the ps command, which are tabulated below:
| a | This option is used to display the users who are running the processes. |
| u | This option displays some additional useful information about the processes. |
| x | This option displays the processes not associated with any running terminal screen. |
We will understand all the options mentioned above one by one.
How to Use the ps Command Utility With the ‘a’ Option?
We will run the ps command with its “a” opinion and observe the output:
$ ps a
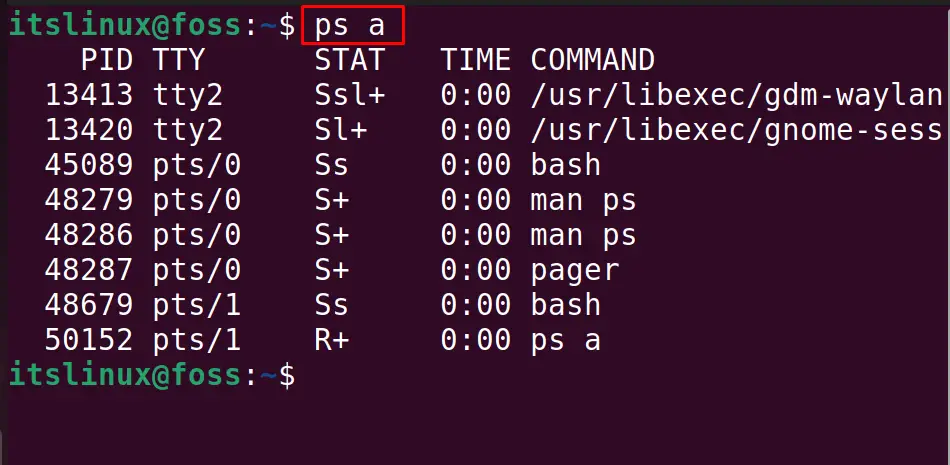
In the above output, the additional thing is the “STAT” column which is used to display the state codes of running processes. For example, in the above output, “S” represents the sleep processes, and the “R” is used for the running process.
How to Use the ps Command Utility With the ‘u’ Option?
The next option needed to explain is the “u” option with the ps command. If this option is run with the ps command, then the output will be:
$ ps u

In the output above, the details of the columns are shown below:
| USER | It displayed the user who is running the proccess. |
| %CPU | It displays the percentage of the CPU which is used by the process. |
| %MEM | It displays the percentage of the RAM which is used by the process. |
| VSZ | It displays the size of the virtual memory occupied by the process. |
| RSS | It displays the size of the physical memory used by the process. |
| START | It displays the size when the process is being initiated. |
| COMMAND | Refers to the command which started the process. |
How to Use the ps Command Utility With the ‘x’ Option?
The last option, which will be explained in this tutorial, is the x option with the ps command, and the output by running the ps command with the x is described below:
$ ps x
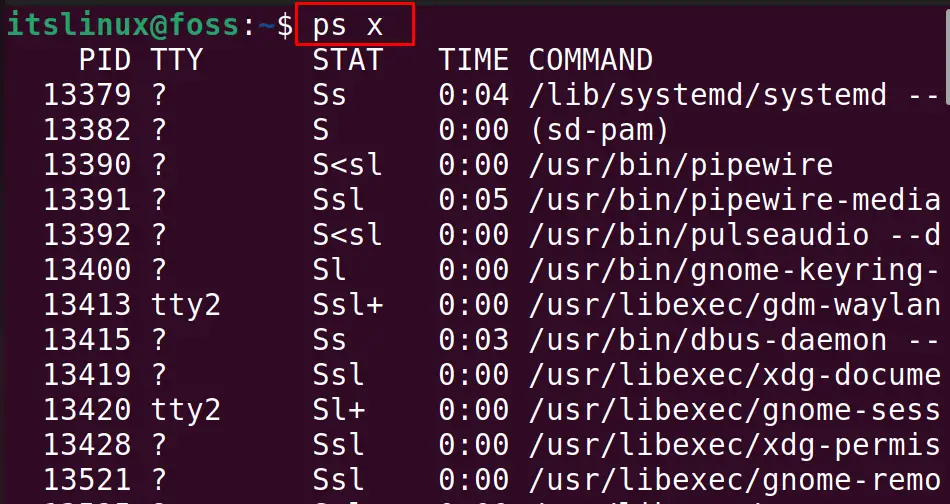
It can be noted that the output of the ps command with the u option is similar to the option. The difference between both the options is that option a shows the details of the running processes whereas the option x displays the processes which are running but are not associated with any terminal screen.
What is the Usage of the ps Command With the aux Options in Linux?
When the ps command is executed with the aux option, it will display all the information of the processes discussed above. For example, we will run the command:
$ ps aux
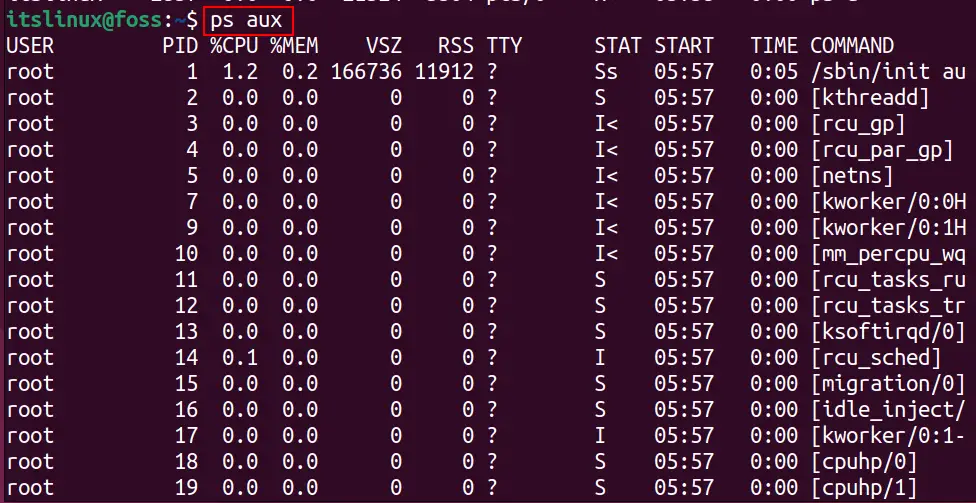
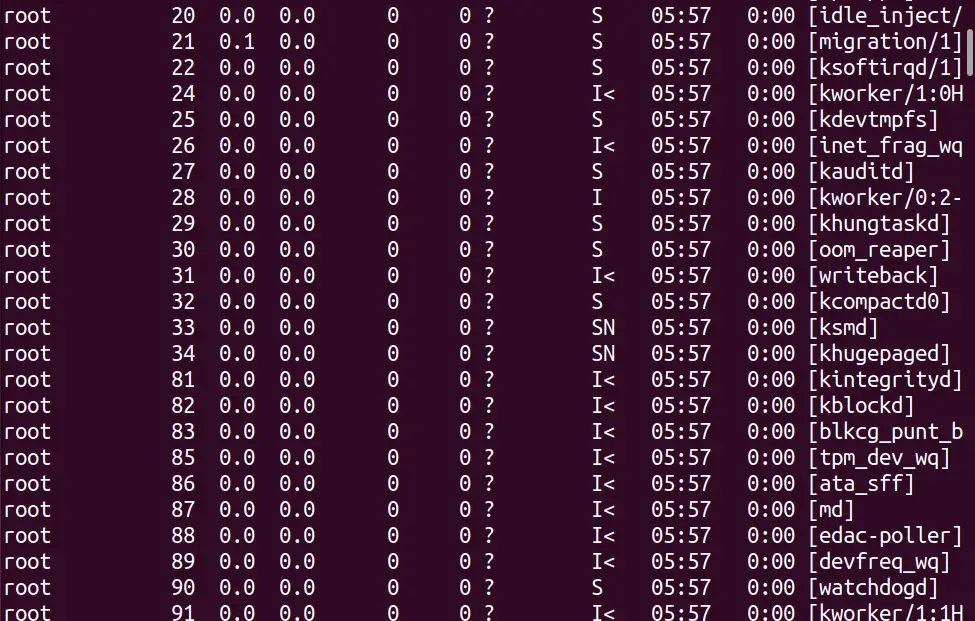
It has displayed all the useful information of the process which are running on the computer.
Note: The description of all the components of the output is described earlier in a table.
This is all about this tutorial!
Conclusion
To use the ps aux command in Linux, run the “ps” command with “aux” options which are used to display the information of all running processes. This post has provided a brief explanation of the “pas aux” command, and for a better understanding, we have presented the usage of “ps” with all these options separately.
