An Uncomplicated FireWall known as UFW is used in different distributions of Linux like Debian and Ubuntu to control and manage the network connections and the web traffic of your machine through the terminal.
You can control the traffic by adding different rules of allowing or denying the web traffic either on specific ports of your machine or to all ports of your machine. For example, the Apache web server uses port 80 by default so to manage the traffic of the Apache web server, we will add different rules for port 80.
In this write-up, advanced UFW firewall configurations are discussed for the newly released version of Ubuntu which is known as Jammy Jellyfish.
How to install UFW firewall on Ubuntu 22.04
UFW comes in the default repository of Ubuntu but is not pre-installed so to install the UFW, we will use the apt package manager:
$ sudo apt install ufw -y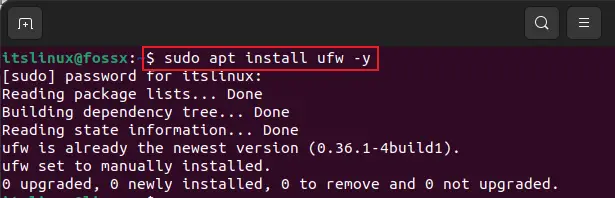
Then we will find out the status of UFW:
$ sudo ufw status
In the output, we can see that the UFW is inactive, so first we will make it enable by using the command:
$ sudo ufw enable 
Only for information purpose, if you want to disable the UFW, you can run the command:
$ sudo ufw disable
By default, all the incoming and outgoing connections are denied by the UFW, all the configurations of the connections are stored in the /etc/default/ufw directory which can be changed at any time. For example, if we want to allow the traffic of the Apache web server on port 80, we will use the command:
$ sudo ufw allow 80
To check the status whether the port 80 is allowed or not, we will use the command:
$ sudo ufw status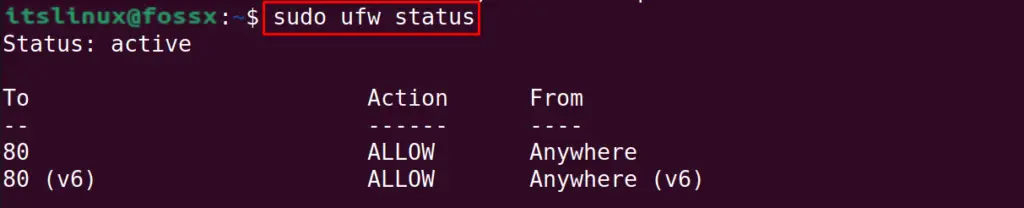
To deny the traffic on port 80, we will use the keyword “deny” using the command:
$ sudo ufw deny 80
Whenever you install the package from the repository of Ubuntu, it keeps a copy in the ufw directory and similarly, if you delete the application, it will update the UFW application list accordingly, to view this list of UFW, we will run the command:
$ sudo ufw app list
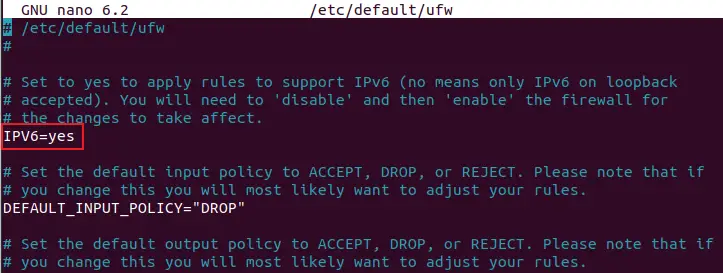
To validate that the IPv6 is working with UFW, we will open the configuration file of UFW using the nano text editor:
$ sudo nano /etc/default/ufw
In the open file, check the status of IPv6, if it is not “yes” then type “yes”:
Restart the service of UFW using the systemctl command:
$ sudo systemctl restart ufw
Also, check the status of UFW using the systemctl command:
$ sudo systemctl status ufw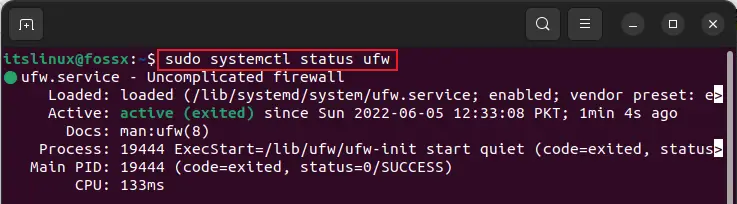
In the above section, we have allowed the port using its number, we can also allow web traffic by using the name of service, for example, if we want to allow traffic of SSH by using its name, we will use the command:
$ sudo ufw allow ssh
To reset all the settings of the UFW to its default settings, we can use the command:
$ sudo ufw reset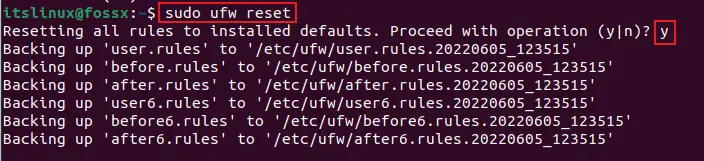
When the command is executed, it will ask you to continue the operation and if you allow it, then it will set all the settings to its default which can be verified by checking its status:
$ sudo ufw status
How to configure UFW using GUI App
The service is inactive as it comes by default and to use the UFW graphically, we can install its GUI version using the command:
$ sudo apt install gufw -y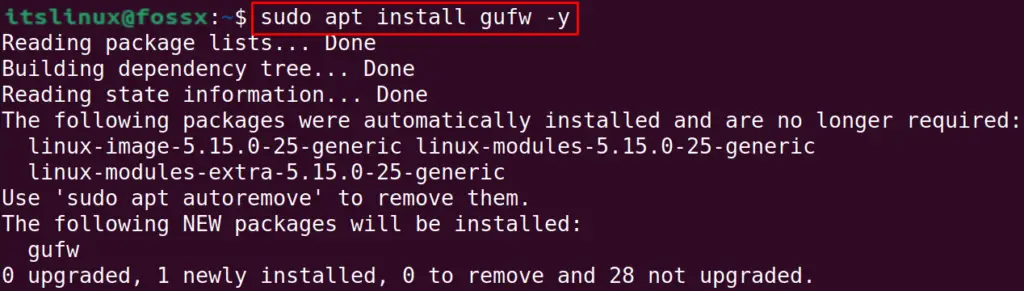
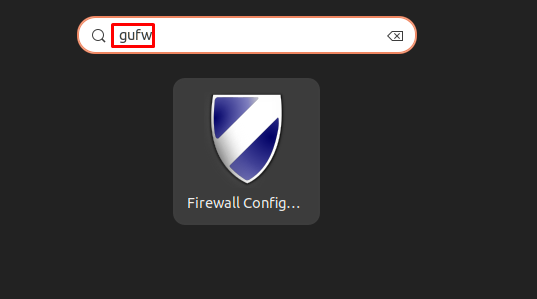
Go to the application’s search bar and type “gufw”, then click on its icon to launch it:
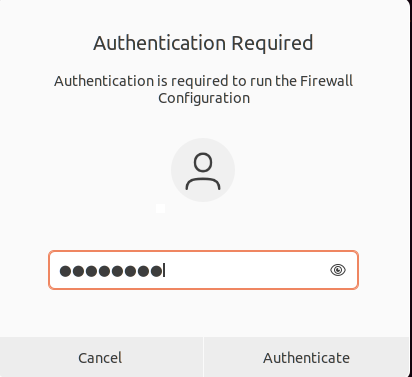
It will ask the root password for authentication purpose, provide the password to proceed the next step:
The home page of the UFW application will be launched:
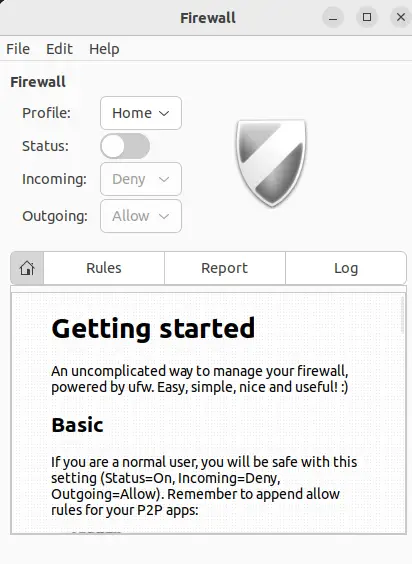
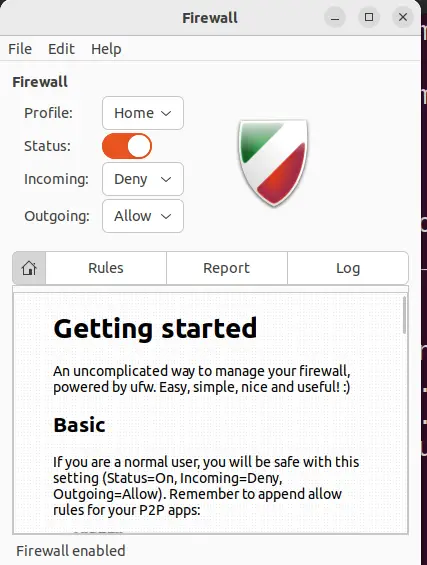
You can make it enable by toggle the button of “Status”:
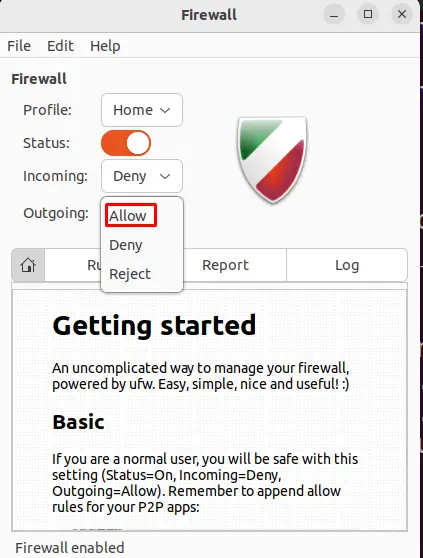
To control the traffic of incoming and outgoing, we can change the status by selecting the option when click on any one of them, for example, we will allow the outgoing traffic, then click “Allow” from outgoing:
How to delete UFW from Ubuntu
To delete the UFW and gufw along with their configuration file, we will purge their package using the apt package manager:
$ sudo apt purge gufw ufw -y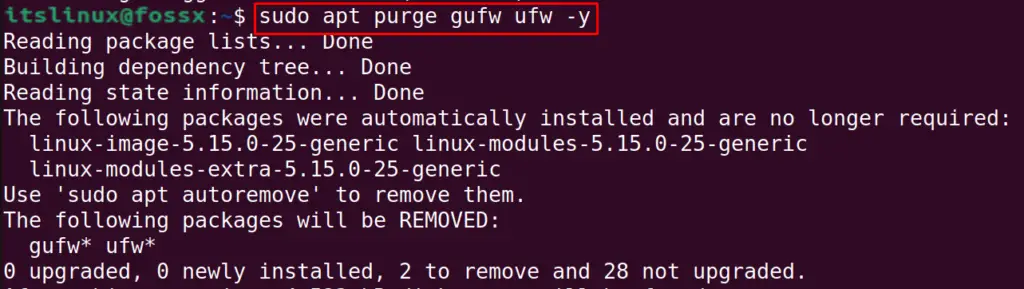
In the above command, we deleted both packages, ufw and gufw, in a single command, you can delete them in two separate commands as well.
Conclusion
You can monitor the traffic from the other clients or servers coming to your machine in Ubuntu and other Linux distributions using the UFW and also manage the incoming and outgoing traffic. In this guide, UFW is installed and its usage has been explained with command-line and graphical interface on Ubuntu 22.04.

TUTORIALS ON LINUX, PROGRAMMING & TECHNOLOGY