The hostname is a human-readable custom name that represents a device’s identity in a particular network. A network can have multiple devices, and there’s a possibility that some devices have the same name. This might create confusion or even network issues. To fix it, you can change your hostname either for a short time or permanently using various methods.
In this write-up, I will show you how to change the hostname on a Linux system using the commands or the GNOME settings.
Hostname Classes
A hostname can be classified into three classes: “Pretty”, “Static”, and “Transient”:
- Pretty: A user-defined, user-friendly name without naming restrictions. It can include any UTF-8 characters, including spaces and symbols. It is mainly used for display purposes.
- Static: The persistent system hostname stored in /etc/hostname. It follows standard hostname rules: must start with a letter or number and may include letters, digits, hyphens (-), and dots (.). This is the primary name used by the system.
- Transient: A temporary hostname assigned and managed by the kernel, often set via DHCP or mDNS. It follows the same naming rules as the static hostname and can change during runtime, but does not persist after a reboot.
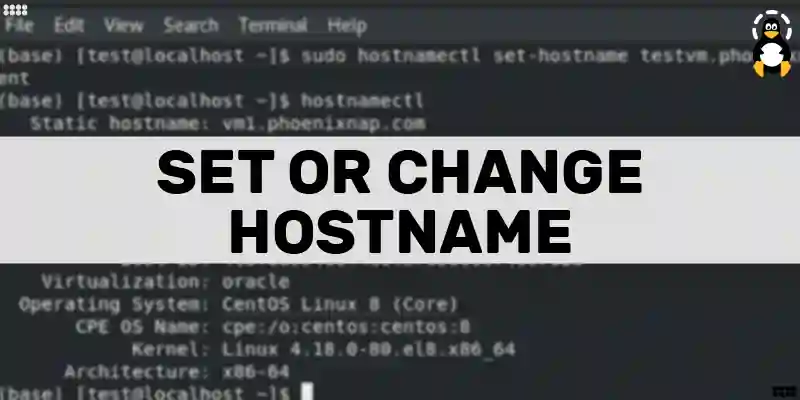
Change Hostname Using hostnamectl Command
The hostnamectl command lets us manage or alter the hostname-related settings on a Linux system. It belongs to the systemd suite of utilities, so this command functions on any Linux distribution that utilizes systemd.
If you run the hostnamectl command without any options, it will show your current hostname along with other related details:
hostnamectl

If you want to modify your hostname permanently (until you change it again manually), execute this command with the “set-hostname” option followed by a new hostname of your choice:
hostnamectl set-hostname itslinuxfoss
Let’s change the current group ID using the following command to see the updated hostname:
newgrp

Change Hostname Using nmcli Command
The nmcli command in Linux lets you manage network settings, check device status, and control network connections. We can use this command to check or update the hostname of a system. This command is a part of the network-manager package. Therefore, to use this command, we need to ensure the network-manager package is installed on our system. If not, you can easily install it using your distribution package manager:
sudo apt install network-manager
Run the following command to check the current hostname:
nmcli general hostname

Now run the numcli command and specify the new hostname that you want to set for your system:
sudo nmcli general hostname linuxuser

Change Hostname Using Network Manager TUI
Network Manager Terminal User Interface, or nmtui, is a handy tool available by default on many Linux distributions. It enables us to configure network and hostname-related settings quickly on your system.
First, install Network Manager on your system if it’s not preinstalled.
sudo apt install network-manager
Next, run the following command, and select the “Set system hostname” from the given options:
sudo nmtui

On the pop-up window, type your new hostname and press Enter to set the desired hostname:

The output snippet confirms that the hostname has been updated successfully:

Change Hostname From GNOME Settings
Do you prefer a GUI method instead of executing commands? No worries! You can use your system settings to modify the hostname. To do that, first, open your system settings, navigate to the About section from the left pane, and then click on the Device Name option:

Specify the new hostname and click on the Rename button or press the Enter key:

How to Update the Hostname of a Specific Class
Linux allows you to change the hostname of a particular class. For example, to modify a static hostname, you can edit the “/etc/hostname” file in a text editor (must be open with sudo privileges):
sudo nano /etc/hostname

Change the given name to your desired hostname, save changes, and revert to the terminal:

Restart your system to apply the changes. Now open the terminal, and your hostname must be updated to “ilf”:

Similarly, you can update a pretty hostname by executing the hostnamectl command with the –pretty option:
hostnamectl set-hostname "specify your pretty hostname here" --pretty
For example, to set a pretty hostname to “linuxuser”, run the following command:
hostnamectl set-hostname linuxuser --pretty
Let’s check the updated pretty hostname using the following command:
hostnamectl --pretty

If you have to change the Transient hostname, use the sysctl command. This command modifies the kernel parameters, and since hostname is a kernel parameter, it stores the system’s transient hostname in the kernel variable. Therefore, you can execute the sysctl command with the following syntax to set the transient hostname of your machine:
sudo sysctl kernel.hostname=<new_hostname>

How to Change Hostname Temporarily
To temporarily(current session) change the hostname, type the hostname command and add the new name after it. This command sets the hostname temporarily, so it reverts to the original settings once you restart your system:
sudo hostname newHostname
For example, we replace newHostname with linuxuser to change the hostname to linuxuser for the current session:
sudo hostname linuxuser

Conclusion
You can change the hostname on your Linux system using different commands and system settings. The easiest and recommended method is the hostnamectl command, which changes the hostname immediately. To change the hostname just for the current session, you can use the hostname command instead. If you prefer a GUI method, go to the About section of your GNOME settings, click the Device Name option, type a new hostname, and click the Rename button to apply the changes. Alternatively, you can run the nmtui command and select the “Set system hostname” option to change your hostname.

Check our LinkedIn company page