
A swap file is an area on a hard drive that is utilized as temporary memory. It allows the operating system to utilize disk space to store data, like the functionality of RAM. This swap file is useful when the system is running low on physical memory and allows the system to continue processing without halting.
This tutorial explains step-by-step procedures to create a swap file in Linux.
Prerequisite: Install fallocate Utility
To install the allocate utility in different Linux distributions, you can consider the below scripts:
$ apt install util-linux   # Ubuntu, Debian, LinuxMint
$ pacman -S util-linux     # Arch Linux
$ yum install util-linux   # CentOS
$ dnf install util-linux   # Fedora
How to Create a Swap File in Linux?
The steps are provided below to create and configure the swap file in Linux:
Step 1: Create a Swap File in Linux
To create a swap file in Linux, the “fallocate” command is used with the sudo privileges. To do so, users can allocate the desired size by specifying the name of the swap file:
$ sudo fallocate -l 1GB /memory

The output shows that the 1GB “memory” swap file has been created in the system.
Step 2: Change the Permissions
To change the permissions of the swap file, the “chmod 600” command is used so that only the root user can read and write to it:
$ sudo chmod 600 /memory

Now, the “memory” file can only be read and written from the root user.
Step 3: Set up the Swap Area
To set up the swap area, the “mkswap” command is used with the file name. It provides the operating system with additional virtual memory, which is used to temporarily store data that is not actively being used by the system:
$ sudo mkswap /memory

The output returns that swap space has been set in the system.
Step 4: Enable the Swap File
To enable the swap file, the “swapon” command is utilized with the swap file name as below:
$ sudo swapon /memory

The output shows that the swap file has been enabled in the system.
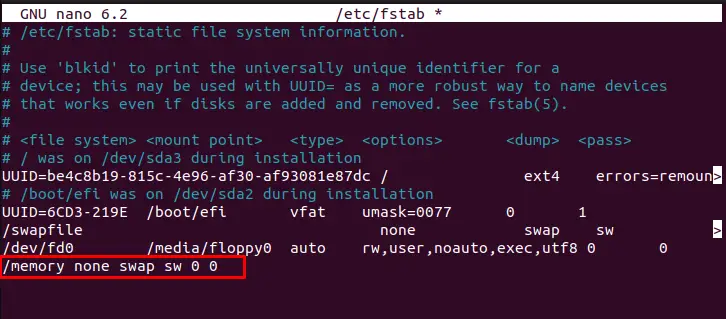
Step 5: Edit the /etc/fstab File
To mount the swap file at the boot time, the user requires editing the /etc/fstab file. You can do this by running the below script:
$ sudo nano /etc/fstab

It navigates to the “fstab” file, add the line at the bottom of the file:
$ /memory none swap sw 0 0
Save the fstab file and reboot your system to make the swap file active.
Step 6: Adjust Swap Value
Users can adjust the swap values using the “sysctl” command. It ensures smooth processing in the system during the limited available RAM. The swappiness value is already assigned at 60 in the system.
$ sudo sysctl vm.swappiness=50

The output shows that the swappiness value has been set to 50.
How to Remove a Swap File in Linux?
To remove the swap file, the “swapoff” command is used with the “-v” verbose option specifying the file name:
$ sudo swapoff -v /memory

The output shows that the swap file “memory” has been removed from the system.
Conclusion
Linux offers the “fallocate” command to create a swap file by specifying the file name and desired size. You can also change the permission, set the swap area, and adjust the swappiness value. This guideline has explained step by step procedure to create the swap file and modify the swap size/area in Linux.
