Debian is called a “universal Operating System” and rightly so. It is a free source OS that is developed by thousands of volunteers from all around the world. They mostly work online. When we dig a little deeper, we come to know that this is the base or the foundation for many Linux distributions out there. One such example is the popular Ubuntu.
Debian 1.1 was first released in 1996 and its name was Buzz. The latest release was launched on 14 Aug 2021. It is Debian 11 and its name is Bullseye. It is also worth mentioning that it is supported for the next five years and is a stable Debian version. Debian 11 offers stability, securability. For this reason, it is a very popular Os system and is an ideal candidate for server setup.
When you first install Debian 11 or when you upgrade your Debian from any version to Debian 11, you have to perform configuration first. This makes the server secure. So, in this article, we are going to teach you how to set up a server initially with Debian 11.
Step1: Opening Terminal
First, we have to open the terminal to start typing commands.
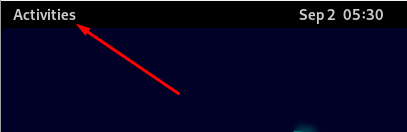
When you are logged in to Debian 11, you’ll see the Activities keyword at the top left corner of the screen. Click on that.
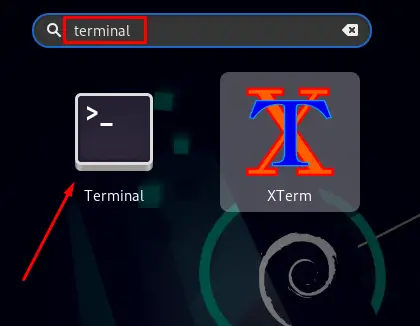
After clicking on the activities, type terminal in the search bar and then select Terminal:
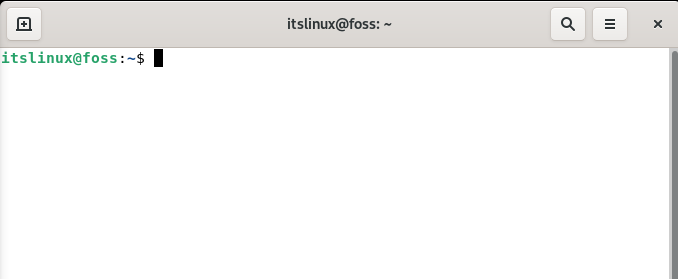
Terminal Screen will appear.
Step2: Debian Update and Upgrade
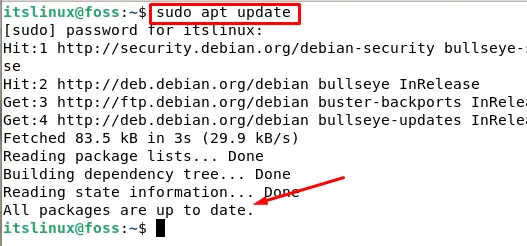
In this step, we are going to first update our Debian packages and then upgrade them if necessary. To update the packages type the following in your terminal:
$ sudo apt updateIf you see “All packages are up to date” then you don’t need to upgrade.
However, if there are some packages that need upgrading type the following command in your terminal:
$ sudo apt upgrade
Step3: Create Sudo User
For our server management, it is preferred that we create a new sudo/administrator user. For this purpose let’s create a sudo user with the following command:
$ sudo adduser linuxmasterWhen you run this command you will be asked a bunch of questions including Full name, room number, etc. You can either set these values or leave them blank and press enter. When you will leave it blank, it will take the default values. In the end, y and no option will be given. Type y to continue.
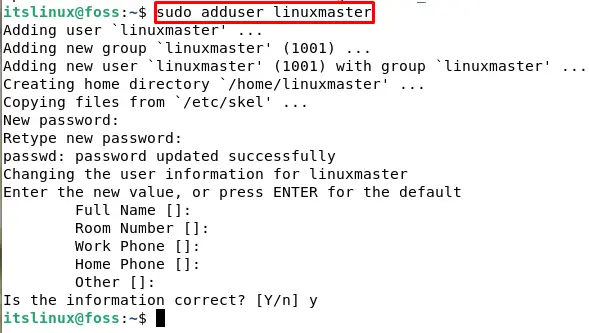
We have successfully created a new user with the name of linuxmaster. The next step is to give this user the sudo privileges. For this purpose type the following command:
$ sudo usermod -aG sudo linuxmaster
Now it’s time to switch the account. Type the following to switch accounts and go to linuxmaster user. For this type the following command:
$ sudo su linuxmaster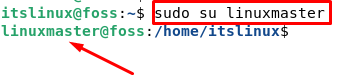
We can see in the above screenshot that we have successfully changed the user from itslinux to linuxmaster.
Step4: System Hostname Configuration
The identity of our system is the hostname over some network. It is a common practice to change the hostname and put a proper name. To see your current hostname type the following command in your terminal:
$ sudo hostnamectl
To change the hostname, run the below command:
$ sudo hostnamectl set-hostname itslinuxReplace the itslinux with whatever you want your hostname to be.

To see the new hostname close the terminal and start the terminal again. You will see the new hostname now. To check the hostname with a command type the following:
$ hostname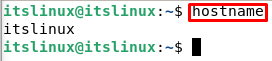
Step5: Secure SSH
SSH is also called Secure Shell. It is a protocol which is used for connecting with remote servers. Let’s configure the server by changing the default port first and disabling root SSH login.
Type the following command in your terminal which will open the following file in nano editor:
$ sudo nano /etc/ssh/sshd_confiq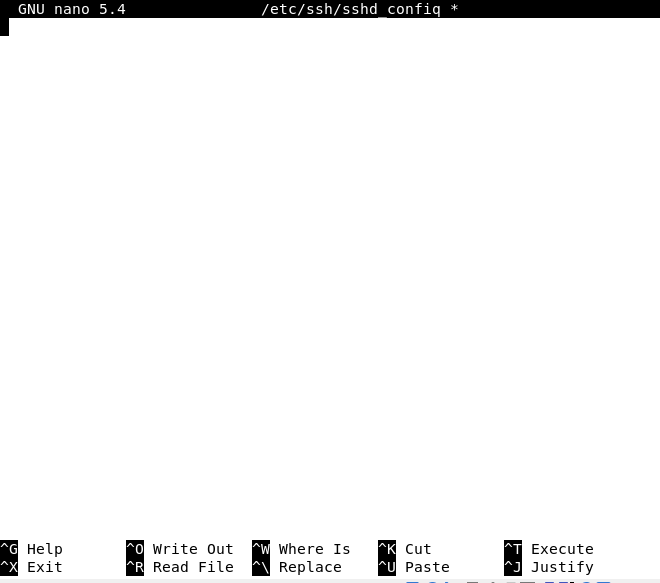
Once opened type the following in your editor:
port 2284

PermitRootLogin no
When you are done typing the above lines, press CTRL+S to save the file and CTRL+X to exit.
Once done, type the following command in your terminal:
$ sudo systemctl restart ssh
If somehow the file didn’t open then it means you are missing ssh server in the system. Install SSH server in your system by typing the following commands:
$ sudo apt install openssh-server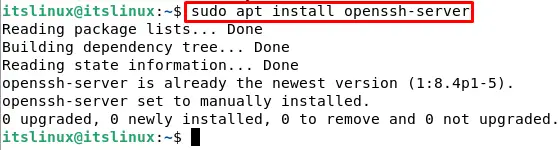
Step6: Configuring Firewall(UFW) on Debian 11
By default, Debian doesn’t have a firewall installed. In order to install firewall type the following command in your terminal:
$ sudo apt install ufw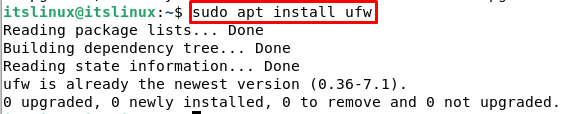
I had ufw already installed that’s why it showed that “ufw is already the newest version”.
Once installed let’s enable our firewall. For this purpose type the following:
$ sudo ufw enable
The next step is to allow the port set in step 5. For this type the following command in your terminal:
$ sudo ufw allow 2284
However, it is on anyone’s preference whether he/she wants to deny or allow the incoming or outgoing traffic. To deny the incoming traffic type the following command:
$ sudo ufw default deny incoming
To allow outgoing traffic type the following command:
$ sudo ufw default allow outgoing
The next step is to reload the firewall UFW. For this purpose, type the following command:
$ sudo ufw reload
If you want to see whether UFW is active or not, check the status by the following command:
$ sudo ufw status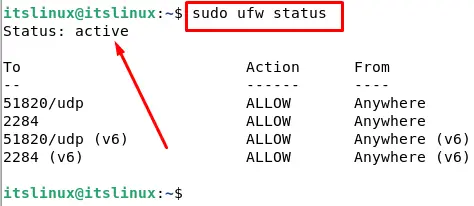
If it is active that means it is enabled.
Step7: System Reboot
The final step involves rebooting your system. For this purpose type the following command:
$ sudo rebootThis command will reboot your system.
Conclusion
When you first install Debian 11 you need to set up a server. One must follow these steps to set up the server. These steps include updating and upgrading, adding a new sudo user, set up a firewall, and securing SSH.
In this article, we have learned today how to set up a server on Debian 11 Bullseye initially. These are some necessary steps when you start working in Debian 11.

TUTORIALS ON LINUX, PROGRAMMING & TECHNOLOGY