
In CentOS, YUM (Yellowdog Updater Modified) is the default package manager used to install, update, and manage software packages. YUM cache is a location on the system where YUM stores the logs and temporary files. However, the cache can become large and take up significant disk space, which slows the system’s performance.
This article will explain the step-by-step instructions to clean the YUM cache by removing the older or unneeded package files.
How to Clean YUM Cache in CentOS / RHEL?
Cleaning the YUM cache is useful to boost the system’s functionality. For this, step-by-step instructions are provided below to clean the YUM cache in CentOS / RHEL:
Clean the YUM Cache
To clean the YUM cache in CentOS or RHEL, utilize the “yum” command with the “all” option as below:
$ yum clean all
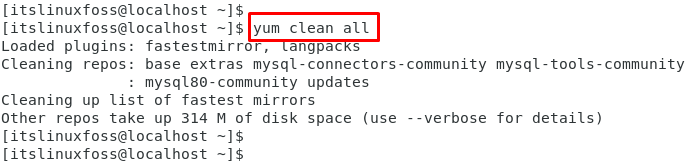
This command removes all files from the system’s YUM cache.
Remove Packages Cache
If you want to remove the cache of the packages only, specify the “packages” as in the following command:
$ yum clean packages

Clean the YUM metadata
To clean the metadata (dependencies files) from the YUM cache in CentOS or RHEL, the user can use the “metadata” argument with the “clean” utility as below:
$ yum clean metadata

The output shows that “15 metadata” files have been cleaned from the system.
Delete Package Headers
To clean the package headers files (old versions of dependencies files) from the cache, mention the “headers” keyword with the “clean” utility below:
$ yum clean headers

It removes all the package headers files from the system’s YUM cache.
Conclusion
CentOS / RHEL offers the “clean all” command to clean the entire YUM cache using the yum package manager. It removes all files, including “metadata ”, “package headers”, and “packages” from the system’s YUM cache. This article has briefly explained the possible methods to clear the YUM cache in CentOS / RHEL.
