
There are different methods to compare the files, like using text editors and comparing the content/size of the files. In Linux, most of the operations are carried out through the command line utilities. The easiest approach to compare the files is by using the diff command utility. In this blog, the usage of the diff command has been explained by demonstrating different examples in Linux, and the post’s content is as follows:
Let’s start this guide!
What is the diff Command Utility in Linux?
The diff is the pre-installed command utility in Linux, which compares different files by reading all lines. The general usage syntax of the diff command in Linux is shown below:
$ diff [Options] [File1] [File2]...
The diff command can be used with different options to compare two or more two files the options which can be used with the diff command are:
| Options | Explanation |
|---|---|
| -q | It will show the output only when the files are different |
| -s | It will show the output only when the files are identical |
| -c | It will show the same content as the compared files |
| -u | It will show the different content of the compared files |
| -i | It will ignore the differences of the case sensitive for the compared files |
| –help | It will display the help menu of the diff command |
| –version | It will display the installed version of the diff command |
For more details on the “diff” command, use the “–help” option as follows:
$ diff --help

All these options are explained in the next sections of the blog.
What is the Usage of the diff Command Utility in Linux?
To understand the usage of the diff command, three different files are already created in which two files, “myfile1” and “myfile2”, are identical, and “myfile3” is different. Let’s practice some examples:
Example 1: Simple Use of Diff Command to Compare Two Files
To compare two files, for instance, “myfile1” and “myfile3”, use the diff command as follows:
$ diff myfile1 myfile3
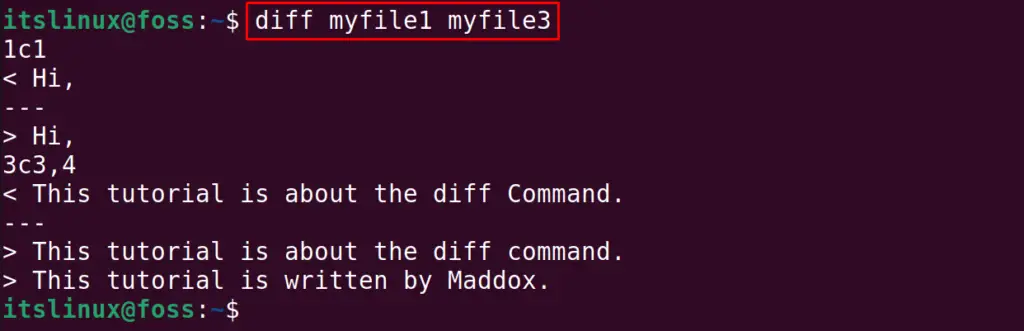
The differences in both files are displayed on the screen. Before understanding the output, let us understand all the possible options that can be seen in the output of the diff command:
| -a | This option tells us to add the line |
| -c | This option tells us to change the line |
| -d | This option tells us to delete the line |
In simple terms, it will compare the first file with the second file and tells you the changes after which both files can look identical.
In the output of the above command, the first file is compared with the second file, and the lines, words, and even characters that are not the same as myfile3 as compared to myfile1 have been displayed as differences.
Example 2: Comparing Two Same Files
Similarly, if both files are being same, then there will be no output if we use the -s option with the diff command:
$ diff -s myfile1 myfile2

Example 3: Comparing Two Different Files
The same results are being displayed, now if we want to display the differences, then use the “-q” option:
$ diff -q myfile1 myfile3

Using “-c” Option
Both files are different and to display the different content of both files, use the “-c” option:
$ diff -c myfile1 myfile3
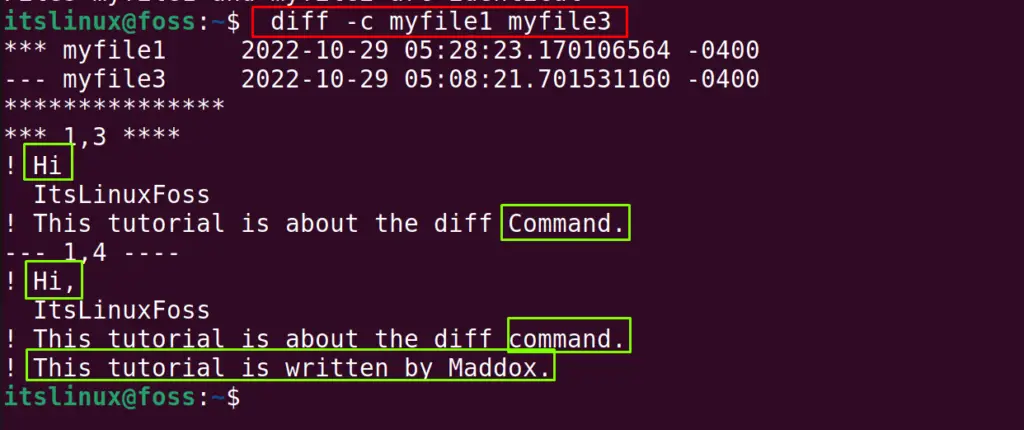
In the above output, the files starting with the exclamation mark are changed in both files.
The differences are displayed and highlighted in green boxes for better understanding.
Using “-u” Option
Similarly, if we want to display the short comparison summary of both files, then use the “-u” option:
$ diff -u myfile1 myfile3
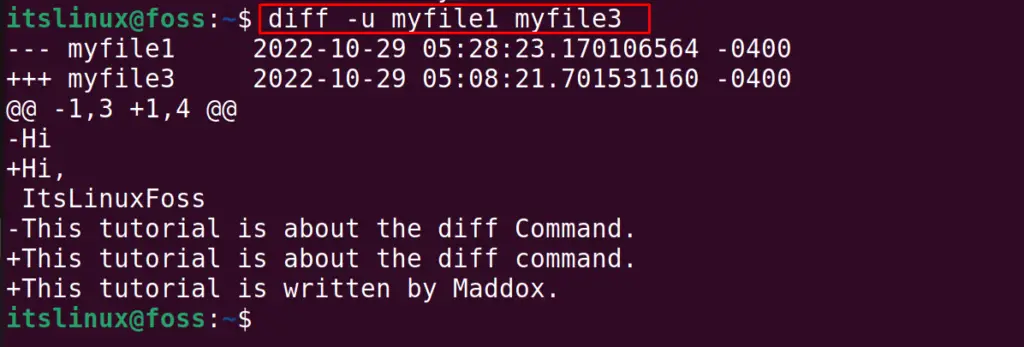
In the above output, the explanation of the results is:
- “-” Lines starting with the minus sign are missing in the myfile3
- “+” Lines starting with the addition sign are missing in myfile1
- “!” Lines starting with the exclamation mark are changed between both files
Also, to display the installed version of the diff command, use the “–version” option:
$ diff --version

That’s all about this tutorial!
Conclusion
The diff command compares the content of two files in Linux. The diff command can show you a simple one-line result, or the line-by-line comparison can also be displayed. In this post, the usage of the diff command has been explained for the Linux distributions with the help of examples.
