Zipped files are an extremely useful method to transfer data between systems. Compressing a file into zipped form helps to safely transfer the file and shrinks the size of the file as well. In Linux, various command line utilities can be used to extract/unzip a particular folder in Linux.
This article will demonstrate various methods to extract or unzip files to a particular folder in Linux.
How to Extract/Unzip File to any Directory?
There are two major methods through which anyone can easily extract a file to a specific folder. The first follows the GUI and the other follows CLI to extract/unzip files. Let’s dig into them one by one:
Method 1: Using GUI
Graphical User Interface is easy to interact with and perform any operation on Linux-based systems. The following steps are carried out to extract/unzip files using the GUI of Ubuntu.
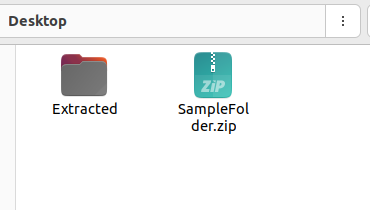
Step 1: Find the Zipped file
Firstly, find the location of where the zipped file is present. In the example below, the file “SampleFolder” is present in the Desktop directory as shown below:
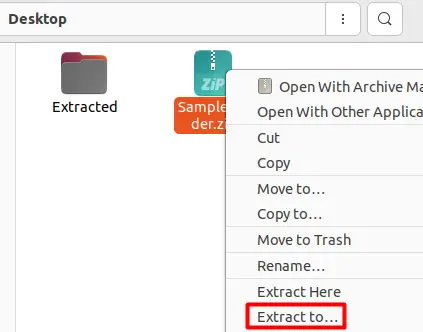
Step 2: Right Click
After finding the zipped file, right-click on the zipped folder which in this case is the “SampleFolder.zip”. Once the menu opens up, click on the “Extract to” option as shown below:
Step 3: Choose Path
A pop-up window will ask you to select the destination of where the file should be extracted. Check the snippet below:

Choose the directory that you need your files to be decompressed to. In this case, the folder is named “Extracted”. Press on the folder and click “Select” in the right-hand corner. This should successfully extract the folder to your desired location.
Method 2: Using Terminal
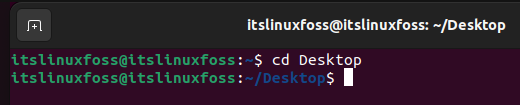
For this technique, we will utilize the Linux terminal to extract /unzip a file. Firstly, navigate to the directory where the compressed file is present using the “cd” command as shown below:
Once you are inside the correct directory, simply run the following command:
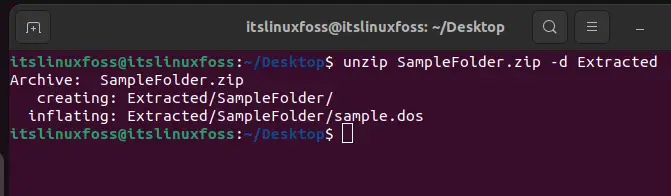
$ unzip SampleFolder.zip -d ExtractedIn this command, the “SampleFolder.zip” is the zipped folder that is going to be extracted and the “Extracted” folder is the destination where this file will be extracted to. The working of this command is shown below:
These are the two major methods through which any compressed file or folder can be extracted to a specific location in Linux.
Note: In the terminal method, you can provide the absolute path of the target directory as well.
Extracting Tar File using Terminal:
To extract a compressed file with the tar extension, you first need to navigate to the directory as demonstrated above and then execute the following command:
$ tar -xvf SampleFolder.tar.xz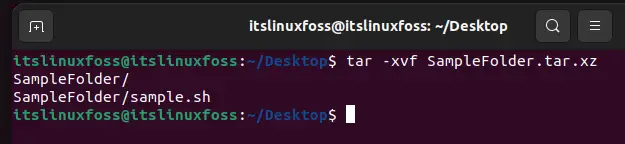
To learn more about how to unzip/extract the GZ file in Linux, follow this dedicated article.
Conclusion
In Linux, any compressed file or folder can be extracted in two ways i.e., GUI and CLI. With the GUI, simply click on the “Extract to” option and choose the directory where you want it to be decompressed. Whereas, you need to use the “unzip” command with the “d” flag to extract the files to a specific folder. In this post, we have demonstrated various ways to extract/unzip files to a particular folder in Linux.

Saryia is a technology entrepreneur and digital publisher specializing in Linux, open-source technologies, and developer education.