
Telnet is a network protocol that allows users to connect to remote systems over a network and execute commands as if they were physically present in the system. The telnet in CentOS allows users to access and manage other network systems remotely. Telnet allows users to log in to a remote system, execute commands, and transfer files over a network connection.
This article will demonstrate the step-by-step instructions to install and configure the telnet in CentOS. The content is provided below:
How to Install Telnet in CentOS?
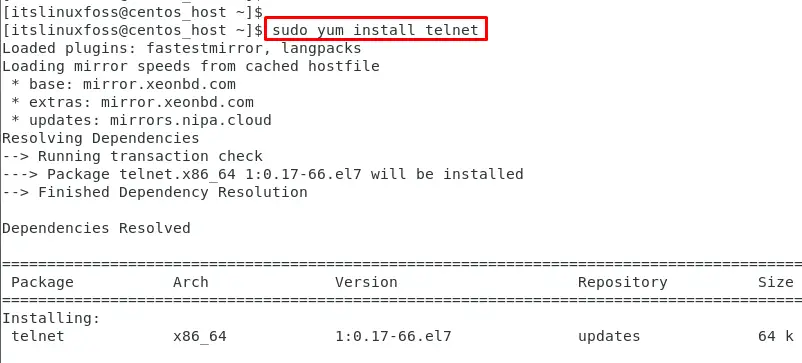
In CentOS, the telnet service is typically not installed by default, but it can be easily installed using the following command:
$ sudo yum install telnet
How to Configure the Telnet on CentOS?
The following steps are carried out to configure the Telnet service on CentOS:
Step 1: Configure the Service
First, start the telnet service using the “systemctl” command:
$ systemctl start telnet.socket

Then, enable the Telnet services to be effective after every reboot:
$ sudo systemctl enable telnet.socket

Lastly, check the service status via the command:
$ sudo systemctl status telnet.socket
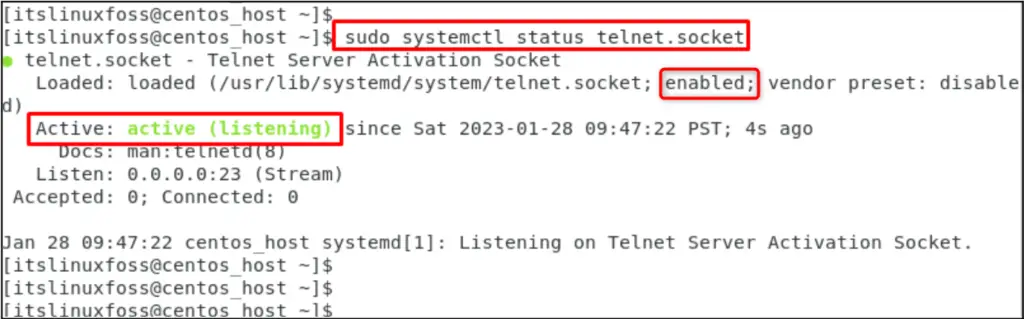
The output shows that the telnet service is actively running and is enabled as well.
Step 2: Add the Telnet Port to the Firewall
In Telnet configuration, users can add a specific port to the firewall for sending or receiving packets over the network. In our case, assign the “23/tcp” port value to the firewall:
$ sudo firewall-cmd --permanent --add-port=23/tcp

The output shows that port 23 has been added to the telnet port in the firewall.
Step 3: Reload the Firewall Services
It is necessary to reload the firewall services that configure all the dependencies:
$ sudo firewall-cmd --reload

The “success” message shows that firewall services have been reloaded.
Step 4: Create a User Account
To create a new user account for telnet access, execute the “useradd” command by specifying the “username”. For instance, “rogerr” is selected as the user account:
$ sudo useradd rogerr

The output shows that “rogerr” has been created in the terminal.
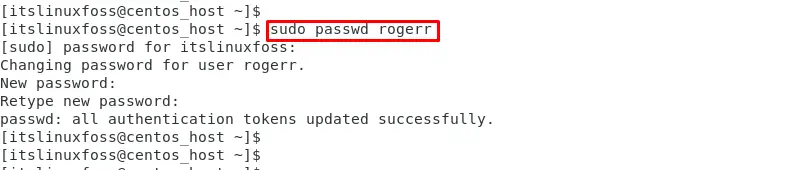
Step 5: Set Password to User Account
Users can set the password through the “passwd” command by specifying the username. In our case, the “rogerr” is specified as the username:
$ sudo passwd rogerr
Step 6: Verify the Telnet Connection
Users can verify the configuration of telnet by specifying the “telnet” command along with the “IP address” or “hostname”. In our case, specify the hostname as “localhost” to connect the telnet connection:
$ telnet localhost
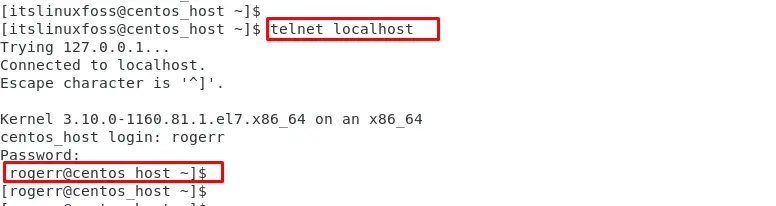
The output confirms that the “roger” username has been successfully logged using the telnet.
How to Remove Telnet From CentOS?
The Telnet package can be removed from the CentOS system via the command:
$ sudo yum remove telnet
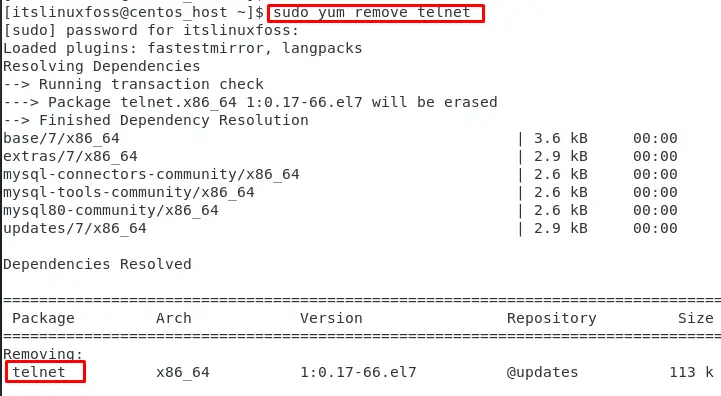
The output shows that “telnet” has been removed from CentOS.
Conclusion
CentOS offers the “yum” package manager to install the telnet package via the “sudo yum install telnet” command in the Operating System. After that, configure the telnet by enabling the “telnet.socket” services and create a user account with the password to log in. Telnet is particularly useful for managing servers and other networked devices that do not have a graphical user interface. This article has explained the step-by-step instructions to install and configure the telnet in CentOS.
