
TFTP (Trivial File Transfer Protocol) is a simple file transfer protocol that is used to share files between devices over the network. A TFTP server runs the TFTP protocol and allows clients to upload or download files to or from the server. It has various applications, such as updating firmware, transferring configuration files, and synchronizing files between Linux machines.
This guide will present the steps to install and run a TFTP server on Linux.
How to Install a TFTP Server?
To install the TFTP server on the linux, follow the below-mentioned steps:
Step 1: Update Package Lists
It is a good practice to update package lists before installing any new software. To update the package lists, use the below commands for some popular Linux distributions:
$ sudo apt update      # Ubuntu, Linux Mint and Debian
$ sudo yum update      # CentOS
$ sudo dnf update      # Fedora

It ensures that users have the latest package information available.
Step 2: Install TFTP Server
To install the TFTP server, specify the “tftpd-hpa” package with the “install” utility:
$ sudo apt install tftpd-hpa          # Ubuntu, Linux Mint and Debian
$ sudo yum install tftp-server        # CentOS
$ sudo dnf install tftp-server tftp   # Fedora
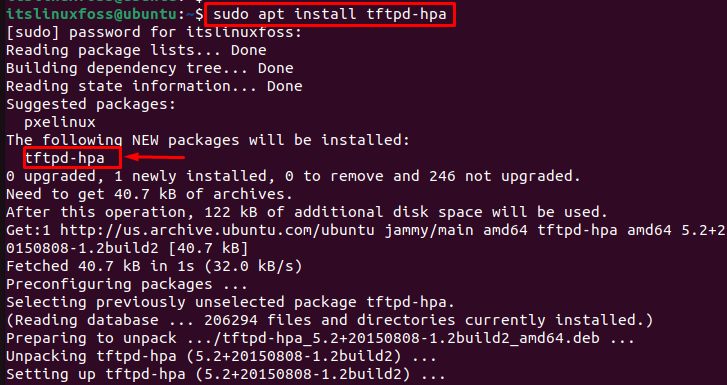
This command installs the TFTP server package on the Ubuntu system.
Step 3: Configure TFTP Server
Once the installation is complete, users need to configure the TFTP server. To do this, open the “tftpd-hpa” file via the “nano” editor in the below command:
$ sudo nano /etc/default/tftpd-hpa
It opens the configuration file in the nano text editor. In this file, set the TFTP server directory to “/var/lib/tftpboot” and the TFTP server IP address to 0.0.0.69 to allow connections from any IP address:
TFTP_DIRECTORY="/var/lib/tftpboot"
TFTP_ADDRESS="0.0.0.0:69"
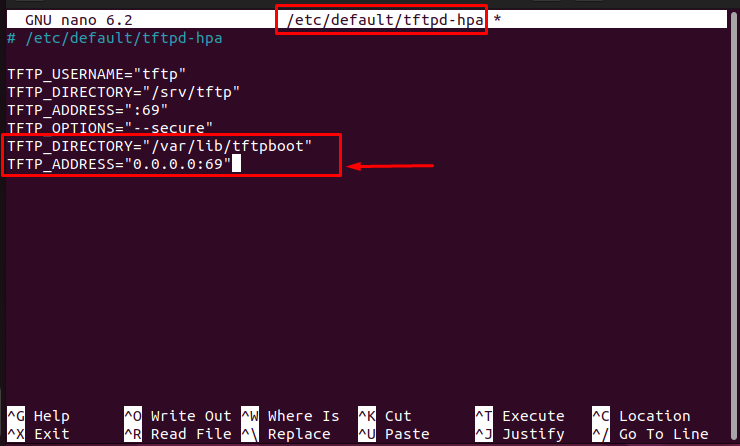
Save and close the configuration file.
Note: TFTP servers listen on a designated port (default port number is 69) for incoming client TFTP requests.
Step 4: Create TFTP Server Directory
When setting up a TFTP server, users need to configure the server to point to the directory where the files that clients will request are stored. To create the TFTP server directory, use the “mkdir” command by specifying the path:
$ sudo mkdir /var/lib/tftpboot

It creates a directory named “tftpboot” in the “/var/lib” directory.
Step 5: Set Permissions on TFTP Server Directory
After creating the TFTP server directory, set the 777 permissions on the “tftpboot” directory. It ensures the security and integrity of the system and prevents unauthorized access or modification of files on the server. To do this, execute the below commands:
$ sudo chmod -R 777 /var/lib/tftpboot
$ sudo chown -R nobody:nogroup /var/lib/tftpboot

These commands set the permissions on the “tftpboot” directory to allow any user to read, write, and execute files in the directory. They also set the directory ownership to the nobody user and nogroup.
Step 6: Restart TFTP Server
Finally, restart the TFTP server to apply all changes. To do this, run the “systemctl” command with the “restart” option:
$ sudo systemctl restart tftpd-hpa

This command restarts the TFTP server service on your Linux system.
How to Run TFTP Server on Linux?
To run the TFTP server on Linux, follow the step-by-step instructions:
Step 1: Check the Services of the TFTP Server
To verify the services of the TFTP server, utilize the “systemctl” command with the “status” option as below:
$ sudo systemctl status tftpd-hpa

The “active (running)” status represents that the TFTP server has been installed and configured on the Linux system.
(Optional): For Dead State
If the services are in a dead state, users can start them using the following command:
$ sudo systemctl start tftpd-hpa

It starts the TFTP server if services are not in an active state.
Step 2: Enable the TFTP Server
To enable the TFTP server, use the “systemctl” command with the “enable” option to start automatically at boot time using the following command:
$ sudo systemctl enable tftpd-hpa

The output shows that “tftpd-hpa” services have been enabled in the system.
Step 3: Test the TFTP Server
To test that the TFTP server is working properly, use a “tftp” command with the IP address of the machine:
$ tftp 192.168.157.149

The TFTP server has been successfully connected.
Transfer a File (Server to Local Machine)
To transfer a file from the TFTP server to the local machine, use the “get” command by specifying the filename as “file.txt”:
> get file.txt

The output shows that the “file.txt” has been transferred to the local machine from the server.
Transfer a File (Local Machine to Server)
To transfer a file from the local machine to the server, utilize the “put” command by specifying the “file.txt” that is present in the home directory (give the complete path if it is located somewhere else):
> put file.txt

The above command confirms that “file.txt” has been transferred from the local machine to the server.
Conclusion
To install the TFTP server on Linux, use the “tftpd-hpa” or “tftp-server” package via the “APT”, “YUM,” or “DNF” package managers. Before running the TFTP, ensure that it is configured properly and perform the necessary modifications in the config file of TFTP. After the configuration, users can transfer files to and from the server via the “tftp” command by specifying the IP address.
This article has illustrated the step-by-step procedure to install and run the TFTP server in Linux.
