
MySQL is the database management system that manages and organizes data via Structured Query Language (SQL). MySQL support is available on various operating systems, like Linux distributions.
This article aims to give the procedural method to install MySQL on CentOS 7. CentOS is a distribution of Linux that depends on the source code for RHEL.
The content of the post is:
How to Install MySQL on CentOS 7?
This section demonstrates the steps to install MySQL on CentOS 7.
Step 1: Update the Packages List
After logging in to your CentOS 7 system as the root user, update the package manager cache by running the following command:
# yum update
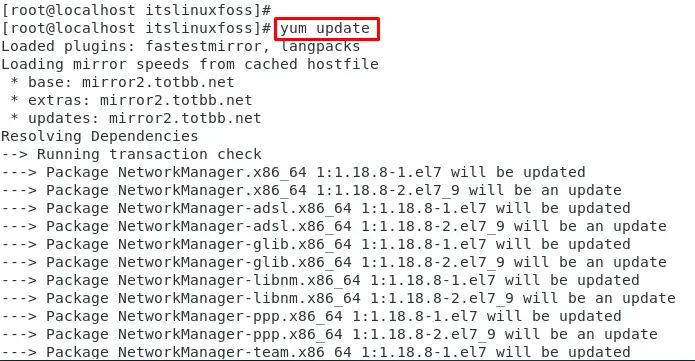
The output shows that the package manager is updating in the terminal.
Step 2: Enable the MySQL Repository
To enable the repository of MySQL 8.0 (latest version), specify the URL with the “localinstall” command below:
# yum localinstall https://dev.mysql.com/get/mysql57-community-release-el7-11.noarch.rpm
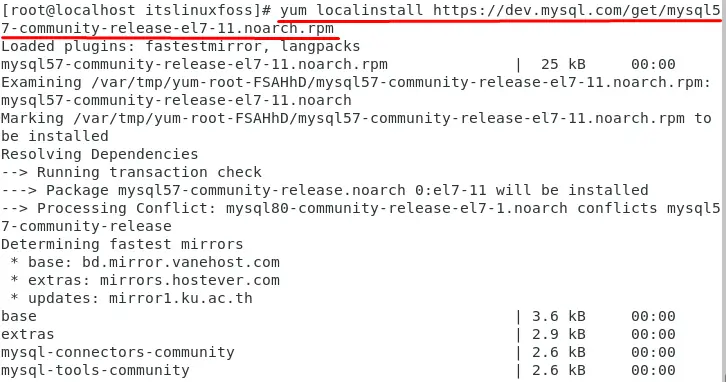
The output shows that the repository of MySQL has been enabled in the system.
Step 3: Install the MySQL Server
To install the MySQL Community Server, the “yum” package manager is used by specifying the “mysql-server” below command:
# yum install mysql-server
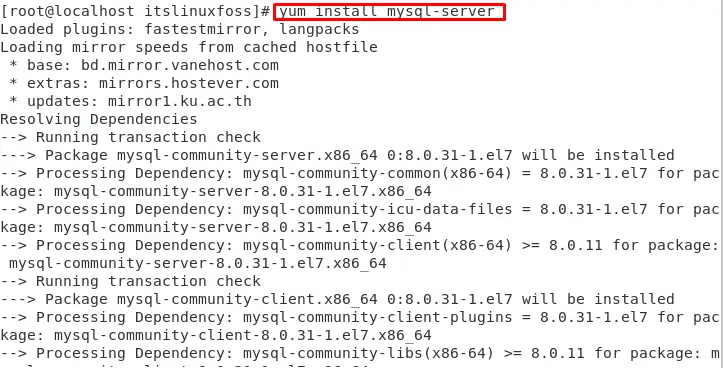
The output shows that a mysql-server package has been installed in the system.
How to Setup MySQL on CentOS 7?
After installation, the primary step is to set up the MySQL server. For this, the following recommended steps must be followed:
Step 1: Manage the MySQL Service
Managing the service is the primary step to start using service-dependent packages. Service management includes starting, enabling, and verifying the service status. Let’s implement this on MySQL:
Start the MySQL Service
First, start the service via the command listed below:
# systemctl start mysqld

The output returns that the “MySQL” service has been started.
Check the Service Status
Now, check the service status:
# systemctl status mysqld
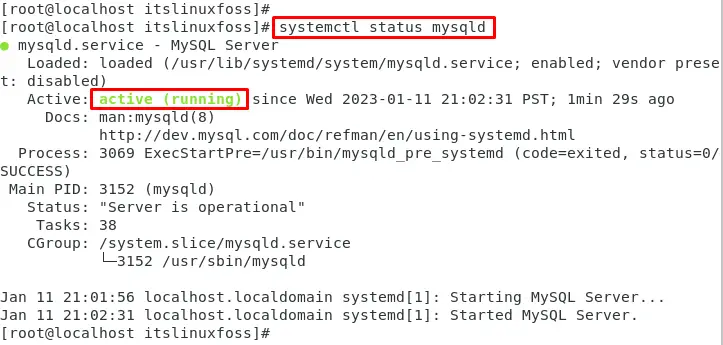
The output shows that the service “MySQL” has been active.
Step 2: Find Password for First Time Login
To find the temporary password for MySQL, use the “grep” command that fetches out the password by specifying the “/var/log/mysqld.log” file:
# grep 'temporary password' /var/log/mysqld.log

The output shows that a temporary password has been generated which is used during login to MySQL terminal.
Step 3: Log in to MySQL
In this step, log in to the MySQL shell by specifying the “root” user with the same temporary password “yg;onq>hO5!6”, which is generated in the above step:
# mysql -u root -p

That’s it! You have now installed MySQL on CentOS 7.
How to Remove MySQL From CentOS 7?
To uninstall MySQL on CentOS, specify the “remove” command with the yum package manager below:
# yum remove mysql-server
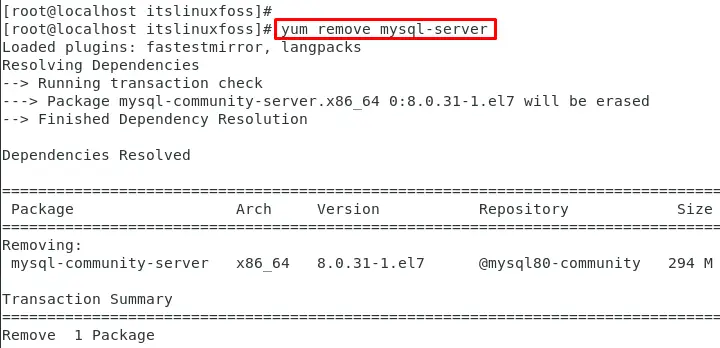
The output shows that “mysql-server” with all dependencies has been removed from the system.
Conclusion
To install MySQL on CentOS 7, the “mysql-server” package is required after enabling the repository of MySQL 8.0. It is commonly used in web applications, data warehousing, and logging applications. This article has explained the step-by-step procedure to install “MySQL” on CentOS 7.
