Node.js is a tool for managing and building server-side applications with JavaScript. It is based on Chrome’s JavaScript engine and a runtime environment. Node.js lets you use your existing JavaScript knowledge to create scalable backends. Using Node.js, building applications that run on servers is easier than running them on a standard web browser.
This guide will show different ways to install Node.js on your Ubuntu 24.04 system.
Table of Contents:
- How To Install Node.js on Ubuntu 24.04
- Install Node.js Using Source Code
- How to Install Custom Version of Node.js Using NVM
- Conclusion
1. How To Install Node.js on Ubuntu 24.04
To install Nde.js in Ubuntu 24.04, you can use the default apt package manager tool or the official Node.js binary files to compile and install it. Another option is using the NVM, the standard Node Version Manager. Using it, you can install any custom version of Node.js in your Ubuntu system. The NVM lets you control and provide flexibility in Node.js installation on Ubuntu. You can install any older version as needed.
However, Ubuntu’s default apt package manager tool may not always contain the updated version of Node.js, so it’s preferable to use other methods, such as the Node.js Deb repository, or compile it using its source code.
Now, we will cover these Node.js installation ways.
1.1. Install Node.js Using Default Ubuntu Repository
To install Node.js from the Ubuntu default repository, you simply have to update your old packages. Once that is done, you can get Node.js directly from the terminal using the apt install command.
First, update your Ubuntu 24.04 system:
sudo apt update
Now install Node.js using this command:
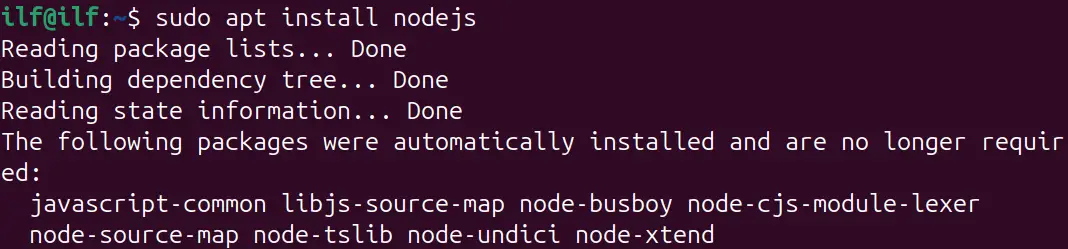
sudo apt install nodejs

After installation, you can check the installed Node.js version using this version command:
node --version

The latest release version of Node.js is 22. If the above method does not install it, you can try the next method.
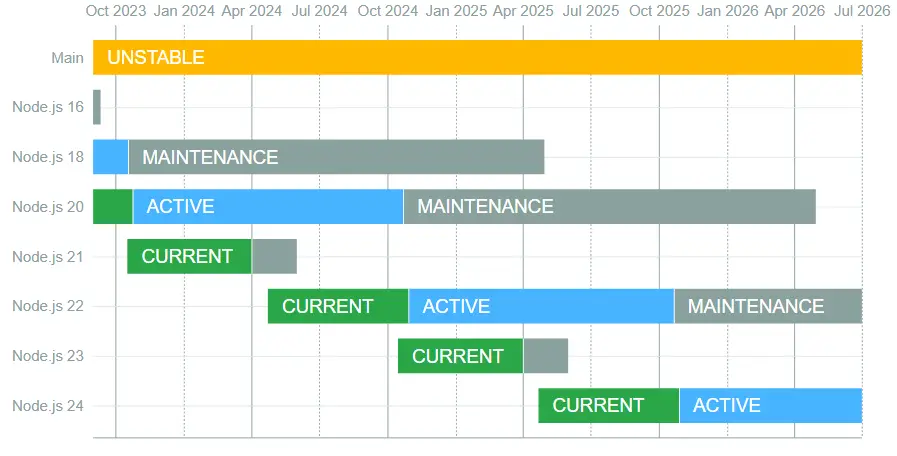
To learn more about a Node.js version, you can check the following graphical representation of all released and future versions.
1.2. Get Node.js Using Deb Repository
A Node.js deb repository is a collection of software packages in Debian format (.deb) containing different versions of Node.js and related tools. Various entities maintain these repositories and provide a convenient way to install and manage Node.js on Debian-based systems. Using this method, the latest Node.js can be installed on your Ubuntu 24.04 system.
You have two different methods for adding the Node.js deb repository in your Ubuntu 24.04 system. You can either add it manually by adding its key to the Ubuntu system or run an installation script for the Node.js deb repository that will do the work for you. We will cover both these methods here.
So before we get started, install some required prerequisite packages on the go. You need to download the following three packages:
- curl: Download the Node.js repository script from the internet.
- gnupg: Verifies the authenticity of the downloaded script using cryptographic keys.
- ca-certificates: Ensures the source of the script (repository) is trusted by the system.
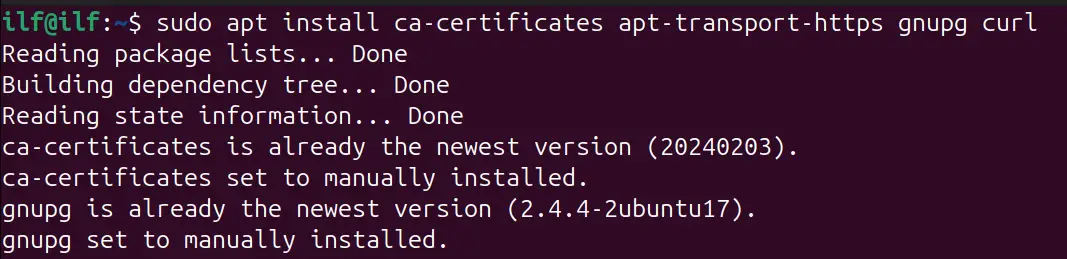
To install these three prerequisite packages, run this command:
sudo apt install ca-certificates apt-transport-https gnupg curl
Manually Adding the Node.js Repository and Installing Node.js
To manually add the Node.js repository to the Ubuntu 24.04 system, first, add the GPG key to your Ubuntu key’s list:
curl -fsSL https://deb.nodesource.com/gpgkey/nodesource-repo.gpg.key | sudo gpg --dearmor -o /etc/apt/keyrings/nodesource.gpg

Now add the Node.js repository using this command:
echo "deb [signed-by=/etc/apt/keyrings/nodesource.gpg] https://deb.nodesource.com/node_21.x nodistro main" | sudo tee /etc/apt/sources.list.d/nodesource.list

Update system packages so the newly added key gets recognized:
sudo apt update
Finally, install the Node.js:
sudo apt install nodejs
Now you can check the installed version of Node.js using this command:
node --version

As you can see, we got the 21.7.3 version of Node.js using the Node.js repository compared to the Ubuntu default repository, which gave us version 18.19.1 of Node.js.
Now let’s check how to do the same steps with an automated script.
Installing Node.js Using an Automated Script
Instead of running multiple commands for adding a Node.js repository to Ubuntu, you can easily add it with this installation script:
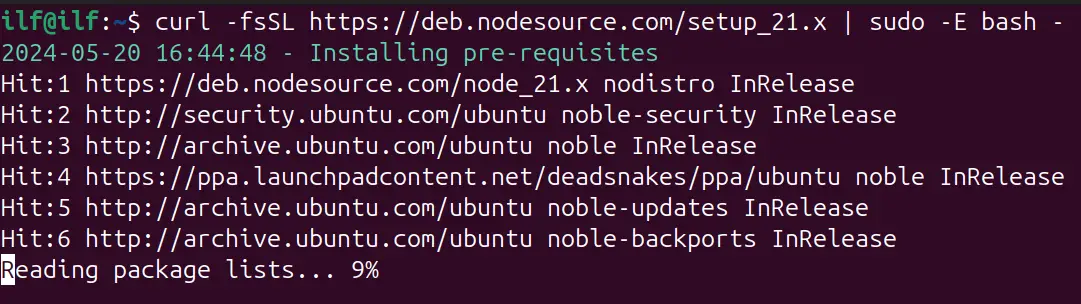
curl -fsSL https://deb.nodesource.com/setup_21.x | sudo -E bash -
This command, by default, gets the latest version of Node.js, but you can also modify the command setup_21.x to get any other version.

Once added, install Node.js:
sudo apt install nodejs

After that, check the installed version of Node.js:
node --version

1.3. Install Node.js Using Binary Executable
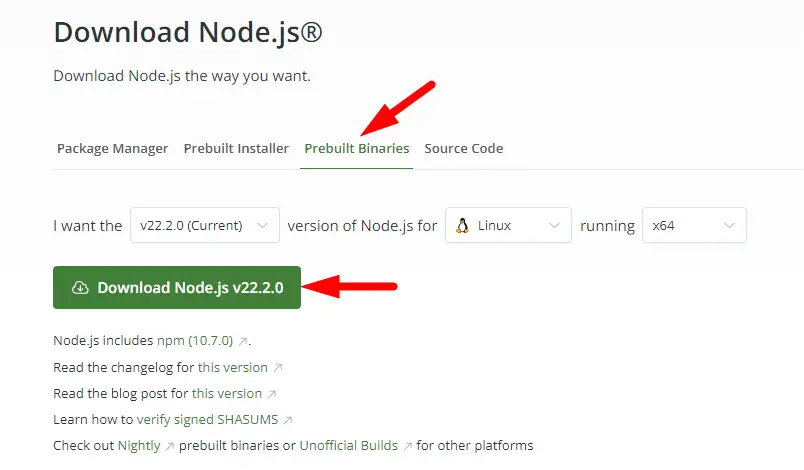
Node.js is also available as a binary executable file. Binaries are compiled machine code that the computer can directly run. You can get the binary executable file from the Node.js download page.
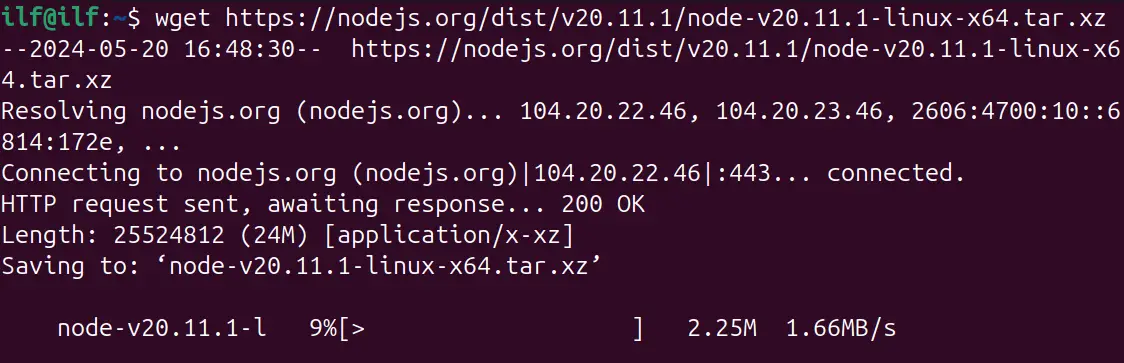
You can manually download it or use the wget command to get the executable tar file:
wget https://nodejs.org/dist/v20.11.1/node-v20.11.1-linux-x64.tar.xz
After that, unzip file:
tar -xf <tar.xz-File-Path>

Navigate to the directory where the Node.js tar file is extracted:
cd <Extracted-Directory>

After navigating to the Node.js extracted folder, list all the contents and find the bin folder. Navigate inside the bin folder:
cd bin/

Inside the /bin directory, you will find the binary executable file for Node.js. Simply execute it:
./node
You will see the Node.js version number and its terminal support upon successful execution.

2. Install Node.js Using Source Code
Installing software in Ubuntu typically involves using pre-built packages through repositories. But there are scenarios where you might need to install software from source code.
Why install from Source Code?
Latest Version: It will give you the newest version of Node.js.
Customization: You may need to modify the software before installation.
Source code Node.js compilation requires these prerequisites:
sudo apt install build-essential libbz2-dev libssl-dev libncursesw5-dev zlib1g-dev libreadline-dev libffi-dev libncurses5-dev libgdbm-dev libsqlite3-dev

Now download the source code of Node.js using the wget command:
wget https://nodejs.org/dist/v20.11.1/node-v20.11.1.tar.gz

Unzip the file to a specified location:
tar -xf <path-of-tar.gz-File>

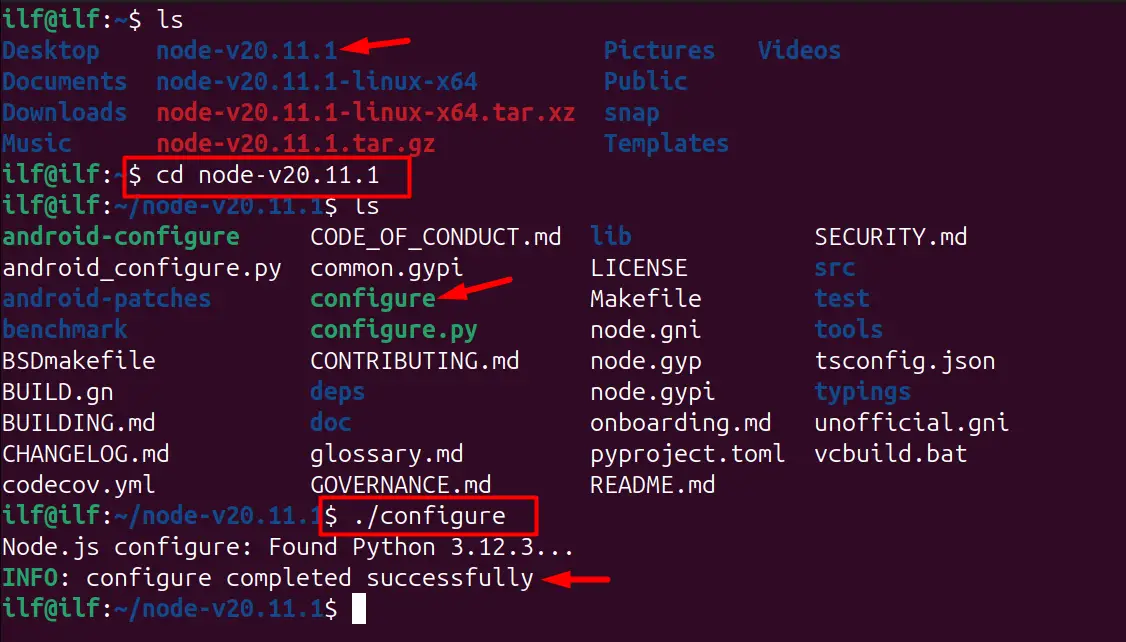
Navigate to where you extracted the Node.js source code, and run the Node.js configuration script:
cd <Extracted-Directory>./configure
Compile the source code and create binary executables. To improve compilation speed, add -j flag with a number:
make -j 4

After successfully building the source code, execute the following command to install Node.js files into system-defined directories:
sudo make install

Finally, verify the installed version using this command:
node --version

3. How to Install Custom Version of Node.js Using NVM
To install a custom Node.js version on your Ubuntu 24.04 system, you should consider the NVM (Node Version Manager). It helps you install and manage older versions of Node.js on Ubuntu.
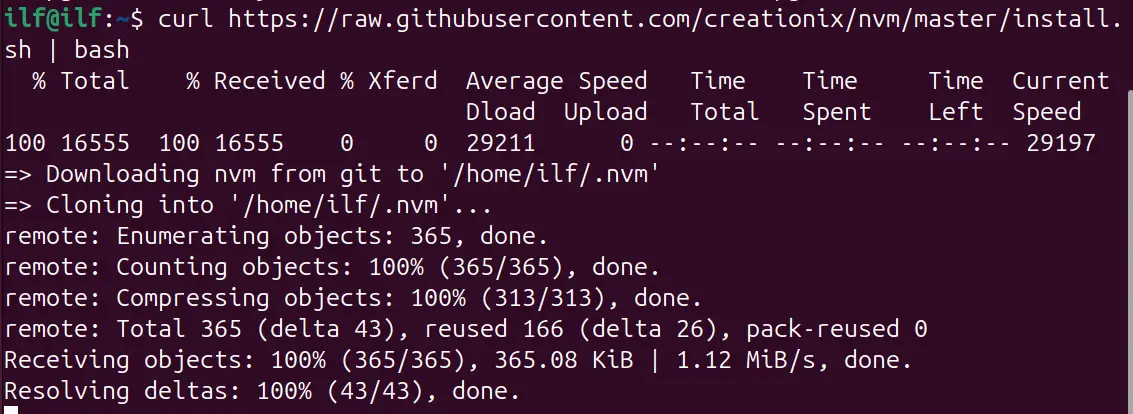
Before installing Node.js, the first step is configuring the NVM on Ubuntu. For this, consider the following command:
curl https://raw.githubusercontent.com/creationix/nvm/master/install.sh | bash
Once NVM is installed, exit or refresh the terminal using the newgrp command.
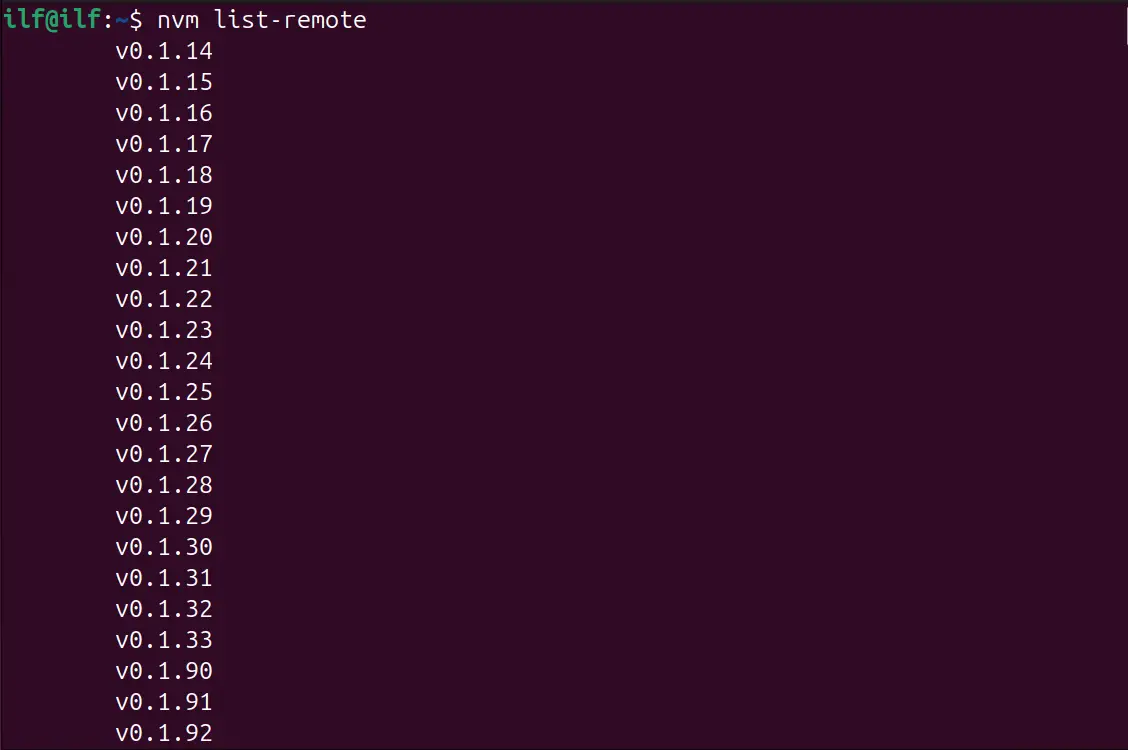
After that, list all the Node.js versions available to install using this command:
nvm list-remote
Now, to install any of the above-listed versions of Node.js, simply edit the version number in the below command:
nvm install <version>
Node.js versions have different names that can be helpful when installing. For example, to install the lts/iron version, you can use this command:
nvm install lts/iron
Some mainly used Node.js version names are as follows:
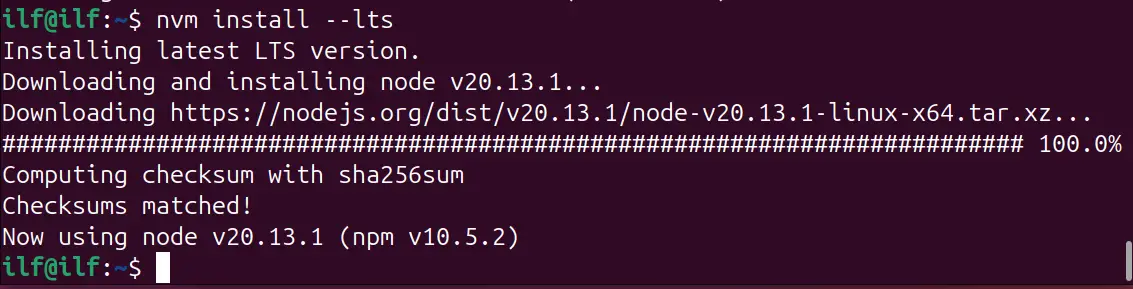
nvm install stablenvm install --ltsnvm install node
Finally, you have installed Node.js on the Ubuntu 24.04 system.
Conclusion
To install Node.js on Ubuntu 24.04 you can use the default Ubuntu repository. But the Nde.js version you get from there will be 18, and that’s not the latest version. You can try out other installation methods to get the latest version, like building the Node.js using its source code or adding the Node.js official repository to your Ubuntu system. However, if you want to avoid all these commands, simply add the NVM (Node Version Manager) to your system and get the desired version of Node.js on your Ubuntu system.
