Portainer CE is a free, open-source management UI for Docker, including Docker Compose. It allows users to manage containers, images, networks, and volumes via a web-based interface, eliminating the need to use command line tools. With Portainer, users can manage multiple Docker environments from a single, centralized location, including those defined in Docker Compose files.
This post will address the step-by-step procedure to install Portainer CE with Docker Compose on Ubuntu 22.04.
How to Install Portainer CE With Docker-Compose on Ubuntu 22.04?
Before installing the Portainer CE with Docker-Compose, we have to install the Docker and Docker-compose by the below-mentioned steps:
Step 1: Install Docker
Before proceeding towards the installation of the Portainer CE, first, make sure the Docker-Compose is installed. It installs Docker using the command:
$ sudo apt install docker.io -y

Verify the installation by displaying the version of Docker:
$ docker --version

The 20.10.12 version of Docker has been installed.
Step 2: Configure Docker Service
Now, enable the docker service via the command (so that docker service starts functioning on reboot):
$ sudo systemctl enable docker

After enabling the Docker, start the docker using the systemctl command:
$ sudo systemctl start docker

To confirm the status of docker service, use the status option of systemctl utility:
$ sudo systemctl status docker

Step 3: Download and Install Docker-Compose
Next step is to download and install the package of docker-compose via the curl script as follows:
$ sudo curl -L "https://github.com/docker/compose/releases/download/1.29.2/docker-compose-$(uname -s)-$(uname -m)" -o /usr/local/bin/docker-compose

Step 4: Make Docker-Compose Executable
Make the downloaded file executable by changing its permissions:
$ sudo chmod +x /usr/local/bin/docker-compose

Confirm the installation of Docker-Compose by displaying its version:
$ docker-compose --version

1.29.2 version of Docker-Compose has been installed.
Step 5: Make a Directory and Install Portainer
Now, make a directory for the Portainer installation:
$ sudo mkdir -p portainer

Navigate to the newly created directory:
$ cd portainer

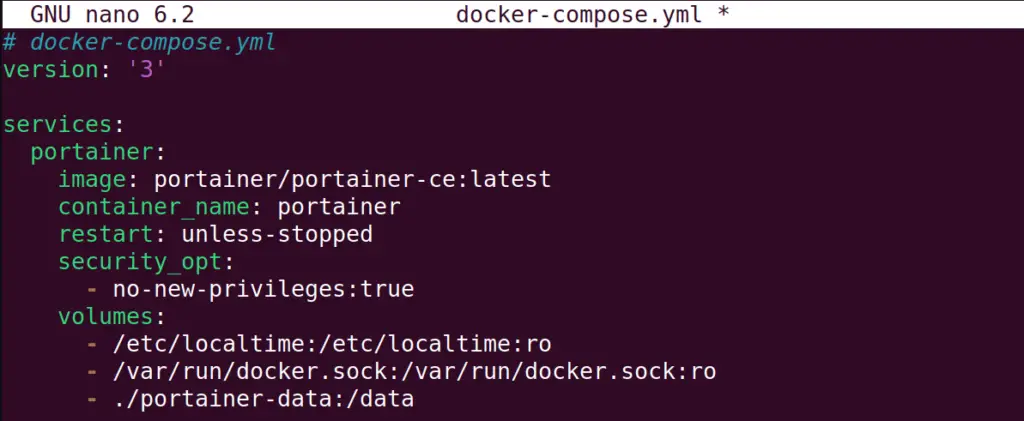
Step 6: Configure the “.yaml” File
Open the docker-compose file by using the nano text editor:
$ sudo nano docker-compose.yml

Paste the below-mentioned script in the newly opened file:
# docker-compose.yml
version: '3'

services:
  portainer:
    image: portainer/portainer-ce:latest
    container_name: portainer
    restart: unless-stopped
    security_opt:
      - no-new-privileges:true
    volumes:
      - /etc/localtime:/etc/localtime:ro
      - /var/run/docker.sock:/var/run/docker.sock:ro
      - ./portainer-data:/data
    ports:
      - 9000:9000
The code provided here is described as follows:
- image: The image to be used.
- container_name: The name of the container associated with the above image.
- restart: The “restart” policy of the container is set to “unless-stopped”.
- volumes: the “volumes” is said to be the directories where the directories are with the container.
- ports: The “ports” the Portainer CE will listen to.


Step 7: Power Up Docker-Compose
To activate the above docker-compose file, power up the docker-compose:
$ sudo docker-compose up -d

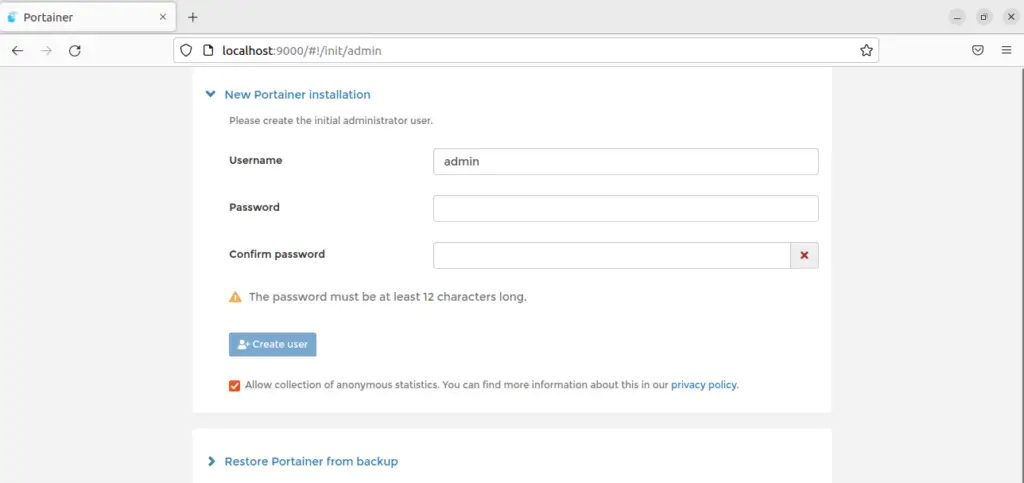
Verify the Portainer
When it is done, open the web browser and go to the below-mentioned URL:
http://localhost:9000

This is the distinction of the Portainer CE that it can be used to manage Docker through the web-interface as a container.
Conclusion
To install Portainer CE with Docker-Compose, install and set up the Docker and Docker Compose services. After that, create a dedicated directory for the portainer and power up the docker there. This will activate the Potainer CE to be used for managing the Docker.
This post has provided a step-by-step guide to installing Portainer CE with Docker Compose on Ubuntu 22.04.
