SELinux (Security-Enhanced Linux) is a security architecture module for the Linux kernel that provides a powerful, flexible mechanism for controlling the security access to resources on a system. There are three SELinux modes: enforced, permissive, and disabled. The Permissive mode logs any violations and allows access to resources.
This article will describe how to enable the SELinux to permissive mode via the following content:
- Set the SELinux to Permissive Mode Temporarily
- Set the SELinux to Permissive Mode Permanently
- Disable the Permissive Mode in SELinux
Method 1: Set the SELinux to Permissive Mode Temporarily
To set the SELinux to permissive mode; we can use the setenforce option, which is passed a value “0“. While disabling the SELinux permissive mode (Enable enforced mode), we can pass the value “1”. The default SELinux mode is disabled.
To change the mode of SELinux to permissive, follow these steps:
Step 1: Set the SELinux Permissive Mode
Run the enforce command by passing the value “0” to enable the SELinux permissive mode with this command:
$ sudo setenforce 0

The SELinux permissive mode is enabled.
Step 2: Verify the SELinux Current Mode
Verify the current status of the SELinux is set to the permissive mode by running any of the below-stated commands:
$ getenforce

The output shows that the SELinux permissive mode is set.
Tip: To enable the enforce mode temporarily, we can pass the “1” value to the setenforce command as shown below:
$ sudo setenforce 1

Method 2: Set the SELinux to Permissive Mode Permanently
If you want to set the SELinux to permissive mode permanently, follow the below steps:
Step 1: Configure the SELinux Config File
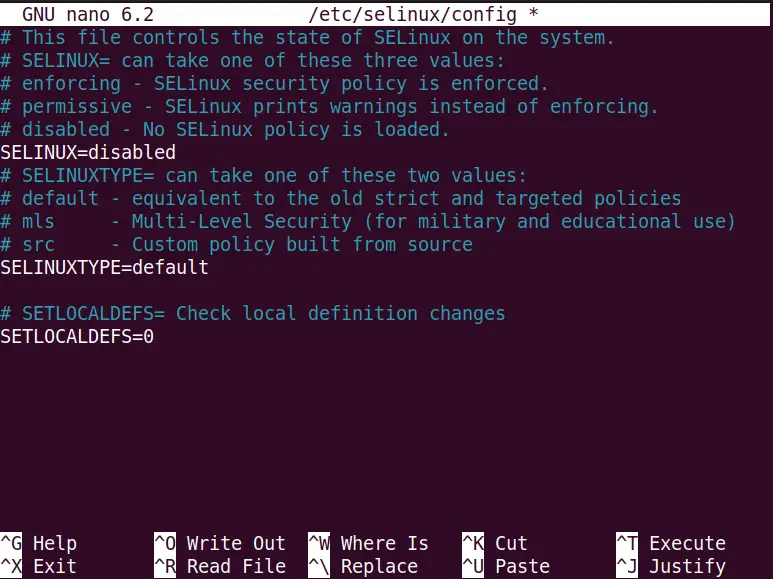
Open the SELinux default system configuration file “/etc/selinux/config” with the nano editor by running the following command:
$ sudo nano /etc/selinux/config
Navigate to the “SELINUX” line and make its value permissive to turn ON the permissive mode as done below:
SELINUX=permissive
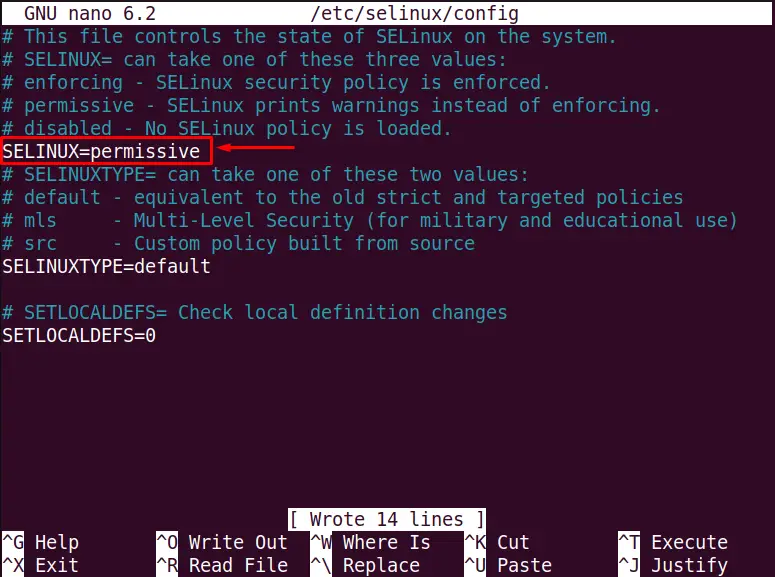
Save “Ctrl O” and exit “Ctrl + X” the editor.
Step 2: Restart the System
Restart the SSH server to save the changes to the system file with this command:
Note: If you are not using the SSH server, you can simply use the “sudo shutdown –r now” command to restart the system.
$ sudo systemctl restart sshd

Step 3: Check the SELinux Mode
Now, verify that the SELinux is set to permissive mode permanently by executing the command in the terminal:
$ getenforce

The output verifies that the SELinux permissive mode is permanently set.
How to Disable the Permissive Mode in SELinux?
Moreover, two modes can also be applied permanently: the “enforced” and the “disabled” mode.
- To enable the enforced mode, we can follow all the steps in the above “Set the SELinux to Permissive Mode Permanently” method. But we need to change the SELinux mode to enforcing in the “/etc/selinux/config” file with this command:
SELINUX=enforcing
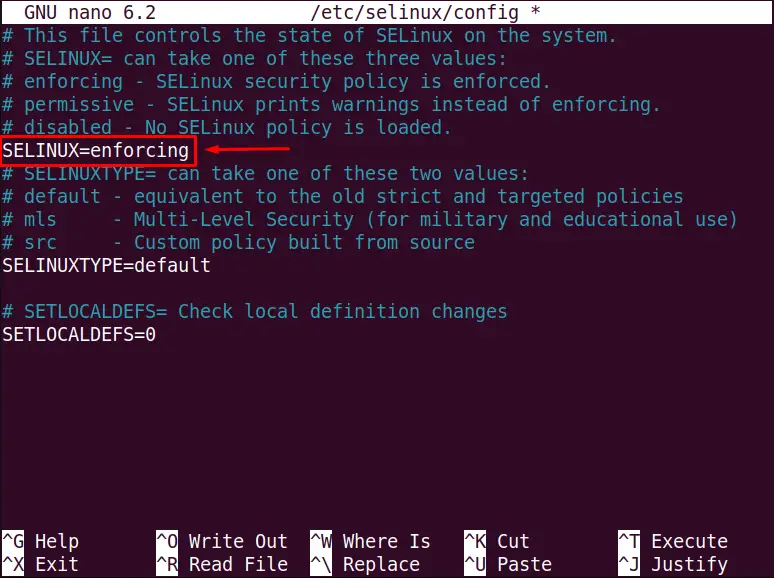
This enforcement will be set permanently.
- Similarly, to set the “disabled” SELinux permissive or enforced mode, we need to change the SELinux mode to disabled in the “/etc/selinux/config” file, as shown below:
SELINUX=disabled
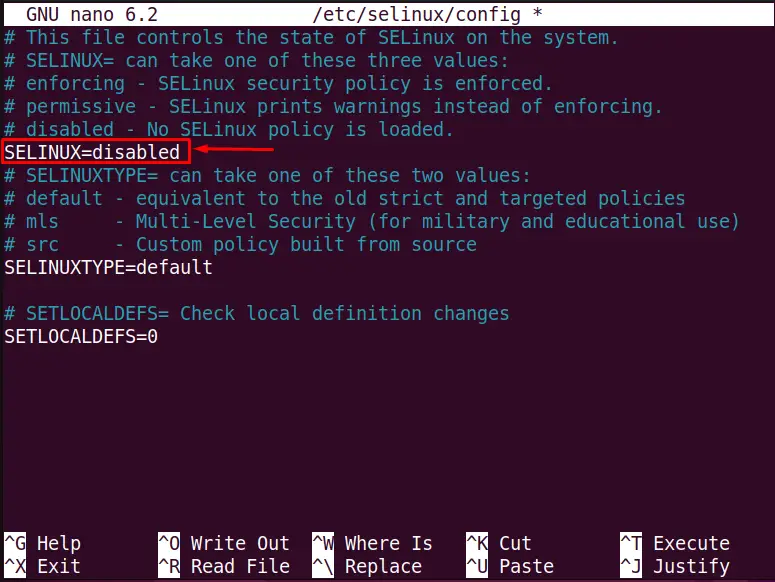
The permissive mode or enforced mode will be disabled.
Conclusion
The SELinux permissive mode can be set temporarily by using the “sudo enforce 0” command and permanently by setting the “SELINUX=permissive” in the “/etc/selinux/config” system configuration file. This guide has offered both methods step-by-step to set SELinux to permissive mode.