NodeJS is a programming language that corresponds to the JavaScript runtime environment. It is generally used in web development and the creation of network applications. It provides an open-source cross-platform to execute the JavaScript programs outside the client/user web browser.
It comes with its latest release every six months. The latest LTS (Long Term Support) stable release of Node.js is version 20.10.0, which includes npm 10.2.3. It is recommended to update the NodeJS to its latest release to enhance its functionality and fix the bugs and issues.
This post opens possible methods to update the NodeJS version in Ubuntu using the command line.
- What is the Objective of Updating the NodeJS Version in Ubuntu?
- How to Update the NodeJS Version in the Ubuntu Command Line?
- Prerequisites: Remove the Already Installed NodeJS Version
- Method 1: Using Binary Packages
- Method 2: Using Node Version Manager(NVM)
- Method 3: Using Node Package Manager(NPM)
- How to Install a Particular Version of NodeJS in Ubuntu?
- How to Switch Between Different Versions of NodeJS in Ubuntu?
- How to Enlist Available Versions of NodeJS in Ubuntu?
- How to Update NVM Itself in Ubuntu?
- How to Uninstall/Remove NodeJS from Ubuntu?
What is the Objective of Updating the NodeJS Version in Ubuntu?
NodeJS permits developers to create and run various applications. However, the default NodeJS version in Ubuntu may not be the latest or most compatible one for your project. Therefore, it is important to update the NodeJS version in Ubuntu to ensure optimal performance, security, and compatibility.
How to Update the NodeJS Version in the Ubuntu Command Line?
Updating the NodeJS version in Ubuntu can be done in several ways, such as using a package manager, a Node version manager, or downloading and installing from the official website.
To update the NodeJS version in the Ubuntu command line, the Node Version Manager (NVM) tool is the easiest way. NVM is a script that allows users to install as well as manage several versions of NodeJS on the same machine.
Let’s begin the journey to update the NodeJS version in Ubuntu via the command line.
Prerequisites: Remove the Already Installed NodeJS Version
Before the update of NodeJS in Ubuntu, users were first required to remove the already installed NodeJS from the operating system. The step-by-step guideline is as follows:
Step 1: Check the Current NodeJS Version
To check the currently installed version of the “NodeJS” package in Ubuntu, execute the “–version” command:
node --version

The installed “NodeJS” version is “v12.22.9” in our operating system.
Step 2: Remove Older NodeJS
It is necessary to remove the older version of the NodeJS application that is currently installed in the Ubuntu system.
To perform this task, use the default package manager “apt” with “autoremove (remove dependencies)” and “purge (remove configuration files)” in this way:
sudo apt autoremove --purge nodejs
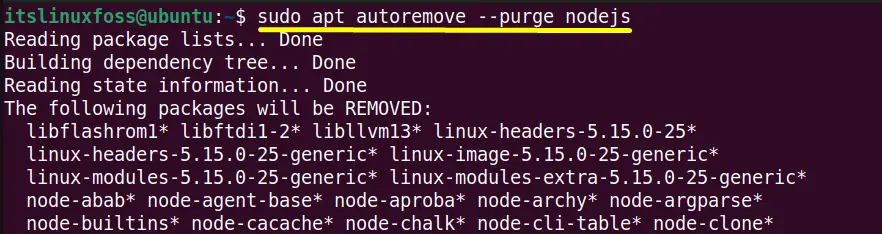
The “nodejs v12.22.9” has been completely removed along with all dependencies.
Let’s install the latest or updated version of NodeJS using the following methods:
Method 1: Using Binary Packages
In Linux, the “Binary Files” contain the executable files of packages from the source code. It hides the built-in source code of every package. It is the most recommended way to install the latest NodeJS release.
Step 1: Download Binary Package
Access the official website of “NodeJS” using the provided link https://nodejs.org/en/download/. The NodeJS website looks like this:
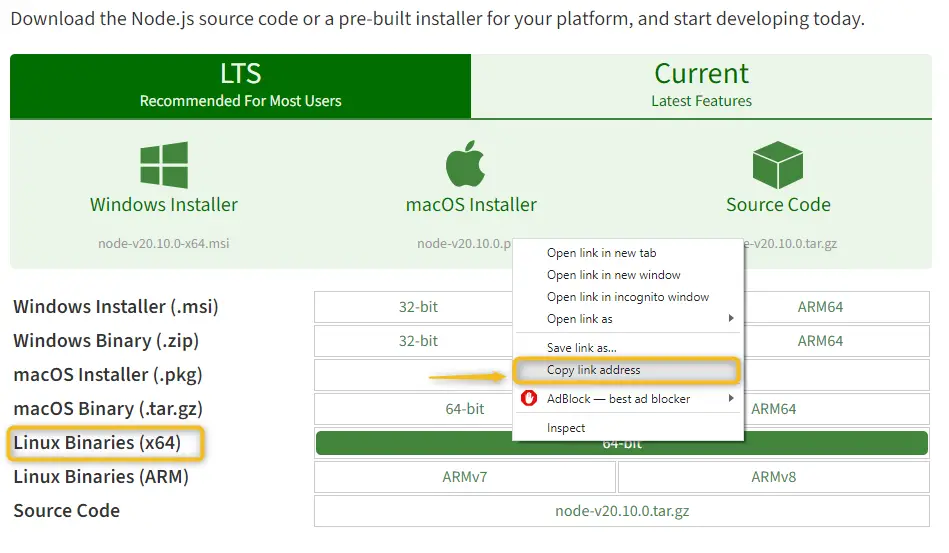
Copy the “Linux Binaries(x64)” URL as per system requirement and download it in the system using the “wget” command:
wget https://nodejs.org/dist/v20.10.0/node-v20.10.0-linux-x64.tar.xz
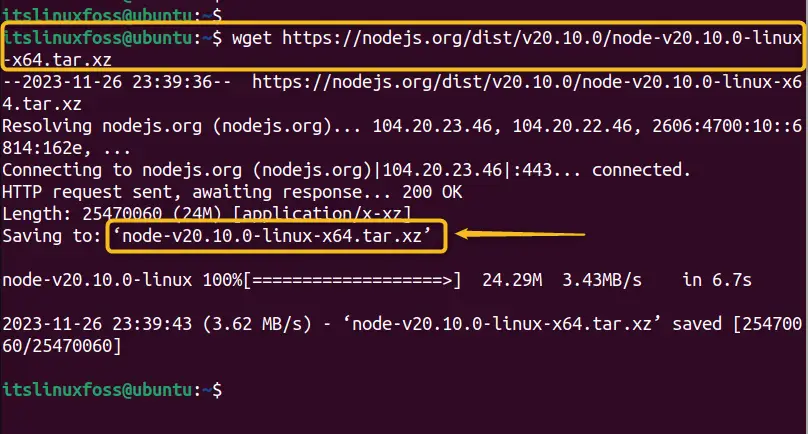
The “node-v20.10.0” binary package has been downloaded in the present working “home” directory.
Note: Users can download the latest NodeJS version based on their latest update. In our time, the latest update is node-v20.10.0.
Step 2: Extract the Binaries
The download NodeJS binary package is compressed and has the “.xz” extension. Extract it in the “/usr/local” directory and install the latest NodeJS using this command:
sudo tar -C /usr/local --strip-components 1 -xJf node-v20.10.0-linux-x64.tar.xz
The explanation of the above command is given below:
- The “-C” flag of “tar” is used to specify the location where NodeJS binary packages will be extracted.
- The “strip-components” specify the leading component from the compressed files before its extraction.
- The “x(extract)”, “j(for “.xz” extension)”, and “f(denotes file)” extract the specified binary package:

The specified node-v20.10.0 package has been extracted into the “/usr/local” directory and installed successfully.
Step 3: Confirm Updated NodeJS
Now, verify the installed version of NodeJS using the “–version” command in the Ubuntu terminal:
node --version

The output confirms that NodeJS’s latest release, “v20.10.0” has been installed successfully.
Method 2: Using Node Version Manager(NVM)
The “NVM” tool provides the different versions of the “NodeJS” application that can be easily installed/uninstalled as per requirements. It effectively manages the node versions for each project.
Step 1: Download the NVM Installation Script
Run the “curl” command line tool to download the “nvm” installation script in the Ubuntu system:
curl -sL https://raw.githubusercontent.com/nvm-sh/nvm/v0.39.1/install.sh -o install_nvm.sh

This will download and execute the installation script from the official NVM repository.
Note: Users can download the latest nvm script based on their latest update by navigating to the GitHub Link.
Step 2: Run the NVM Script
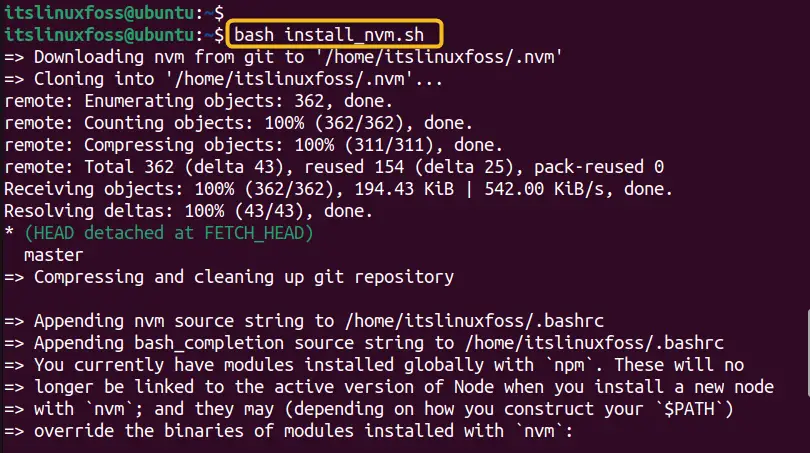
Execute the “nvm script” in the “bash” shell when its installation is completed. It will update the user profile (~/bash_profile, ~/.bashrc, or “~/.zshrc”) and create the project “nvm” repository clone:
bash install_nvm.sh
Reload the Source File
Update/reload the “bashrc” source file manually to make the changes effective in the user profile:
source ~/.bashrc

The “~/.bashrc” file has been updated.
Note: After the installation is complete, users need to restart their terminal or source profile file to load NVM.
Step 3: View NodeJS Available Versions
Check all the available versions of “NodeJS” that can be installed easily via the “nvm” script:
nvm ls-remote
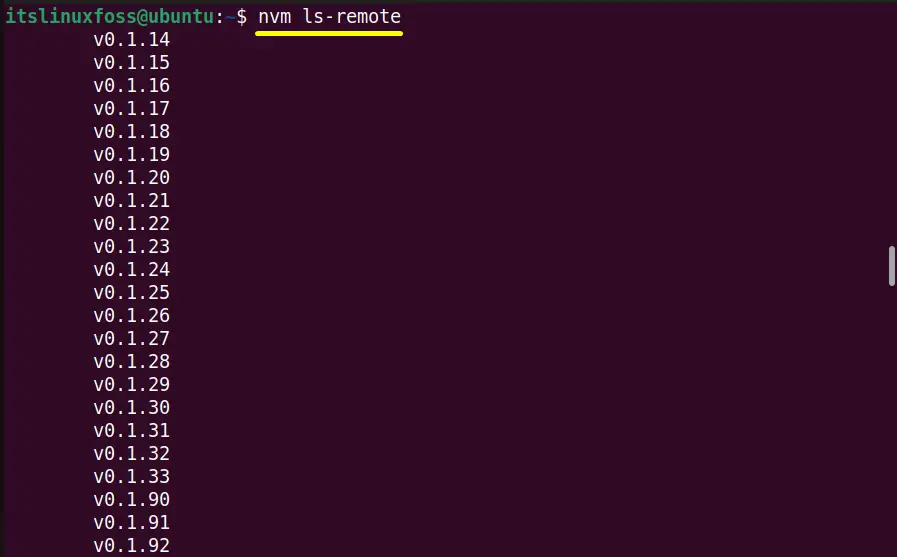
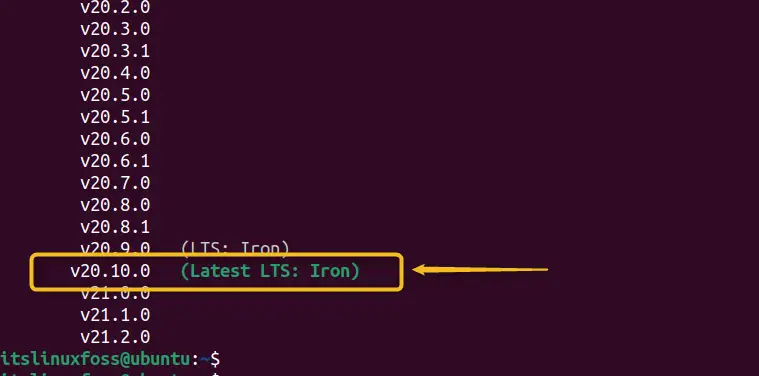
The latest LTS(Long Term Support) version of “NodeJS” in “nvm” is “v20.10.0”.
Step 4: Install the Latest NodeJS Release
Install the updated “NodeJS” “v20.10.0” release in Ubuntu via “nvm” followed by the “–lts(latest)” flag:
nvm install --lts
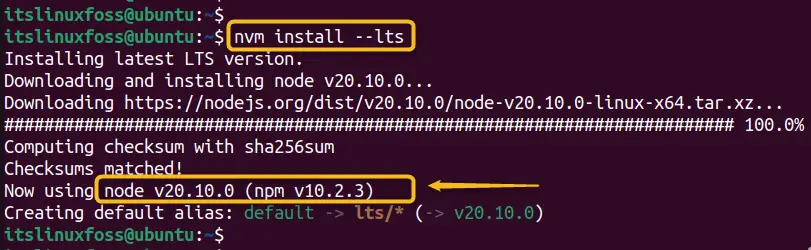
The installation of the latest “NodeJS” has been completed.
Step 5: Verify the Latest NodeJS
Again, check the “NodeJS” version for the verification of its latest release:
node --version

It is confirmed that the latest “NodeJS” release “v20.10.0”, has been successfully installed.
Method 3: Using Node Package Manager(NPM)
The “npm” stands for “Node Package Manager”, which is the widely used package manager for installing JavaScript software projects, including the NodeJS tool. It comes with NodeJS by default.
Step 1: Install “n” Module
First download the “n module” to the default location $HOME/n that is necessary for “npm”. It will also automatically install the latest LTS NodeJS version:
curl -L https://bit.ly/n-install | bash
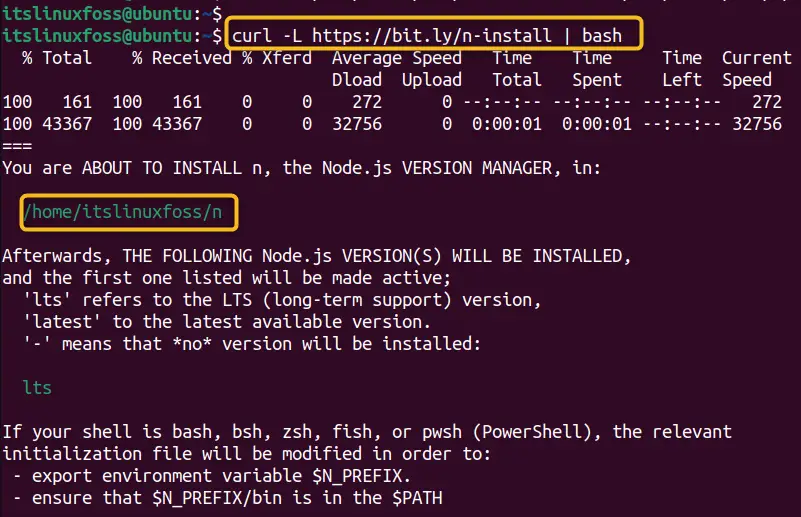
The NodeJS version manager, along with the latest LTS NodeJS release, has been installed successfully.
Important Note: If an error is generated “Node.js-related binaries are already in your $PATH”, then remove any existing n and/or Node.js installation via the “rm” command.
Step 2: Reload the Terminal
The “node-v20.10.2” is the stable LTS release. However, if the user wants to check the install version, then reload the terminal for configuration:
source .bashrc

In this way, the configuration is updated in the operating system.
Step 3: Verify the Latest NodeJS
The “version” command verifies that the latest release of NodeJS has been successfully installed:
node --version

The latest “node-v20.10.0” has been installed.
How to Install a Particular Version of NodeJS in Ubuntu?
To install a particular version of NodeJS, utilize the “nvm install” command along with the version number. For example, to install NodeJS 21.2.0, run the below command:
nvm install 21.2.0
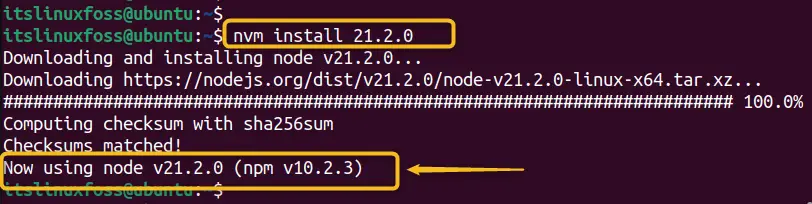
This will download and compile the NodeJS source code and set it as the default version.
You can verify the installation by running:
node --version

This is all about the update of the NodeJS version in Ubuntu via the command line.
Let’s discuss some other relevant queries.
How to Switch Between Different Versions of NodeJS in Ubuntu?
To switch between different versions of NodeJS, users can utilize the “nvm use” command along with the version number. For example, to switch to NodeJS 20.10.0, run the below command:
nvm use 20.10.0

The output shows that NodeJS 20.10.0 has been enabled.
How to Enlist Available Versions of NodeJS in Ubuntu?
Users can also list all the available versions of NodeJS by running the “nvm” command with the “ls-remote” option:
nvm ls-remote

The output shows all installed NodeJS versions in the operating system.
How to Update NVM Itself in Ubuntu?
To update NVM itself, users can run the “nvm” command with the “install-latest-npm” option:
nvm install-latest-npm
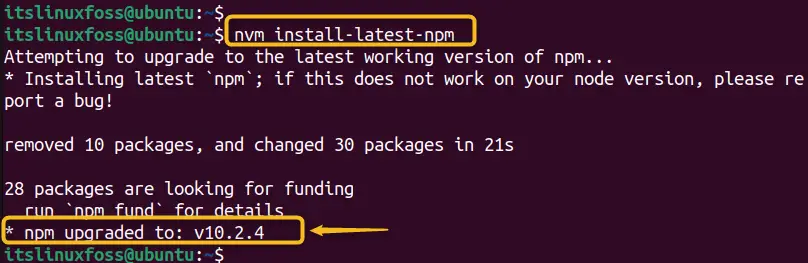
The output confirms that nvm is upgraded to “v10.2.4” in the system.
How to Uninstall/Remove NodeJS from Ubuntu?
If users want to uninstall NodeJS from their Ubuntu system, use the following command in the terminal:
sudo apt purge nodejs      # Uninstall NodeJS
sudo apt purge nodejs --auto-remove   # Remove NodeJS and Dependencies

This will remove NodeJS and any associated packages from your system. You can also use the “–auto-remove” option to remove any unused dependencies as well.
Alternative: Users can also remove the directory where the node is installed via the “rm” command:
sudo rm /home/itslinuxfoss/n/bin/node

The successful execution of the command shows that the particular directory has been removed from the system.
Verification
To verify that NodeJS has been uninstalled, you can run the “node” command with the “v” option/flag:
node -v

This returns an error message saying that the node is not found.
Alternatively, users can use the “which” command to check if the node is in your path:
which node

This returns nothing if the node is not installed.
That is all from the article to update, remove, switch, NodeJS version in Ubuntu via the command line.
Conclusion
To update the NodeJS versions to their latest release, use the “Binary Packages”,
“NVM (Node Version Manager)” and “NPM (Node Package Manager)” tools In Ubuntu. The “NVM” and “NPM” command line utilities come pre-installed with NodeJS. Users can also install, remove, switch, and uninstall specific NodeJS versions according to their requirements. This post illustrates all possible methods to update the NodeJS version in Ubuntu using the command line.
