Google Docs is an appealing online text editor by enlighting various functionalities to its audience. These functionalities include modifying images, adding custom fonts, adjusting margins, and many more. The objective of this article is to elaborate on possible methods for the addition of custom fonts in Google Docs. The content which demonstrates the guidelines are as follows.
- Method 1: Using More Fonts Option for Adding Custom Fonts in Google Docs
- Method 2: Using Extension for Adding Custom Fonts in Google Docs
Let’s start with the first method.
Using More Fonts Option for Adding Custom Fonts in Google Docs
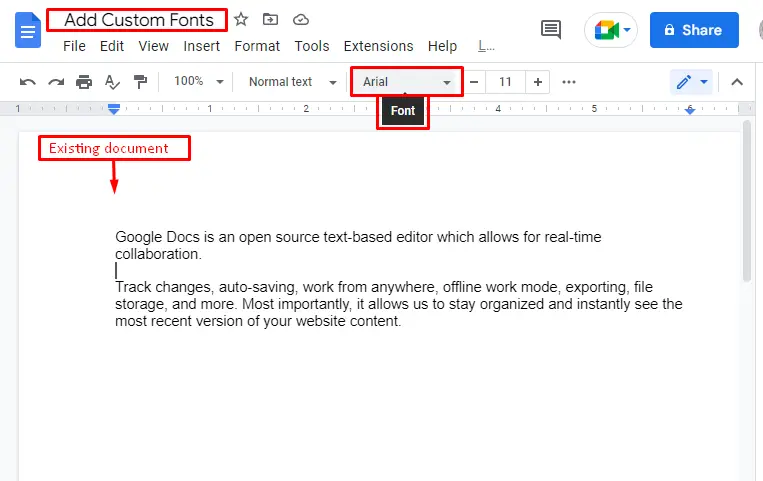
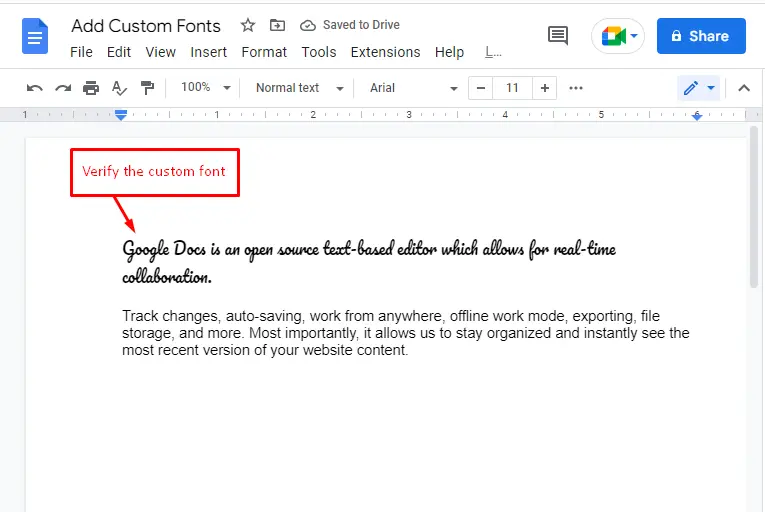
An existing file, “Add Custom Fonts” is considered to implement the custom fonts on the text document. Most designers customize fonts by adding different font styles according to their needs. By default, the “Arial” font is selected, which can be seen in the below screenshot.
For adding the custom fonts in Google Docs, a few steps are provided below:
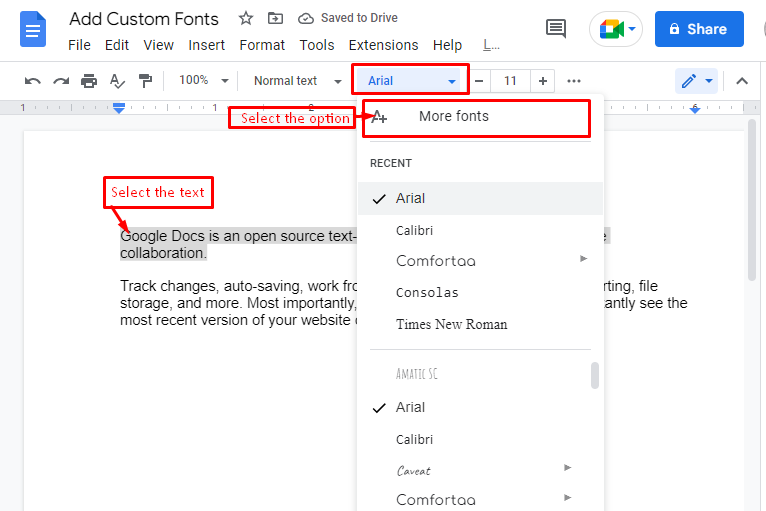
- Select the text first on which the user wants to add custom fonts.
- After that, hit the “Font” icon in the toolbar of Google Docs.
- Furthermore, select the “More fonts” option in the dropdown list.
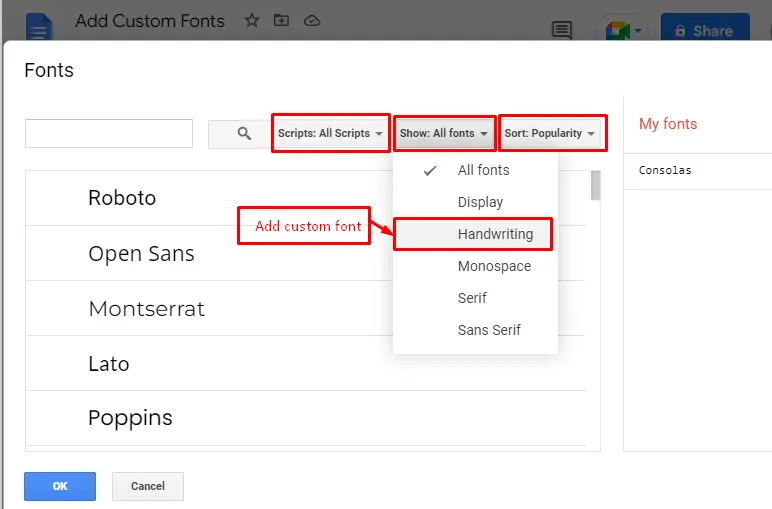
It navigates to the “Fonts” window. In this window, the user can select the custom fonts such as “Display”, “Handwriting”, “Monospace”, ”Serif” and many more. In this scenario, select the “Handwriting” font style in the dropdown list that can verify as below:
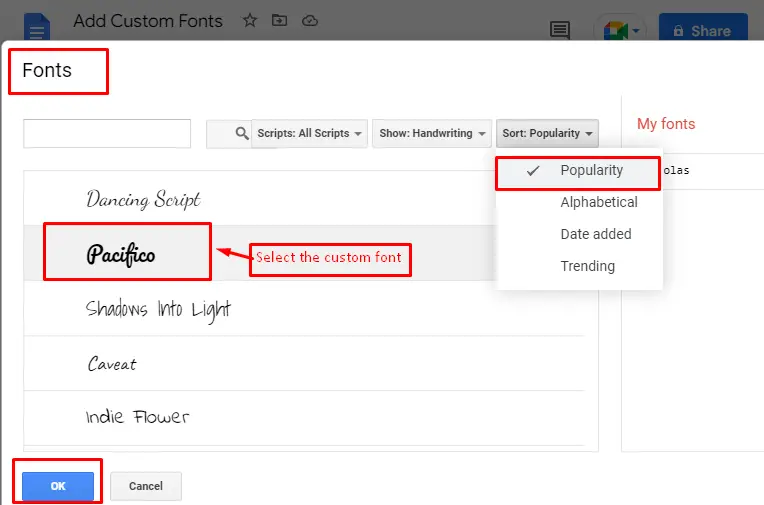
The user has options to sort the font based on “Popularity”, “Alphabetical”, “Date added” and “Trending”. In this scenario, sort the font via “Popularity” and choose the “Pacifico” (this selection is in our case, you can choose as per yours)font style, which can be seen in the below screenshot:
Hence, the custom font is successfully added to Google Docs.
Method 2: Using Extension for Adding Custom Fonts in Google Docs
Google Docs extensions provide a variety of functionalities that are not added in Google Docs by default. In this method, the extension’s functionality is utilized to add custom fonts to Google Docs. Let’s start the process step by step:
Step 1: Get add-ons
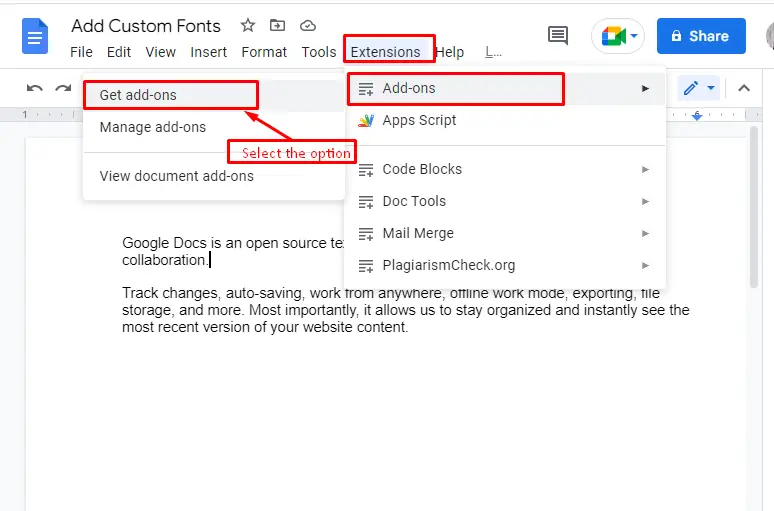
Google Docs support third-party extensions via “Add-ons”.For this, go to the “Extensions” and then click on “Get add-ons” from the dropdown menu:
Step 2: Choose the Extension
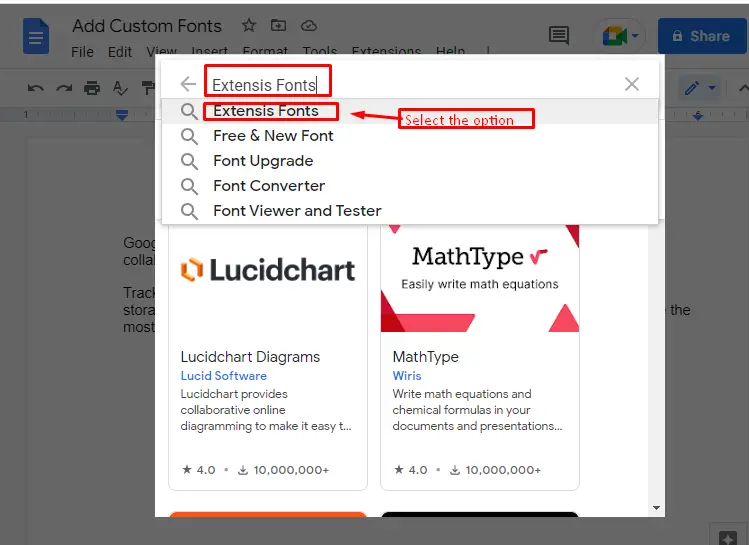
It navigates to the new window; type “Extensis Fonts”(or whatever you want from the list),and choose it for the addition of custom font in Google Docs:
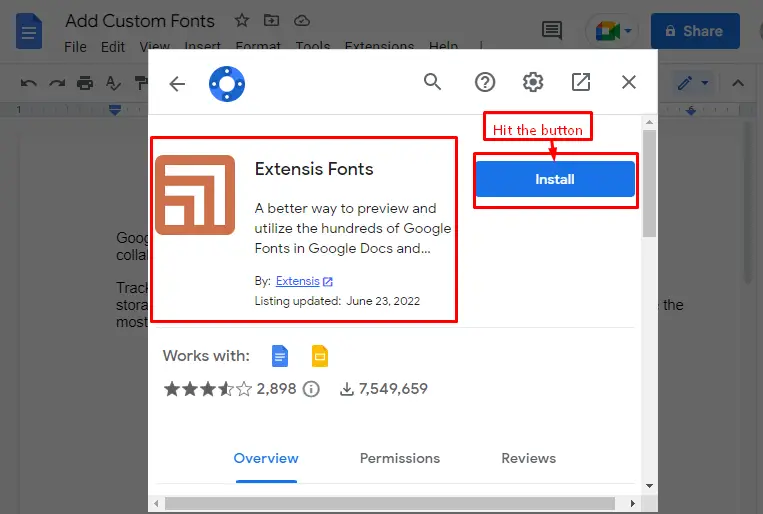
Step 3: Install the Selected Font Extension
Hit the “Install” button to start the installation process of “Extensis Fonts”:
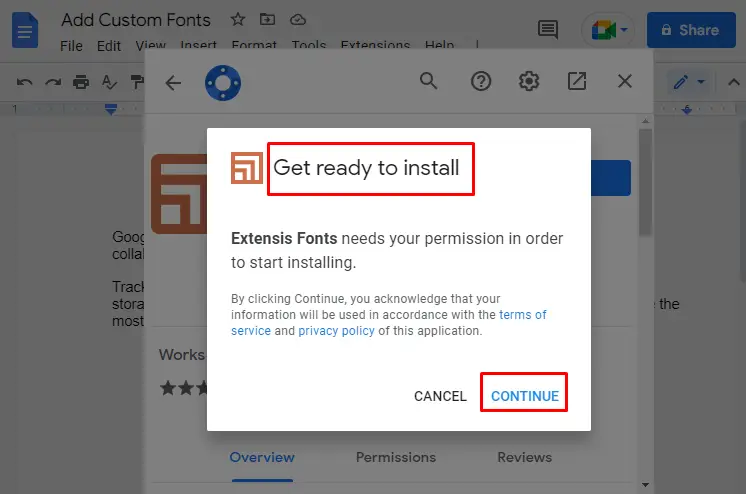
After that, “Extensis Fonts” acquire permission to start the installation process. Press the “Continue” button as shown in the below screenshot:
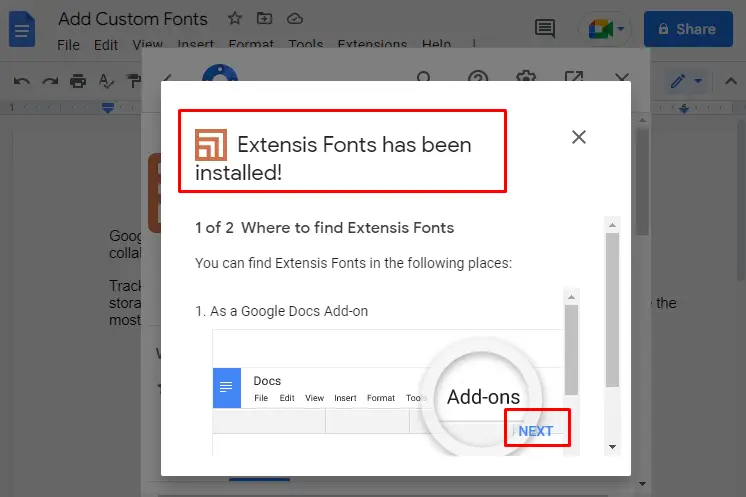
Hence, the “Extensis Fonts” has been successfully installed, which can be verified in the below screenshot:
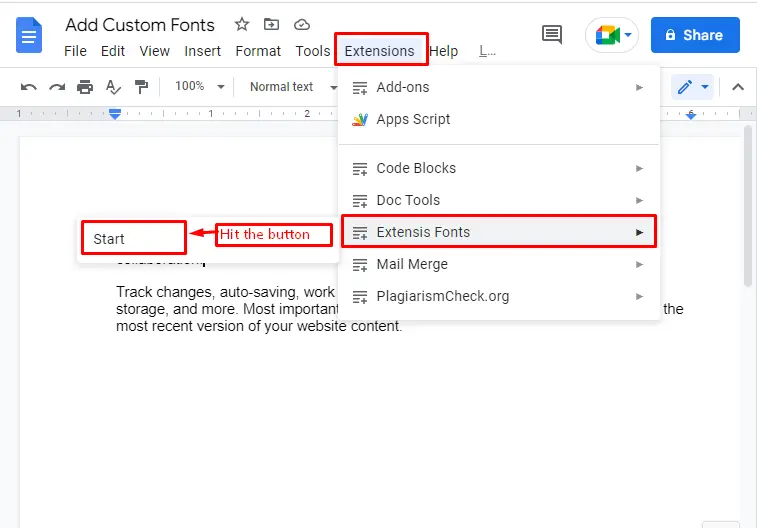
Step 4: Enable the Extension
Now, the user can enable the installed extension “Extensis Fonts” by pressing the “Start” button:
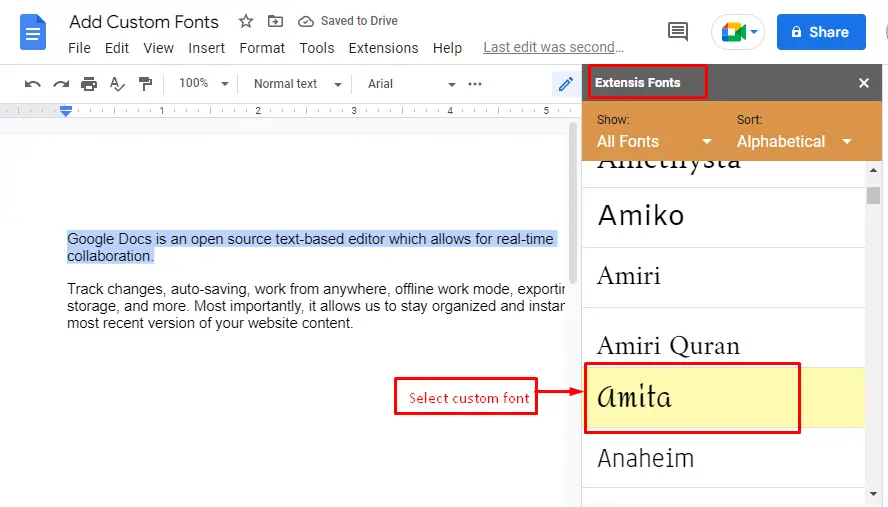
Step 5: Use Font From the Selected Extension Pack
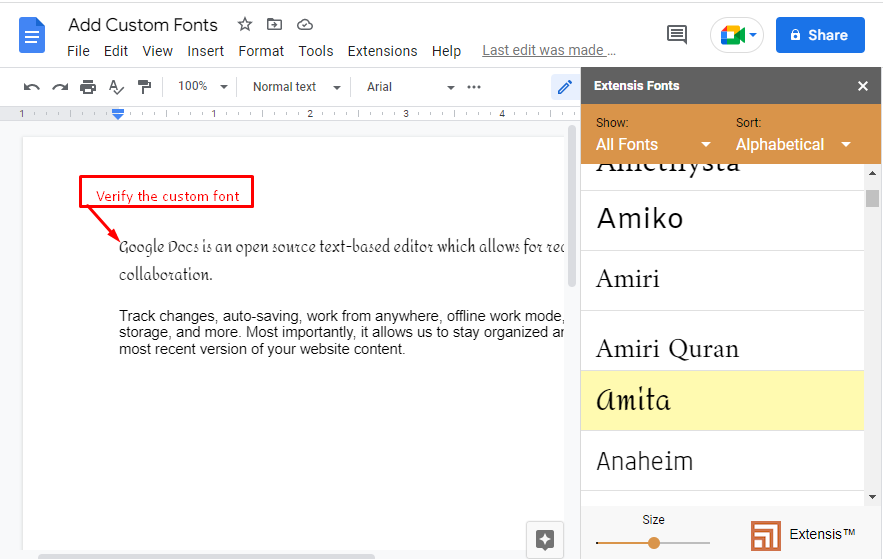
Users have options for adding custom fonts in Google Docs with the installed extension. For practical implementation, select the text first and pick the “Amita” font style in the side window:
Finally, the selected font style “Amita” is added in Google Docs, which can be verified in the below screenshot:
That’s it! You have experienced various ways to add custom fonts in Google Docs.
Conclusion
Google Docs offers the “More Fonts” option and “Extensis Fonts” as an extension to add custom fonts in Google Docs. The “More Fonts” option comes through by pressing the “Font” icon in the toolbar. While the extension “Extensis Fonts” enables the user to insert any font style based on its needs. This article has demonstrated two methods to customize the font style in Google Docs.

TUTORIALS ON LINUX, PROGRAMMING & TECHNOLOGY