
DNS (Domain Name System) is a system that translates human-readable domain names (such as example.com) into numerical IP addresses. Name servers contain the DNS records for a domain and are responsible for answering requests from clients, such as web browsers.
This guide will explain various methods to set the DNS Nameservers on Ubuntu 22.04. The content of this tutorial is mentioned-below:
- Method 1: Using CLI to Set DNS Nameserver
- Alternative Method: Configure 01-network-manager-all.yaml File
- Method 2: Using GUI to Set DNS Nameserver
Let’s start with the CLI method.
Method 1: Using CLI to Set DNS Nameserver
To set the DNS name servers on Ubuntu 22.04 via the command line, users can follow these steps:
Configure resolv.conf file
Open the “/etc/resolv.conf” file in a nano text editor using the “sudo” privileges:
$ sudo nano /etc/resolv.conf

Add a line to the file for each DNS name server you want to use. The line should start with the nameserver with the IP address:
$ nameserver 8.8.8.8
$ nameserver 8.8.4.4

Save the file and exit the text editor.
Verify the DNS Nameservers
To verify the DNS Nameserver, execute the below script with the “sudo” privilege:
$ sudo resolvectl status
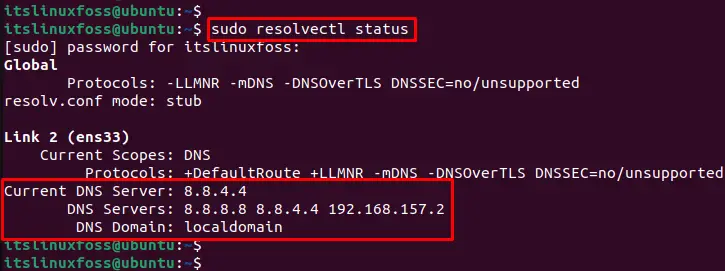
The output confirms that DNS nameservers 8.8.8.8 and 8.8.4.4 have been set.
Alternative Method: Configure “01-network-manager-all.yaml” File Via netplan
Netplan is a tool to configure networking on Linux systems. It allows you to specify the DNS nameservers that your system should use to resolve hostnames.
To set the DNS nameservers in Netplan, you need to edit the Netplan configuration file for your network interface. The configuration file is usually located at /etc/netplan/ and has a .yaml file format.
$ sudo nano /etc/netplan/01-network-manager-all.yaml

Here’s an example of how you can set the DNS nameservers in a Netplan configuration file The description of the script is provided below:
network:
  version: 2
  renderer: networkd
  ethernets:
    enp0s3:
      dhcp4: no
      addresses: [192.168.157.140/24]
      gateway4: 192.168.157.140
      nameservers:
        addresses: [8.8.8.8,8.8.4.4]
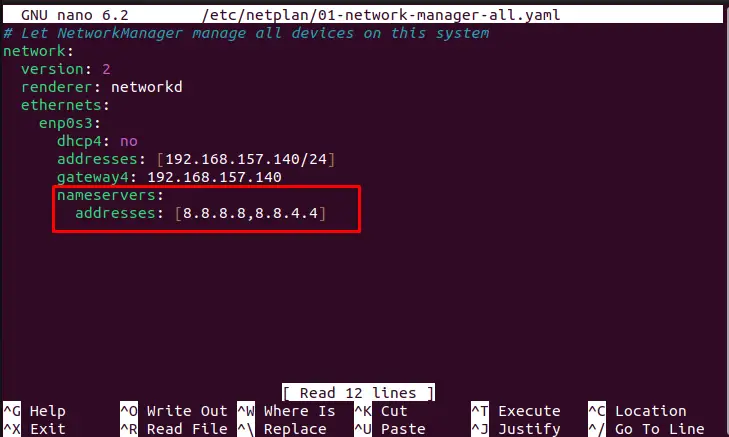
In this example, the nameservers section specifies that the system should use Google’s public DNS servers (8.8.8.8 and 8.8.4.4) to resolve hostnames. Also, the machine’s IP address is “192.168.157.140” with a subnet mask of “24”. The gateway through which traffic flows is “192.168.157.140”.
Once you have edited the configuration file, you can apply the changes by running the following command:
$ sudo netplan apply

This will update the system’s DNS settings and cause it to use the nameservers specified in the configuration file.
Let’s head over the same method in GUI.
Method 2: Using GUI to Set DNS Nameserver
On Ubuntu, the DNS name servers resolve domain names that can be specified in the network configuration files. These configuration files can be altered following a GUI of Ubuntu which is carried out as follows:
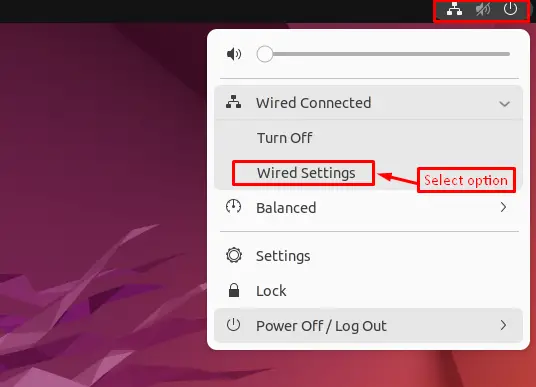
Step 1: Open the Network Settings Window
Press the icon “Network” located at the top right corner of the desktop screen and hit the “Wired Settings” option:
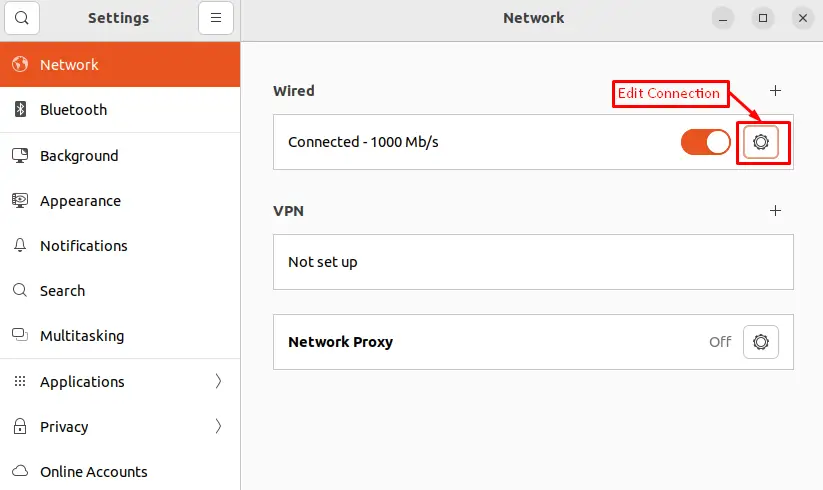
Step 2: Edit Connection
It navigates to the “Network” section in the “Settings” window. Click the “Edit” button on the connection for which you want to set the DNS nameservers:
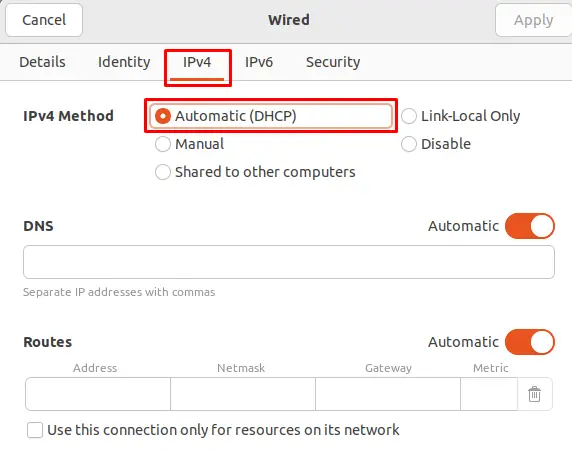
Step 3: Check the Automatic (DHCP)
In the “IPv4 Settings” tab, check if the “Automatic (DHCP) addresses” is enabled or not. If not, choose the option:
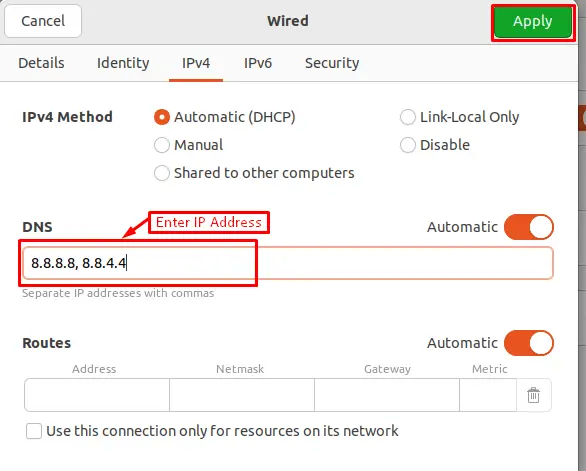
Step 4: Enter the IP Addresses of DNS
Enter the IP addresses of the DNS nameservers in the “DNS Servers” field. Then, press the button “Apply” to save the address:
That is all from the GUI method for setting the DNS Nameservers.
This is how to set DNS Nameservers on Ubuntu 22.04.
Conclusion
In Ubuntu, the Domain NameServers (DNS) can be set using GUI and CLI methods. In GUI, type the IP addresses of the DNS nameservers in the “DNSServers” field using the “NetworkSettings” window. In CLI, add the DNS Nameservers address “(8.8.8.8 and 8.8.4.4)” in the “01-network-manager-all.yaml”, “/etc/resolv.conf” files. This article has explained various ways to set DNS nameservers on Ubuntu.
