In DNS (Domain Name System), domain names are associated with the IP addresses. The purpose of DNS on Linux is to provide a way for users and applications to access network resources using human-friendly domain names. Additionally, you can modify the system’s network configuration file by changing the DNS servers on Linux, which enhances the security and privacy of a system.
This article will demonstrate the step-by-step instructions to change DNS on Linux with the following content:
Method 1: How to Change DNS on Linux Using CLI?
DNS is typically implemented on Linux using a combination of software, such as the BIND (Berkeley Internet Name Domain) server and the local DNS resolver, typically provided by the “libc” library.
Step 1: Access and Configure the resolv.conf File
After opening the terminal on a Linux machine, specify the “resolv.conf” file to access the configuration file. It allows users to change the DNS in the nano text editor:
$ sudo nano /etc/resolv.conf

It navigates to the specified configuration file. Look for the line that starts with “nameserver” and replaces the current IP address with the new DNS server IP address and gateway as “127.0.0.53” and “127.0.10.53”.
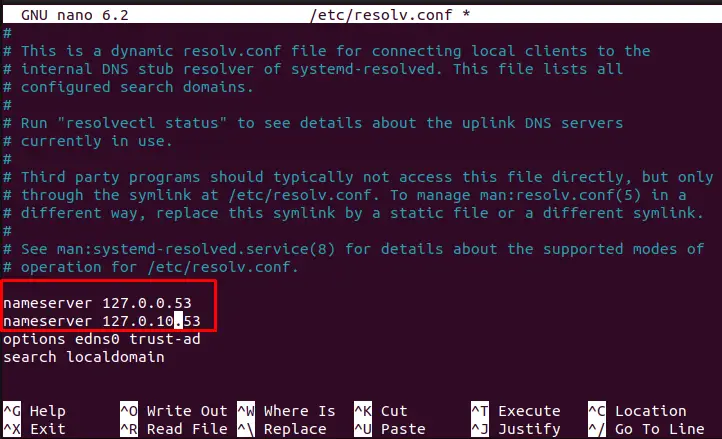
After configuration, save (CTRL+S) and exit the editor(CTRL+X).
Step 2: Restart the Network Manager
To restart the network manager, the “systemctl” command is used in the following manner:
$ sudo systemctl restart NetworkManager

Step 3: Verify Ping Domain Name
Users can verify the services of DNS by pinging to the specific domain. In our case, the “Google.com” domain name is used to check the DNS services:
$ ping -c3 Google.com
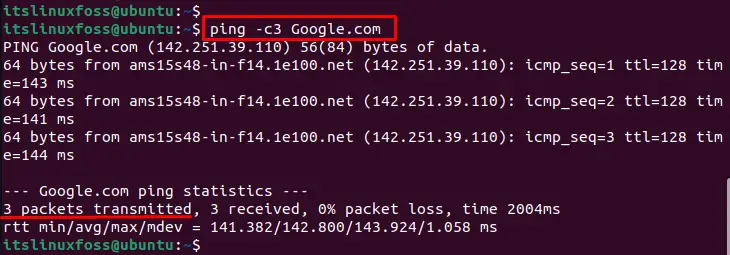
The output shows that 3 packets have been transmitted and received by the system.
Method 2: How to Change DNS on Linux Using GUI?
Linux offers the GUI method to change the DNS IP address more easily. The step-by-step procedure to change the DNS on Linux is provided below:
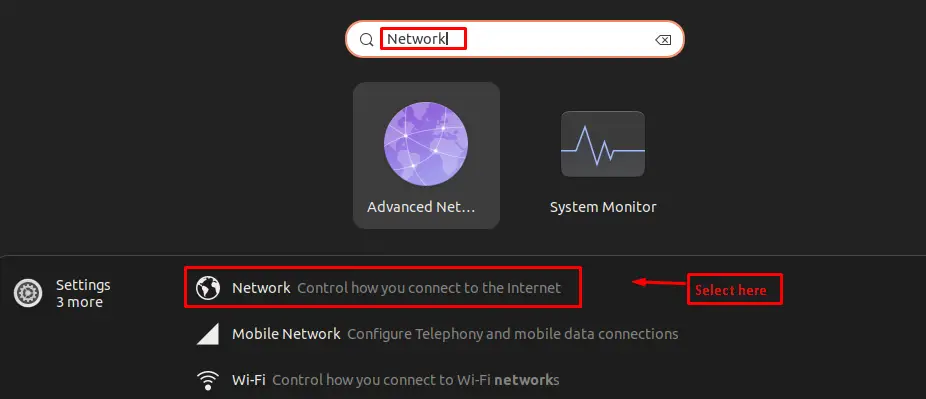
Step 1: Open the Network Manager
To open the Network Manager, click on the network icon in the system tray or by searching for “Network” in the application launcher:
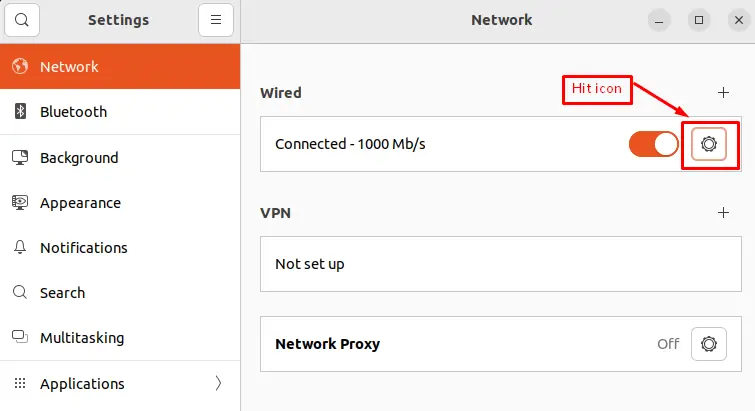
Step 2: Change the DNS Settings
It navigates to the “Network Settings”. In this way, click on the gear icon next to the network connection you want to change the DNS settings for.
Choose the “IPv4” section for modifying the DNS settings. In the “Automatic (DHCP)” settings, hit on the “DNS” text field and type the IP address. In our case, “8.8.8.8” and “8.8.4.4” IP addresses are entered here. Finally, hit the “Apply” button:
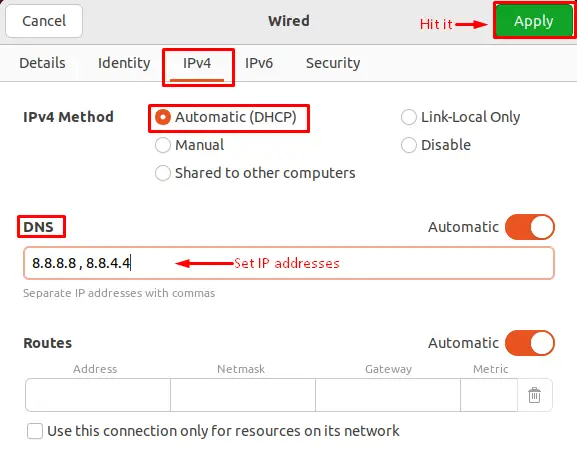
The DNS server IP addresses have been set on Linux.
Conclusion
Linux offers the CLI and GUI methods to change the DNS on Linux. In CLI, change the DNS server IP address after accessing the “/etc/resolv.conf” file. In GUI, users can easily set the DNS server IP address in the “IPv4” tab of Network Settings. This article has explained step-by-step instructions to change the DNS on Linux.
