Social media platforms made communication easy. Different apps are used for communication according to the preference of the user. Discord is a user-friendly platform that enables its users to communicate via messages, calls, and live streaming. It is compatible with both desktops and mobile phones, most commonly used by gamers. Discord lets its users create and hold scheduled online events too.
Creating Discord Events on Desktop
Discord on Desktops can be used in the app and browser. Creating Discord events helps to notify the community within the server about the event beforehand. The interested members of the server get the notification of the live event too, so that nobody misses it due to forgetfulness. Here is a guide provided to create a Discord event on a Desktop:
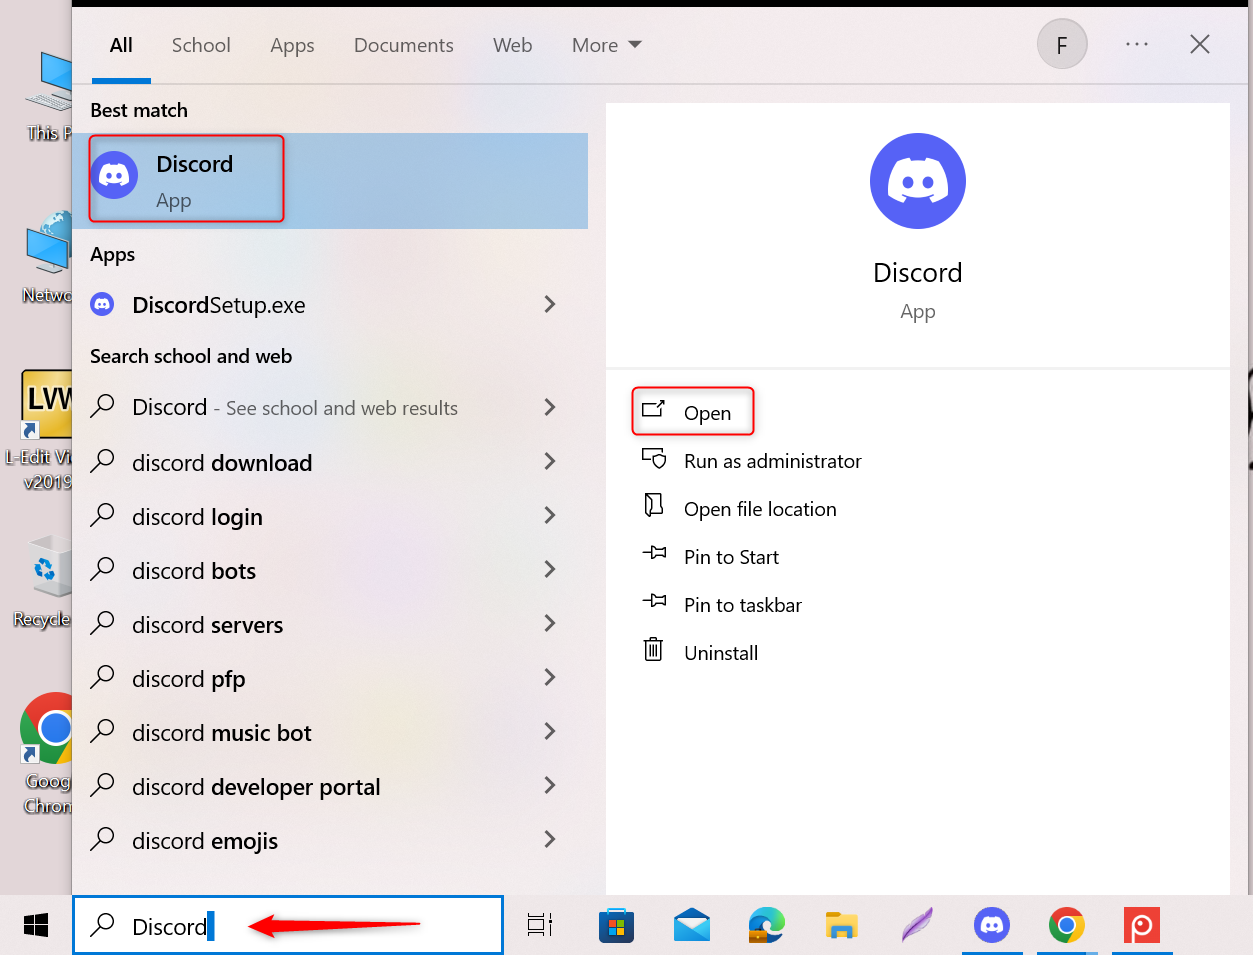
Step 1: Launch the Discord App
Press Win+S to launch the start menu and type Discord. Click on Open to launch the Discord app:
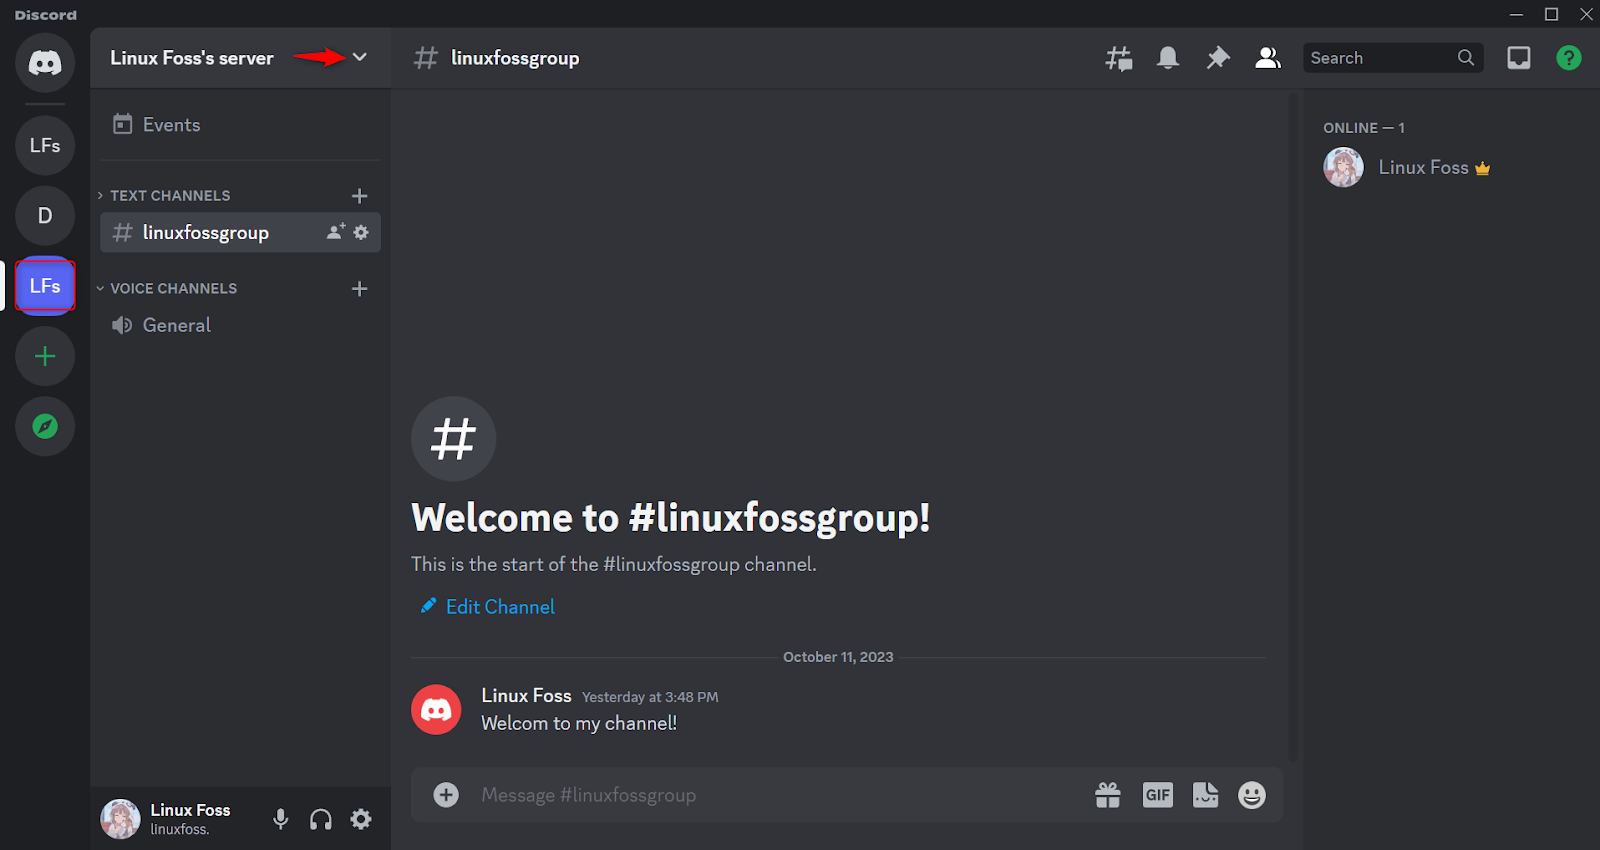
Step 2: Choose a Server
Choose an already created or create a new server on your Discord home screen. I have selected an already-created server. After choosing the server, click on the drop-down menu next to the name of the selected server:
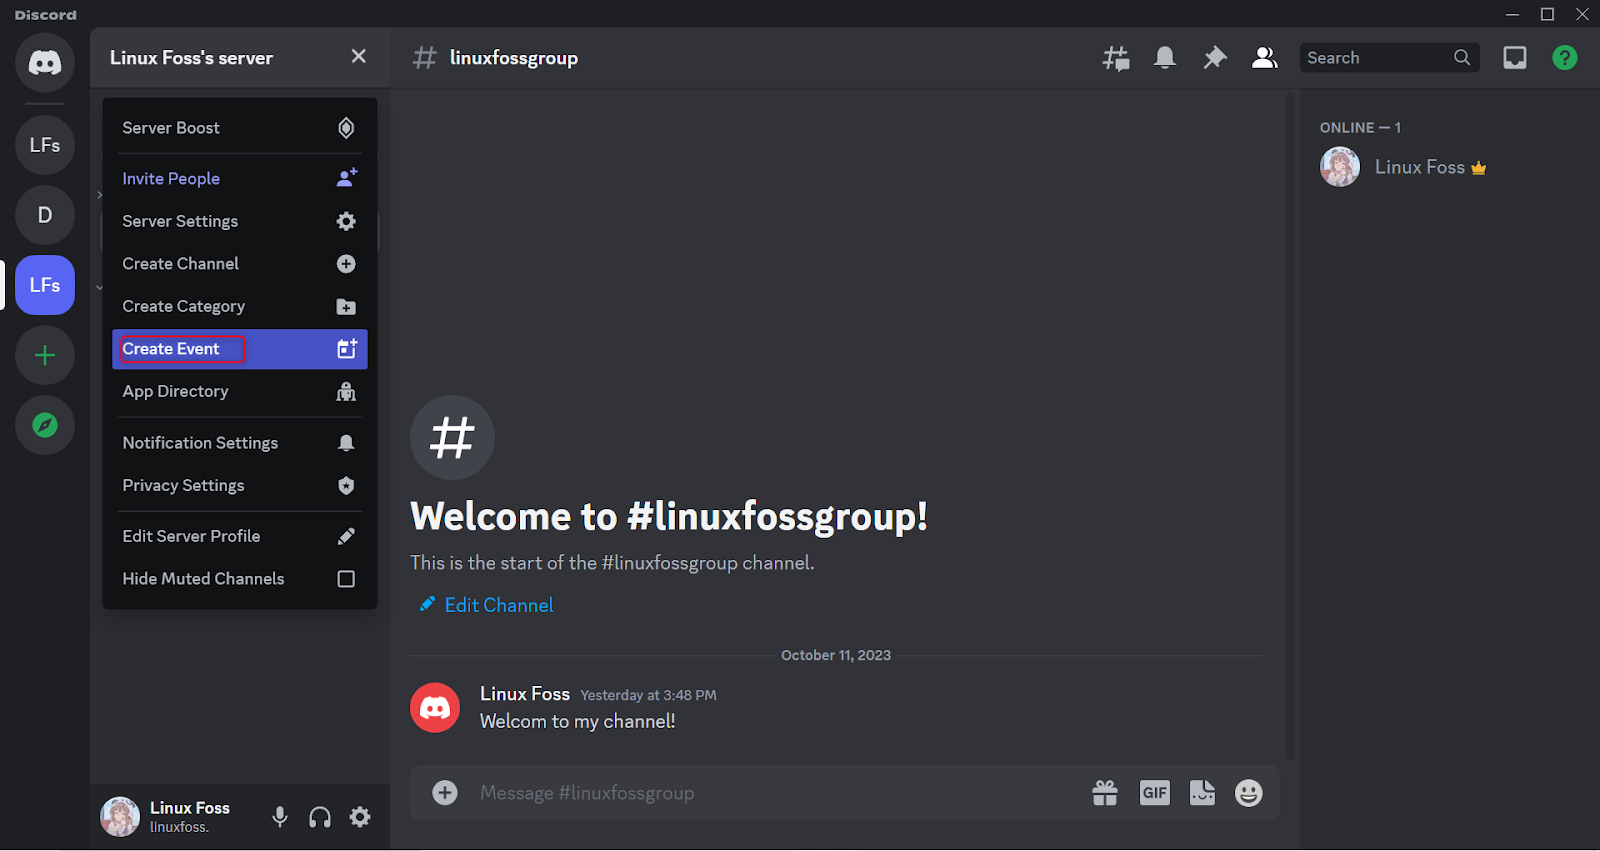
Step 3: Choose Create Event
Select Create Event from the drop-down menu:
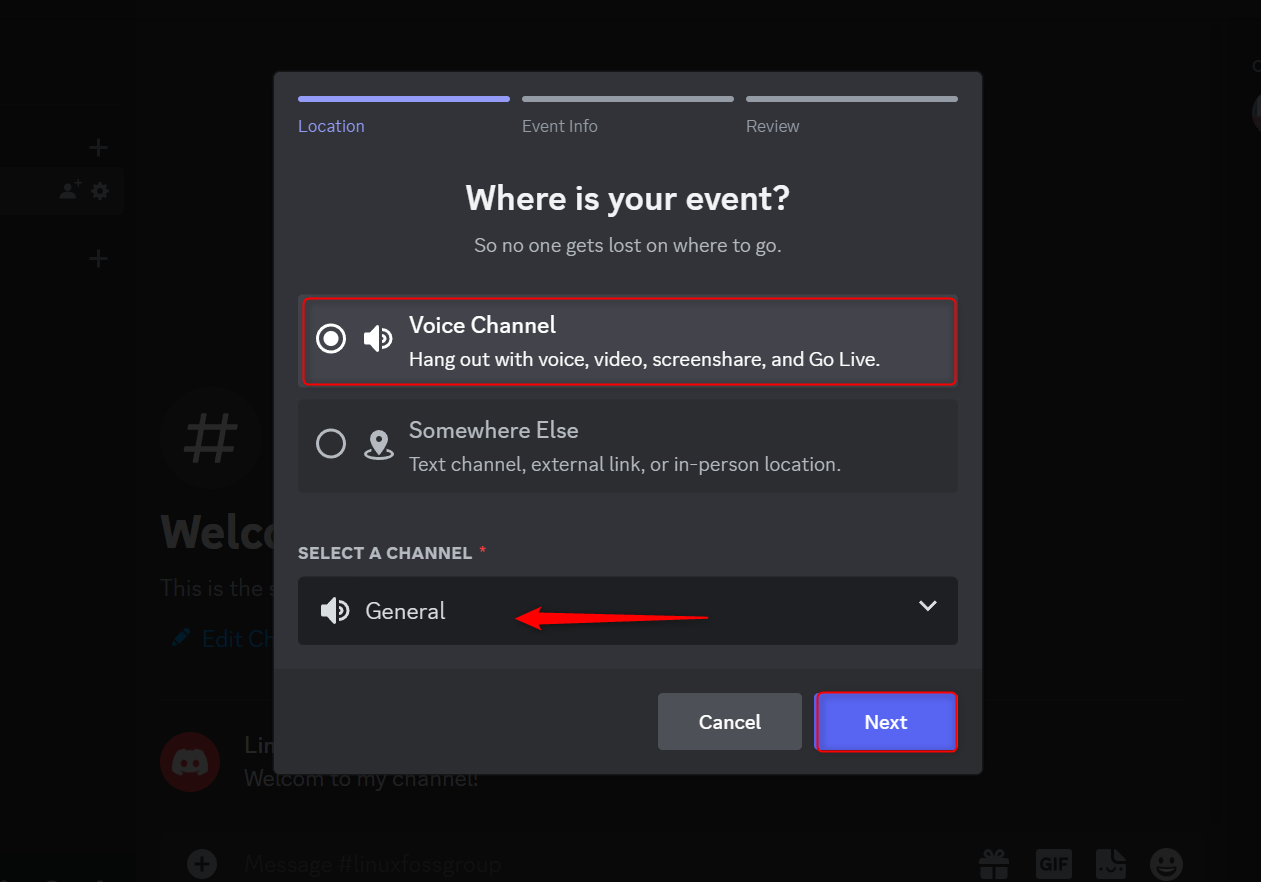
Step 4: Customize Your Event
Customize your event according to your choice. The first step in customization is selecting the location for the event. Hit Voice Channel to schedule an event within the server on Discord. Somewhere Else can be selected in case you are scheduling this event on some other app such as Zoom. This Event is created under the General voice channel in the selected server. Hit Next to move to the next step:
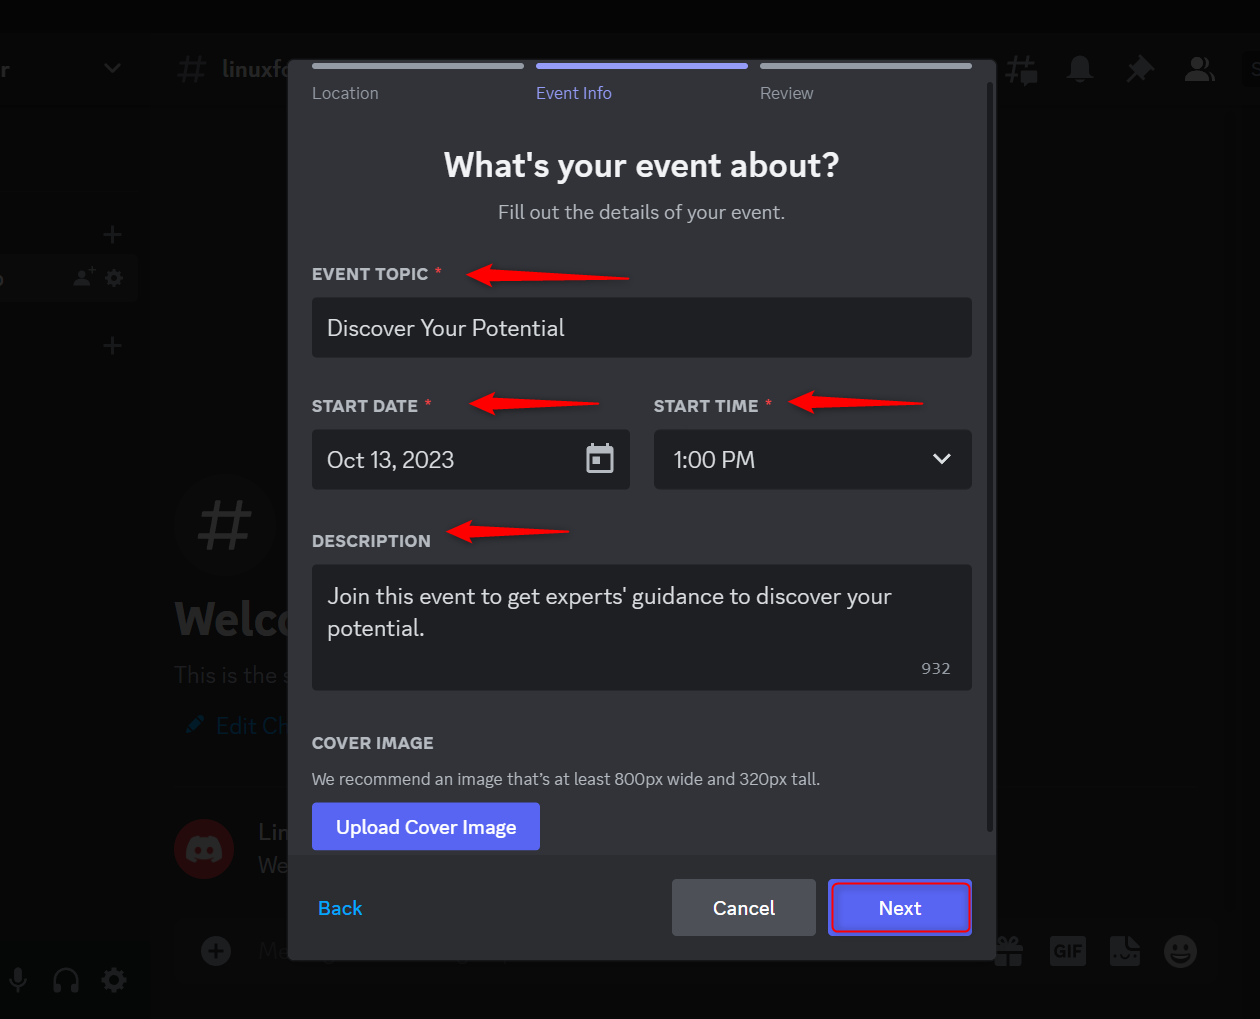
The next step is setting up the Event Info. Select and type the Event Topic. Try to keep the topic interesting so that it may gain the audience’s attention more. Set the Start Date and Start Time for the event so that the audience is already aware of it before the start of the event. Add a Description of your event so that the audience may have an idea about the nature and purpose of the event being scheduled. If you want to add a cover image upload it from your PC otherwise ignore this option and hit Next to save these settings:
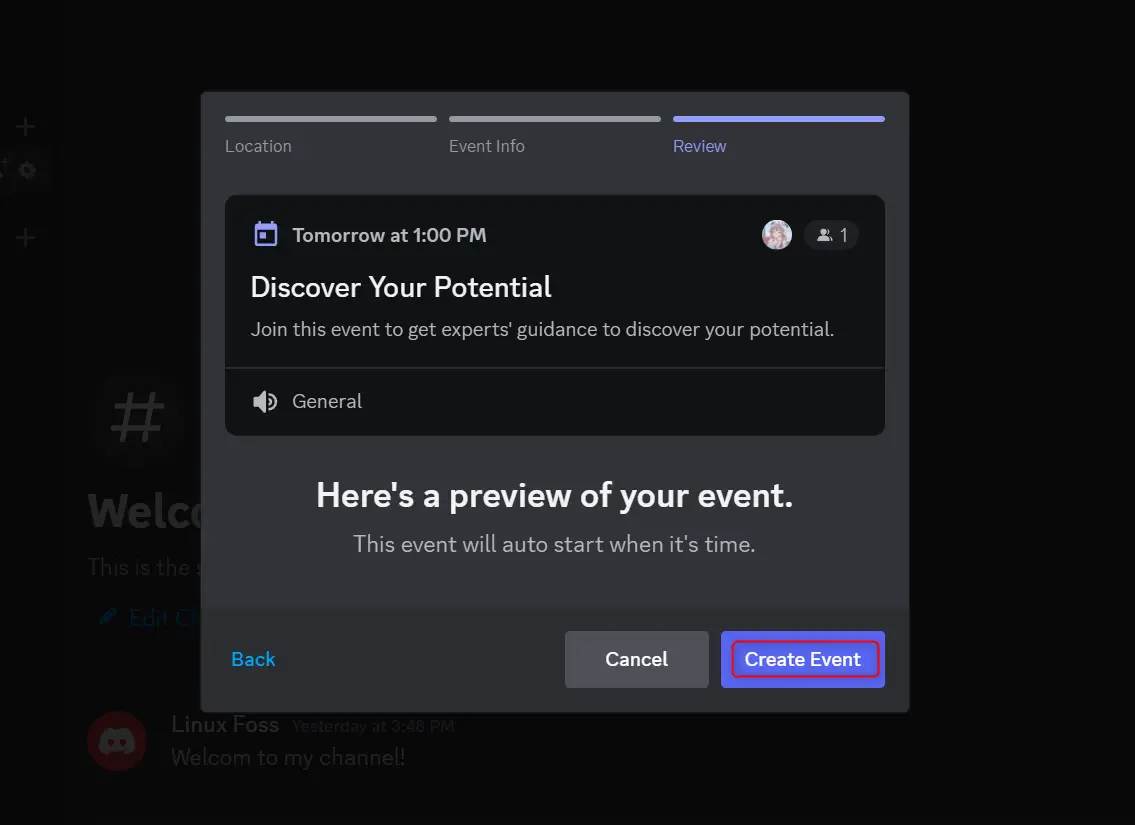
Review your event’s details and hit Create Event to schedule the event:
Step 6: Copy the Event Link and Share
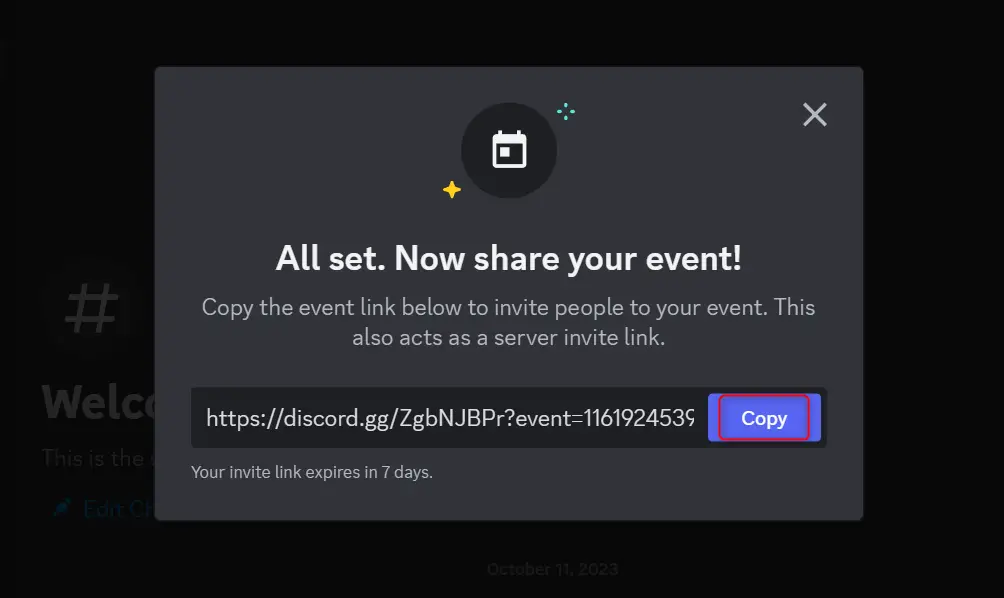
Your event is scheduled. It’s time to invite people to attend it. Hit Copy to copy the joining link and share via Discord or other social media apps with your friends to join it. The link is valid for only 7 days:
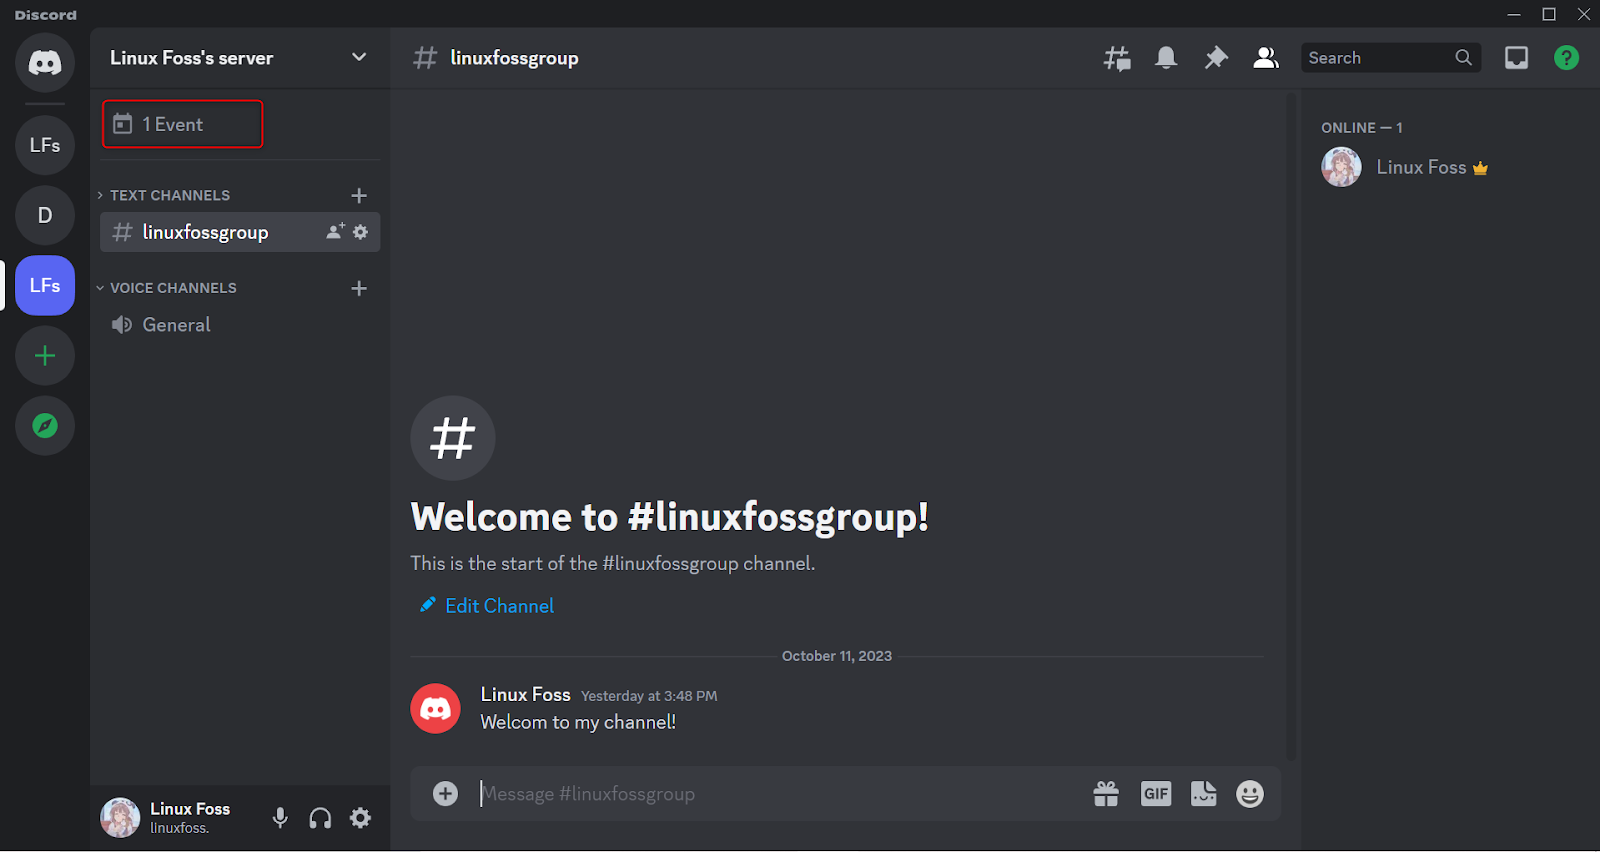
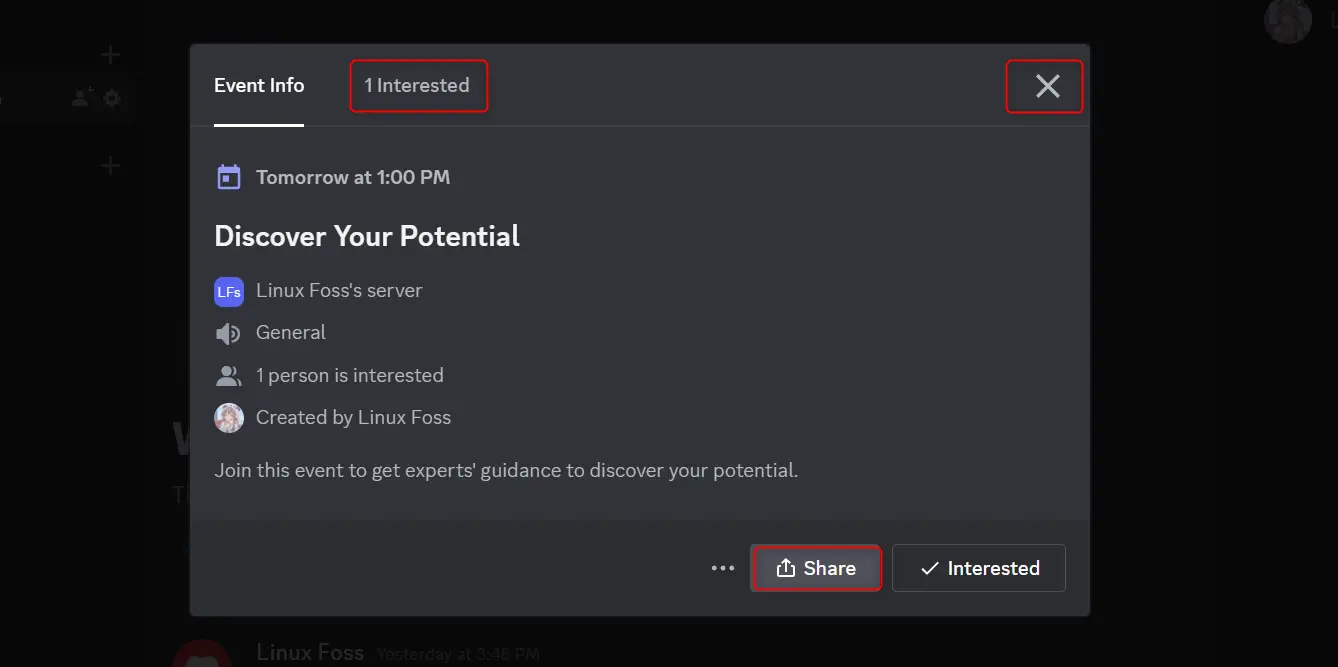
You can go back to your chosen server and see the event is created in the channel. Click on the Event icon:
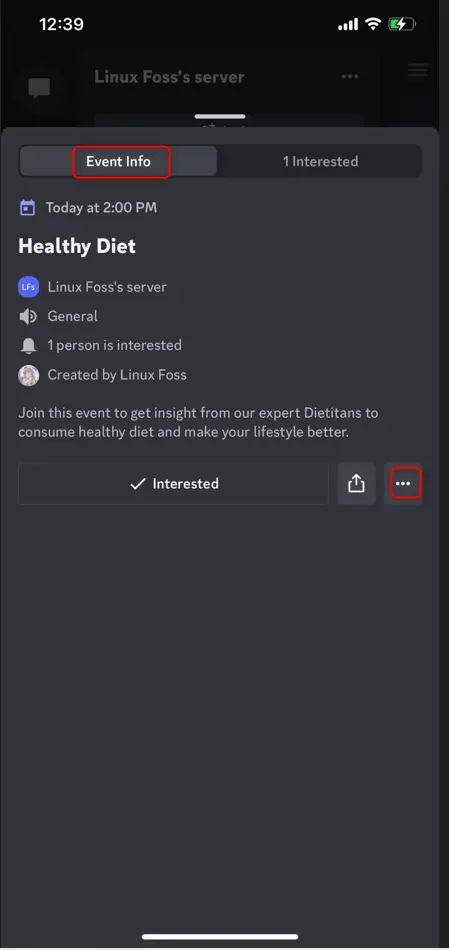
From Event Info, you can see the details about the event. Click on Share to share your event if you have missed somebody earlier. You can see the interested candidates from the top of the screen. To exit the menu, hit the X sign on the top left:
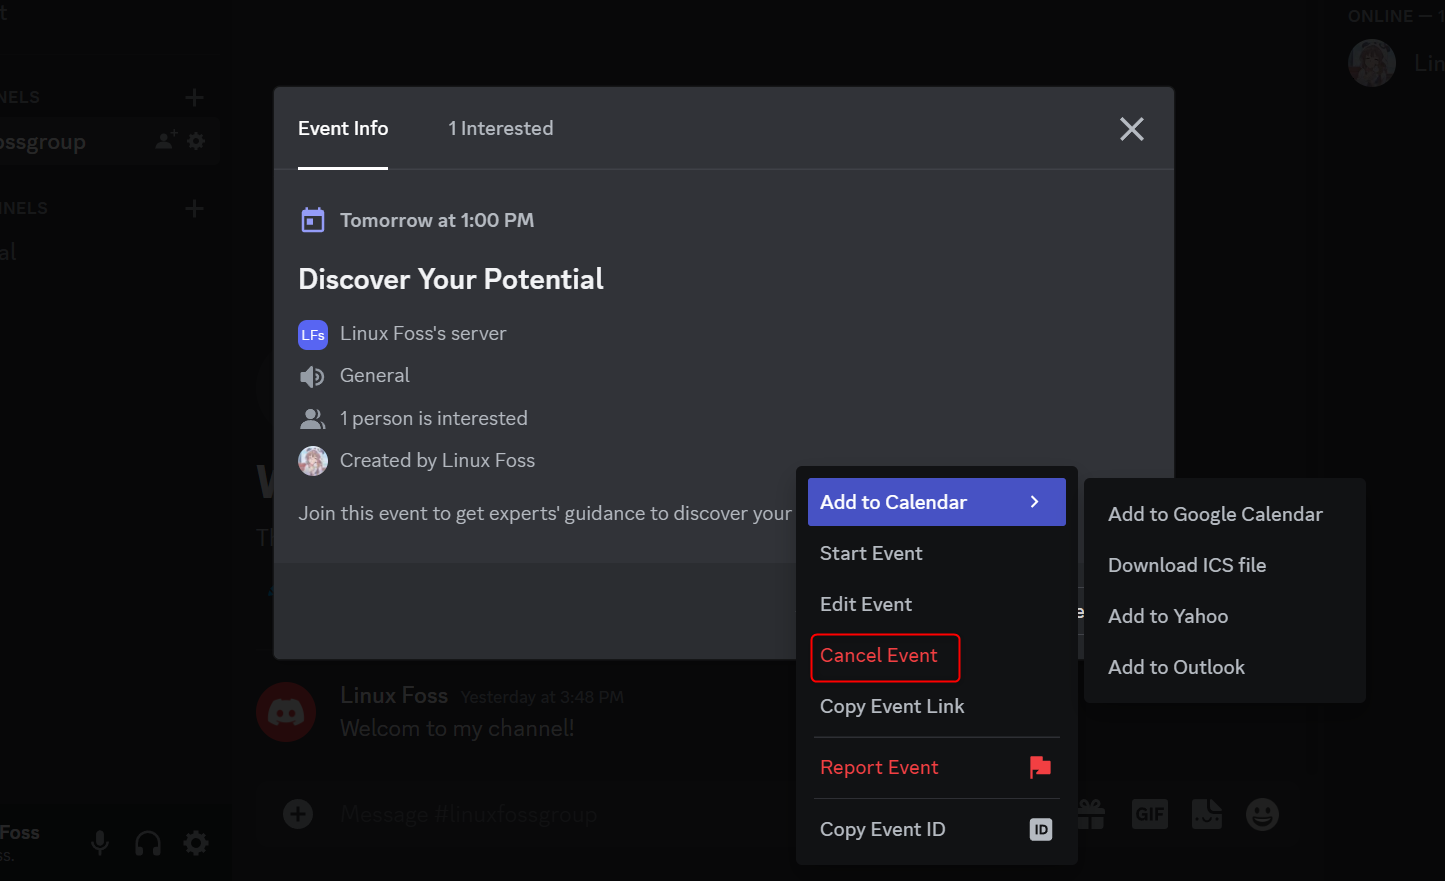
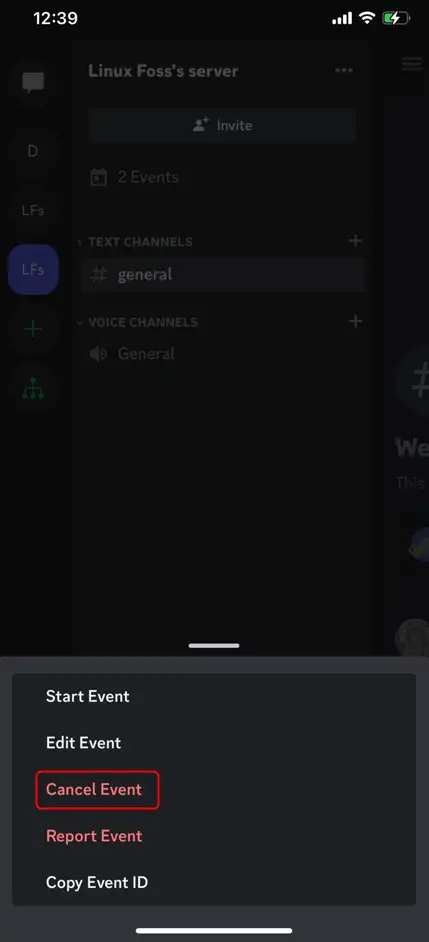
Click on the three dots on the left of Share to launch a drop-down menu. You can choose Cancel Event in case the event is not happening. You can choose to make other changes from the relevant options in the drop-down menu as well:
Creating Discord Events on iPhone
Discord app can be used on different devices such as Desktops for Windows, macOS, Linux, and mobile phones on both Android and iOS, also it can be used on the web without downloading the app. Here is a complete guide given below to use Discord on iPhone to create an event, as the steps are also the same for Android:
Step 1: Launch Your Discord App
Locate the Discord app on your home screen and tap on it to open:
Step 2: Open the Server
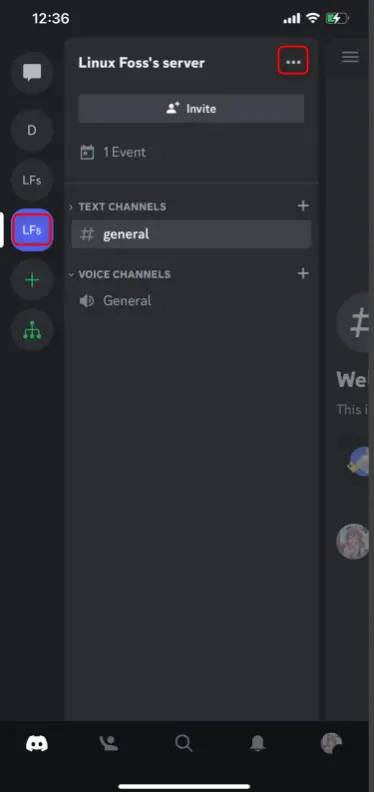
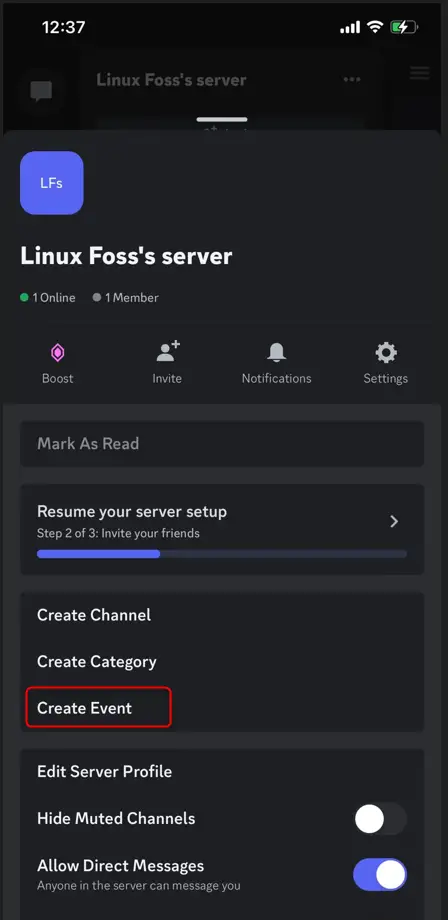
Create or open the already created server. Tap on the three dots next to the name of the server:
Step 3: Create an Event
From the drop-down menu, tap on Create Event to create an event of your choice in the selected server:
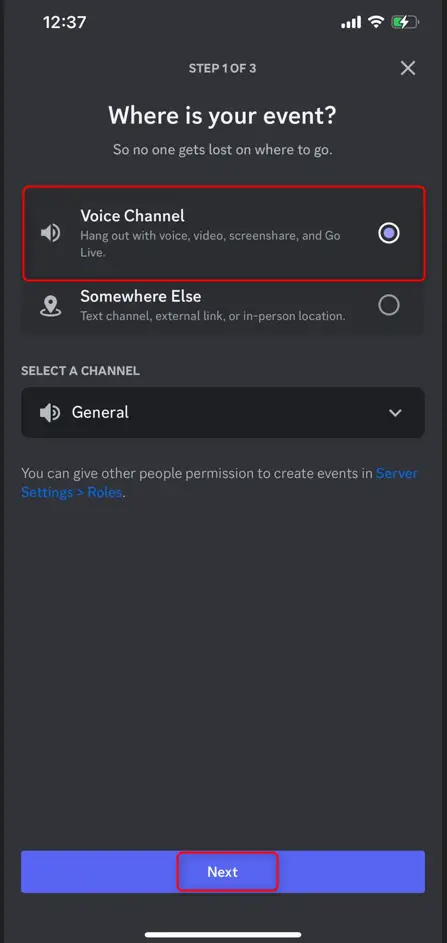
Step 4: Customize Your Event
The first step of customization of the event is setting up the location. Tap on Voice Channel to launch the scheduled event within the Discord server. Tap Next to move to the second step:
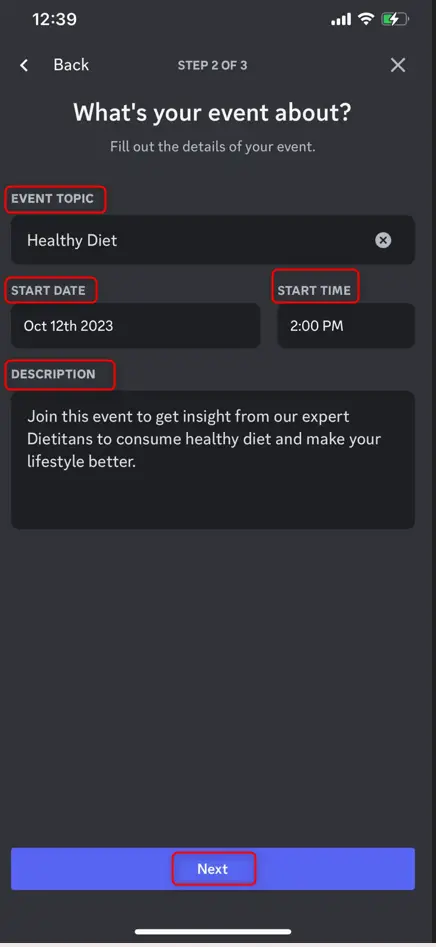
Set the Topic, Start Date, Time, and Description for your event. Make the topic and Description interesting so that it would grab the audience’s interest. Tap Next to reach the next step of customization:
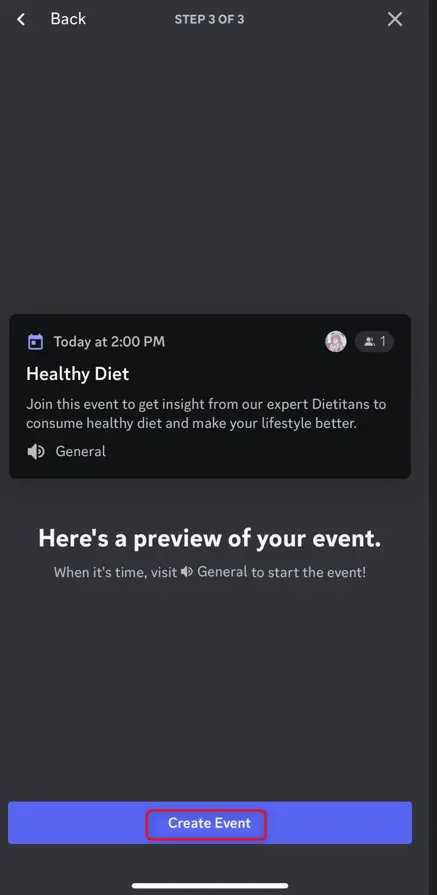
Preview your event and tap on Create Event to successfully schedule the event:
Step 5: Make Changes in the Scheduled Event
After successfully creating an event, there is still the possibility of making changes to it. Go to the Event Info by tapping on Event Created under the server’s name. Under the Event Info menu, tap on the three dots:
From the drop-down menu, you can choose different options according to your choice. Also, there is the option to cancel the event. In case the event is not happening, tap on Cancel Event, and it will cancel the scheduled event:
That’s all about creating Discord events on desktops and smartphones.
Conclusion
Discord events can be created on desktop and mobile within the server. For this purpose, first, launch the discord app, and go to the server you want to create an event in. Right-click on the name of the server, choose Create an Event, customize your event according to your choice, and after previewing select Create Event. After successfully creating an event, copy your event ID and share it with your desired audience, either directly through Discord or any other social media app.

TUTORIALS ON LINUX, PROGRAMMING & TECHNOLOGY