Discord is a social media app that enables its users to communicate via messages and calls. This app is widely used by gamers, YouTubers, and any other person who prefers communication via Discord. It supports video and voice calling, as well as live screen share options.
How to Enable/Disable Screen Share on a Discord Server on a Desktop
Discord supports the screen share options without using any third-party app. You can choose this option to share your screen with fellow gamer communities, friends, or teammates for business purposes.
Here is a guide given below to enable/disable screen share on a Discord server on a desktop:
Step 1: Launch the Discord App
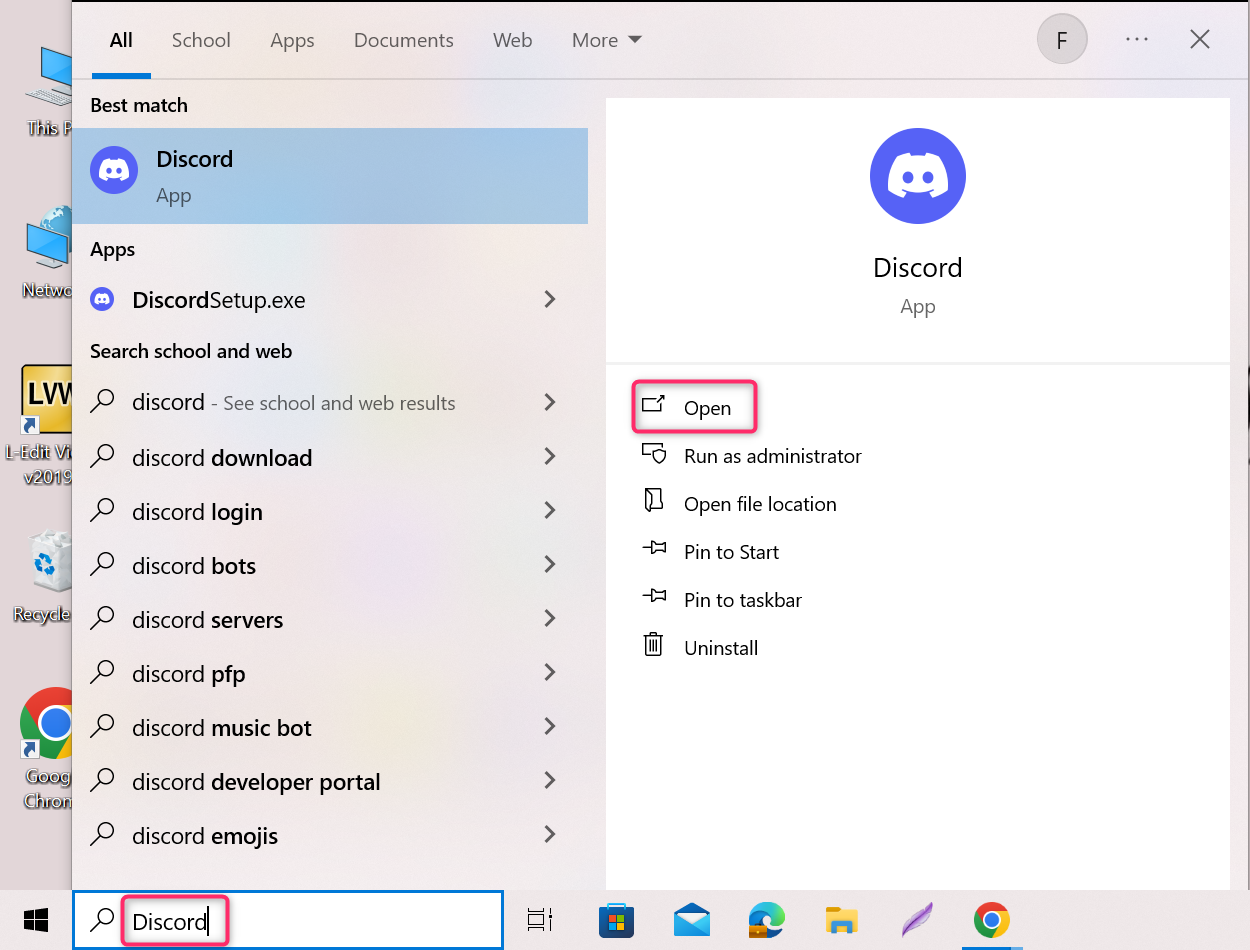
Press Win+S on your keyboard together to launch the search box. Type Discord and click on Open to launch the app:
Step 2: Enable Video Settings on Your Discord app
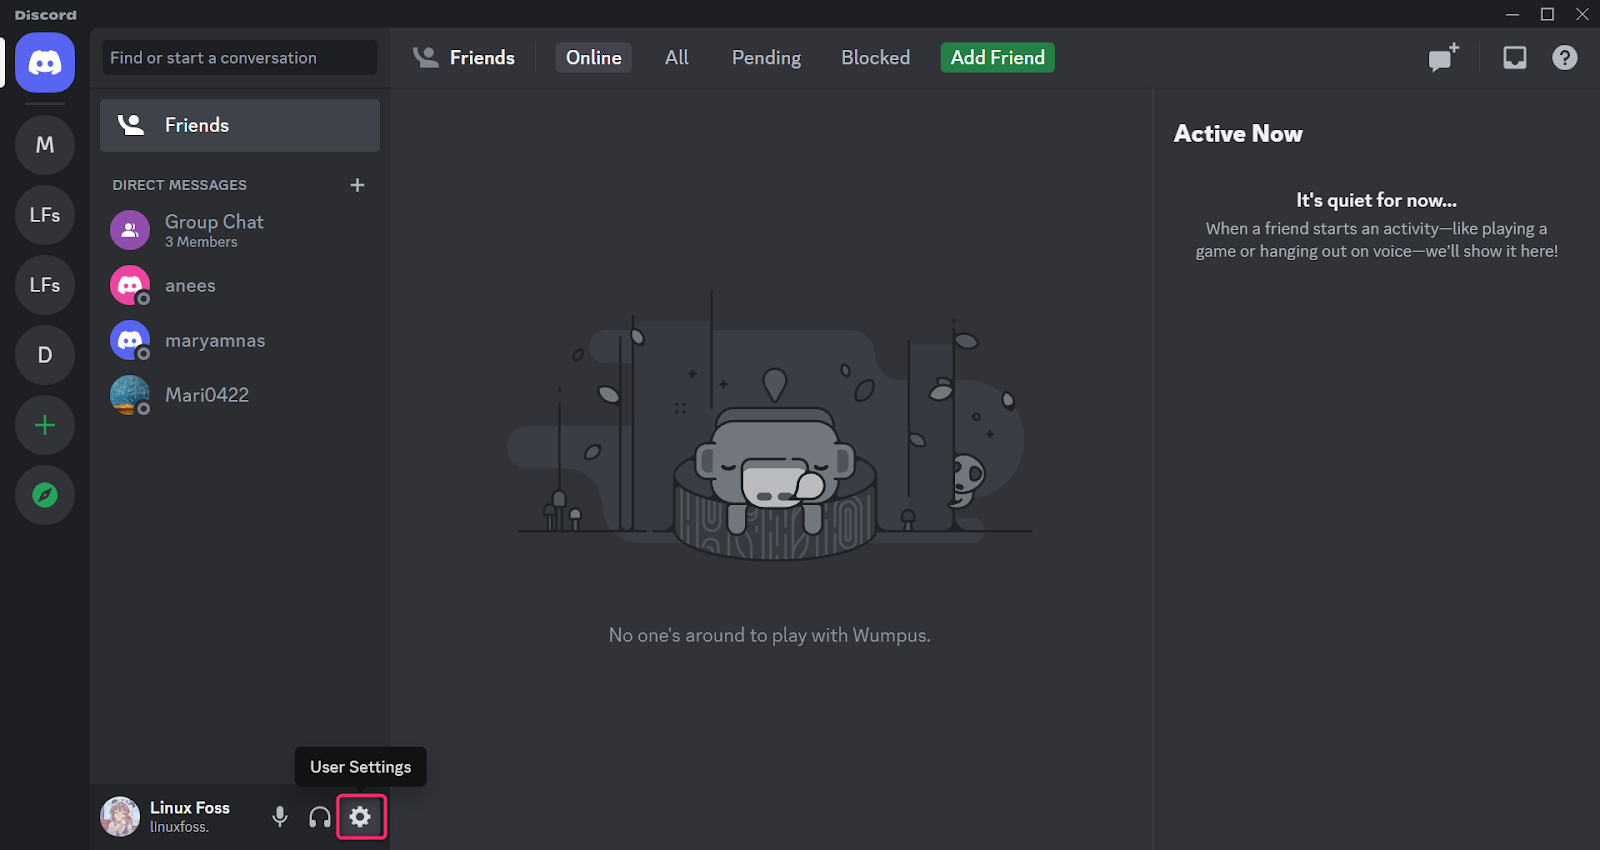
Click on the gear on the bottom left of the home screen to launch User Settings:
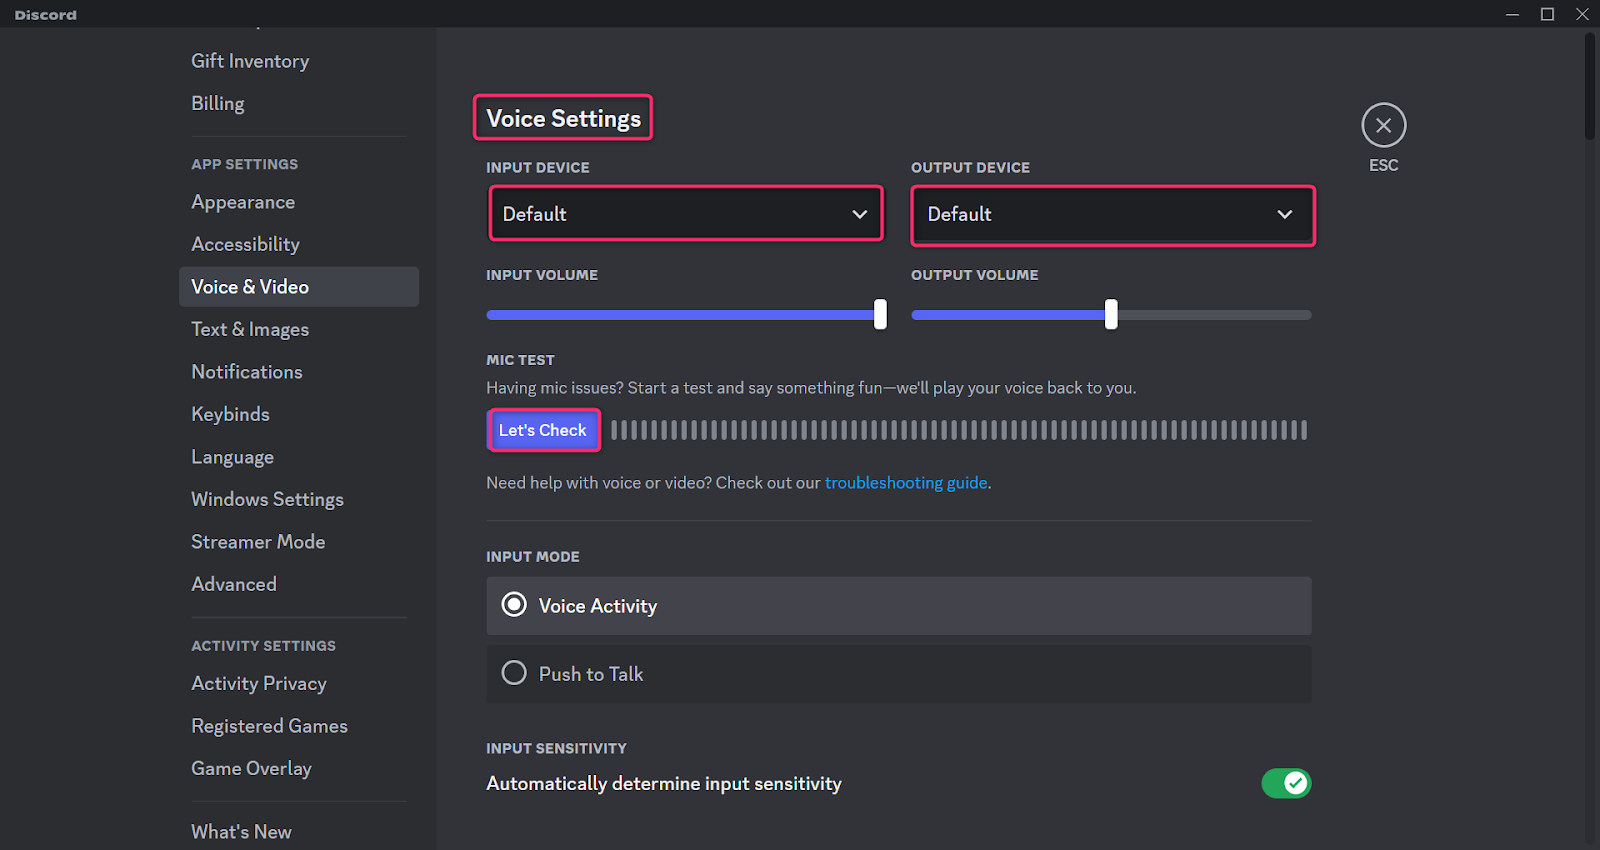
Scroll down and click on Voice & Video under APP SETTINGS. Voice Settings appear on the right side of the window. Choose default input and output devices if you are using your PC’s built-in microphone. Click on Let’s Check to check the working of your microphone. If it is working properly then move to the video settings, otherwise plug in the external microphone:
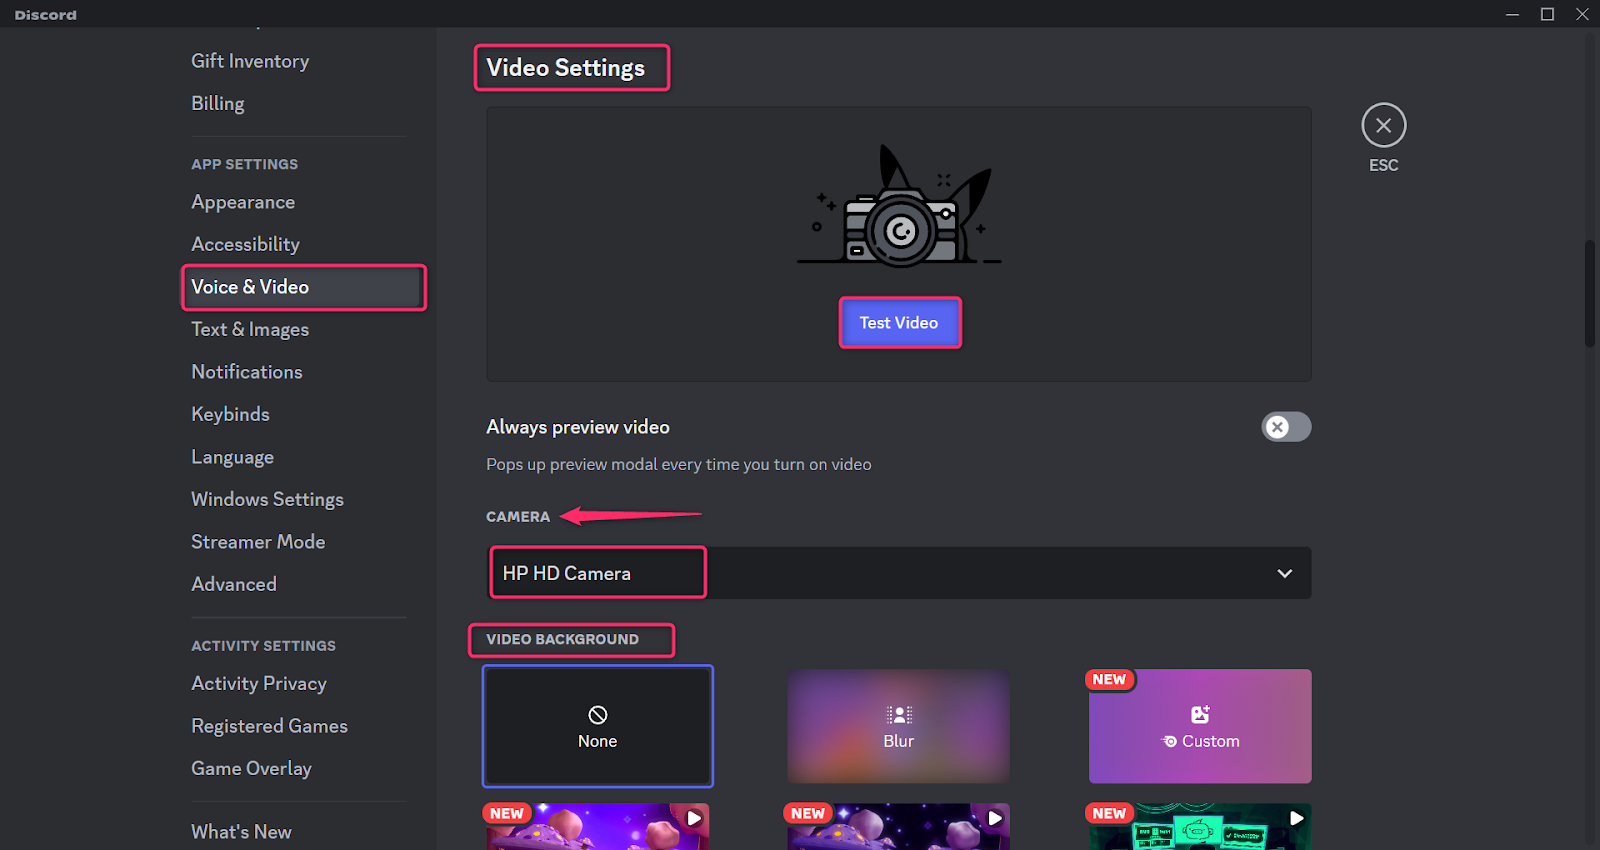
Scroll down to set up Video Settings. Set your Camera to your PC’s default camera if you are not using an external web camera. Click on Test Video to check the functionality of the camera. You can set the background for your video chat if you are not willing to let others view your actual background:
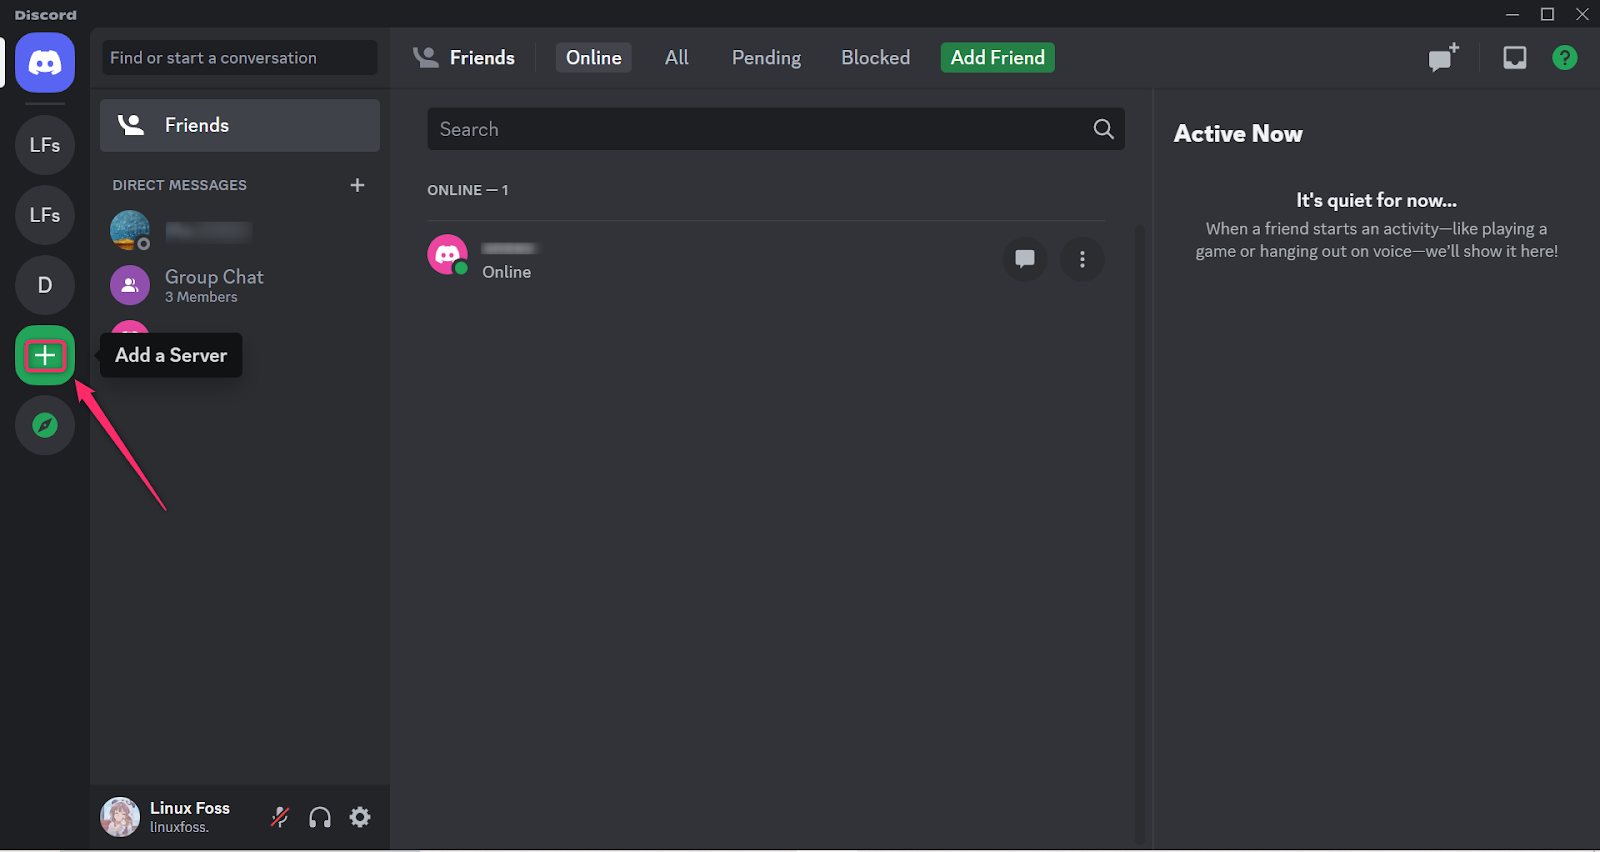
Step 2: Create Server
Click on “+” on the home screen of your app to create a new server:
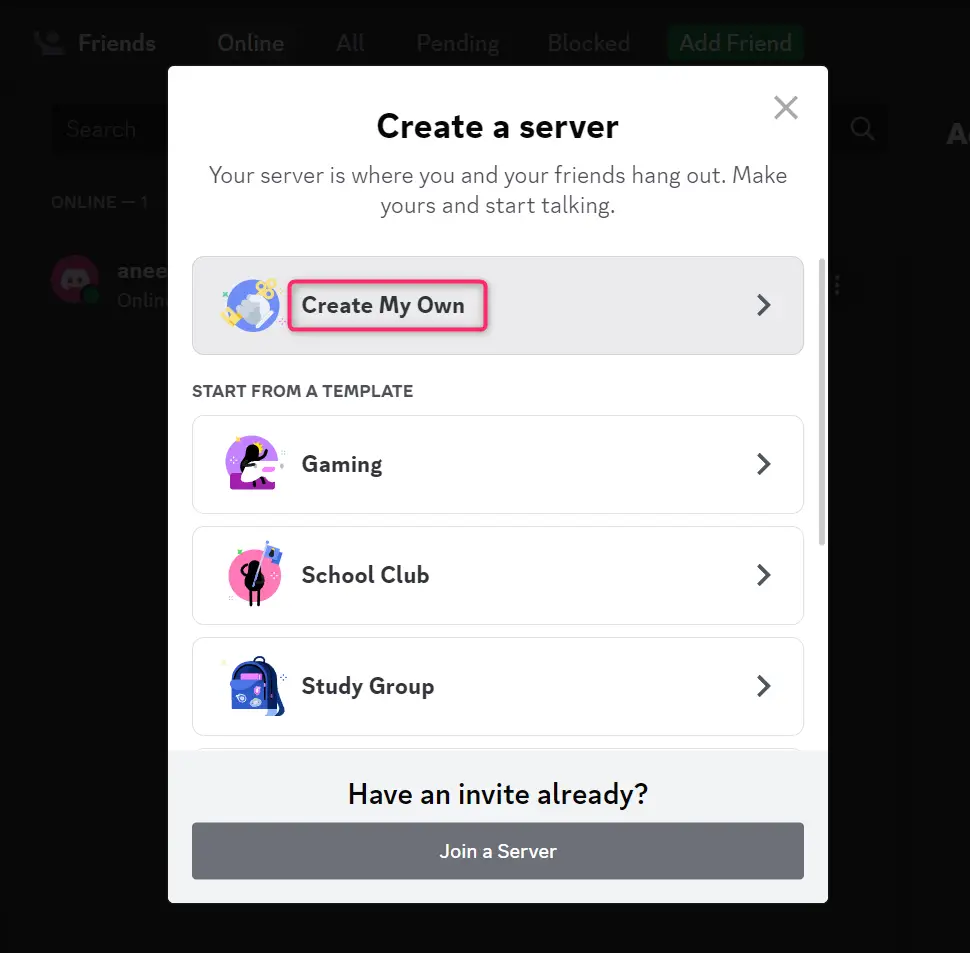
Step 3: Customize Your Server
Customize your server according to your choice. Here, I am choosing Create My Own server:
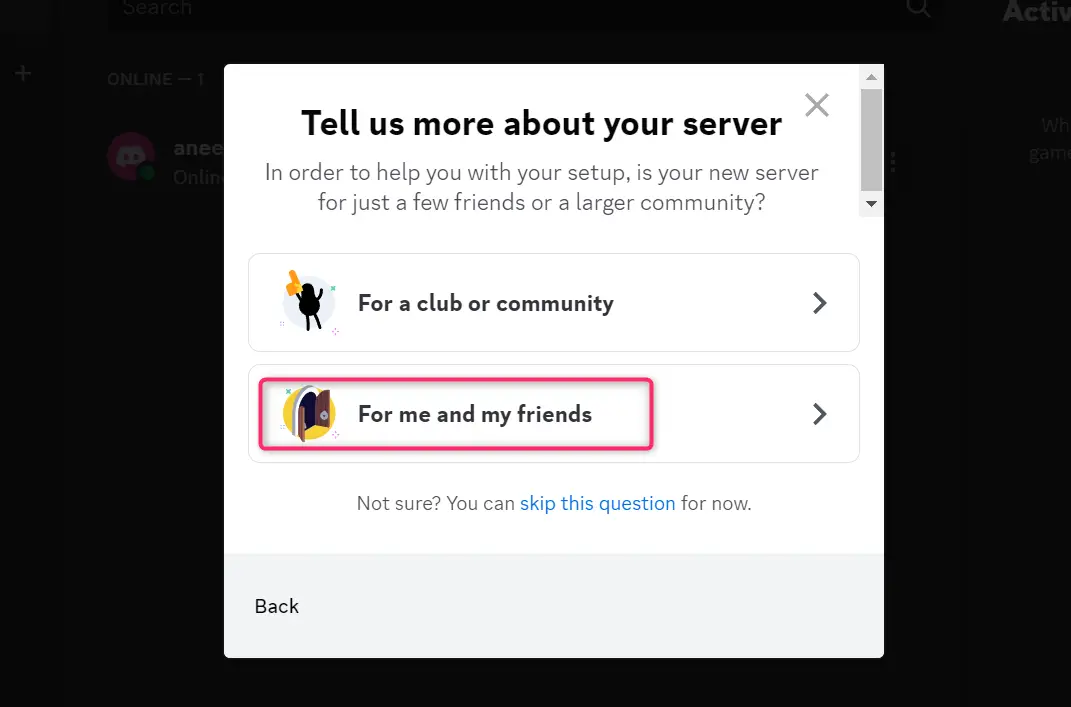
If you want to create a server for friends, choose the option highlighted in the image below, otherwise choose the other option:
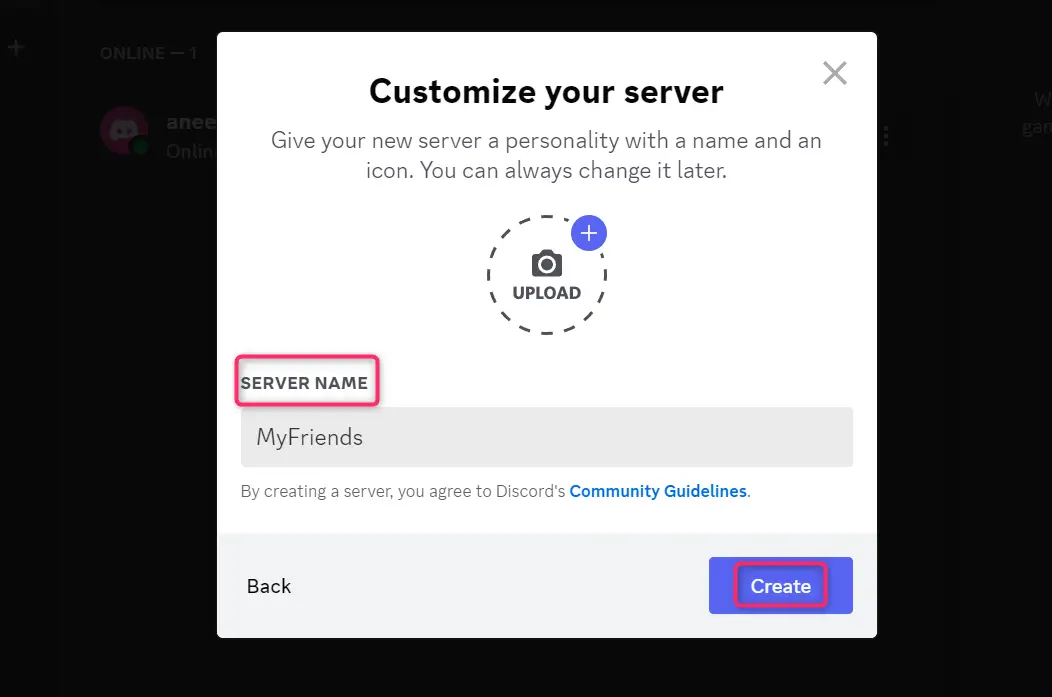
Pick a name for your server, type it in the box, and hit Create:
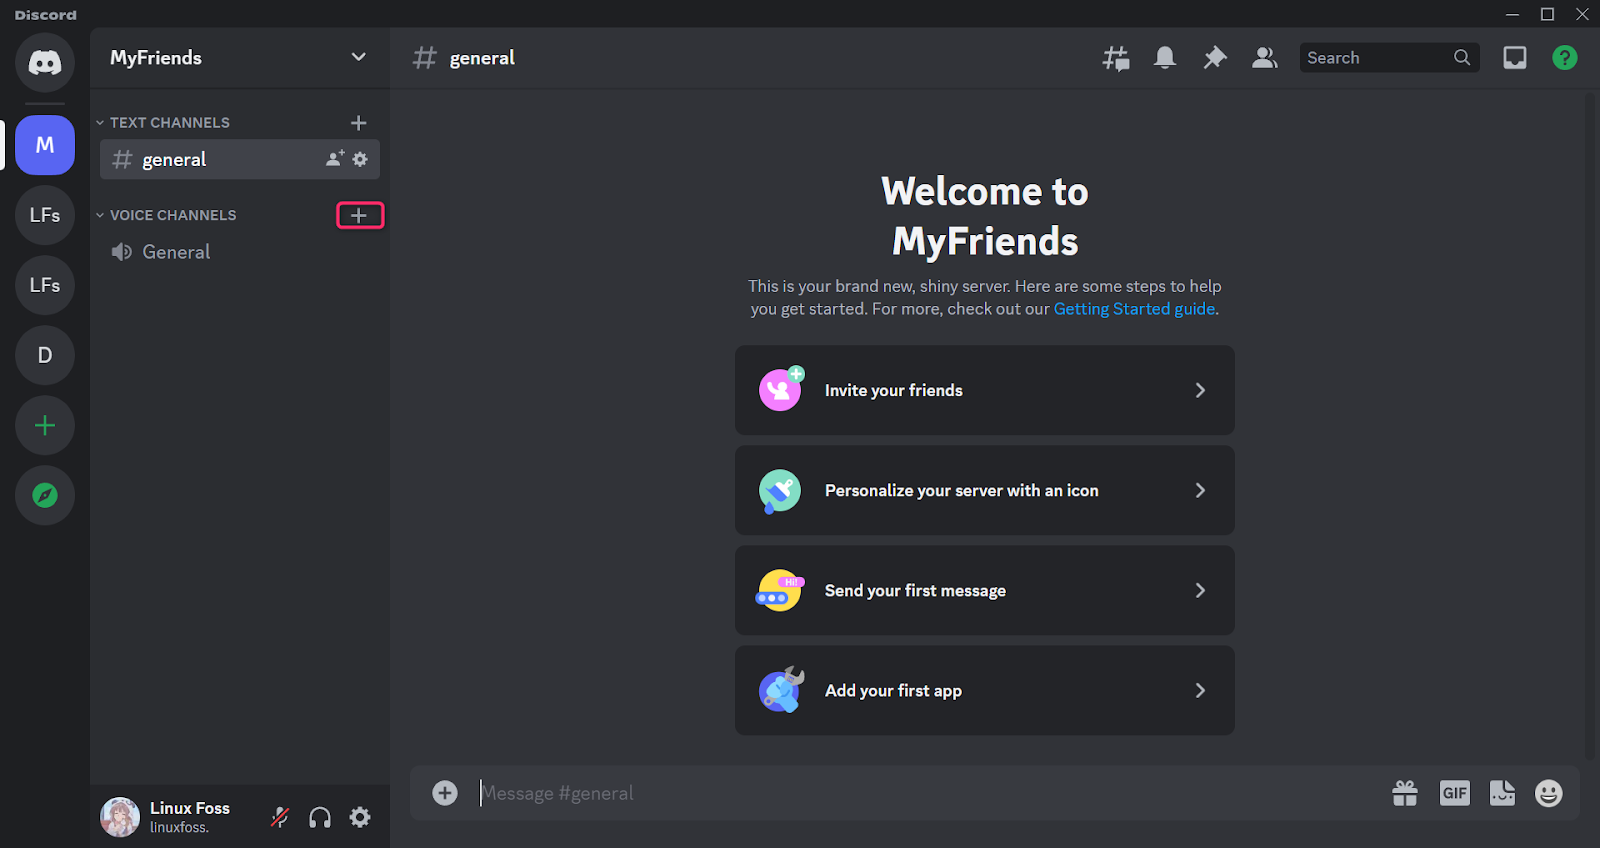
Step 4: Create a Voice Channel
Create a voice channel in the server you created by hitting the “+” icon next to voice channels:
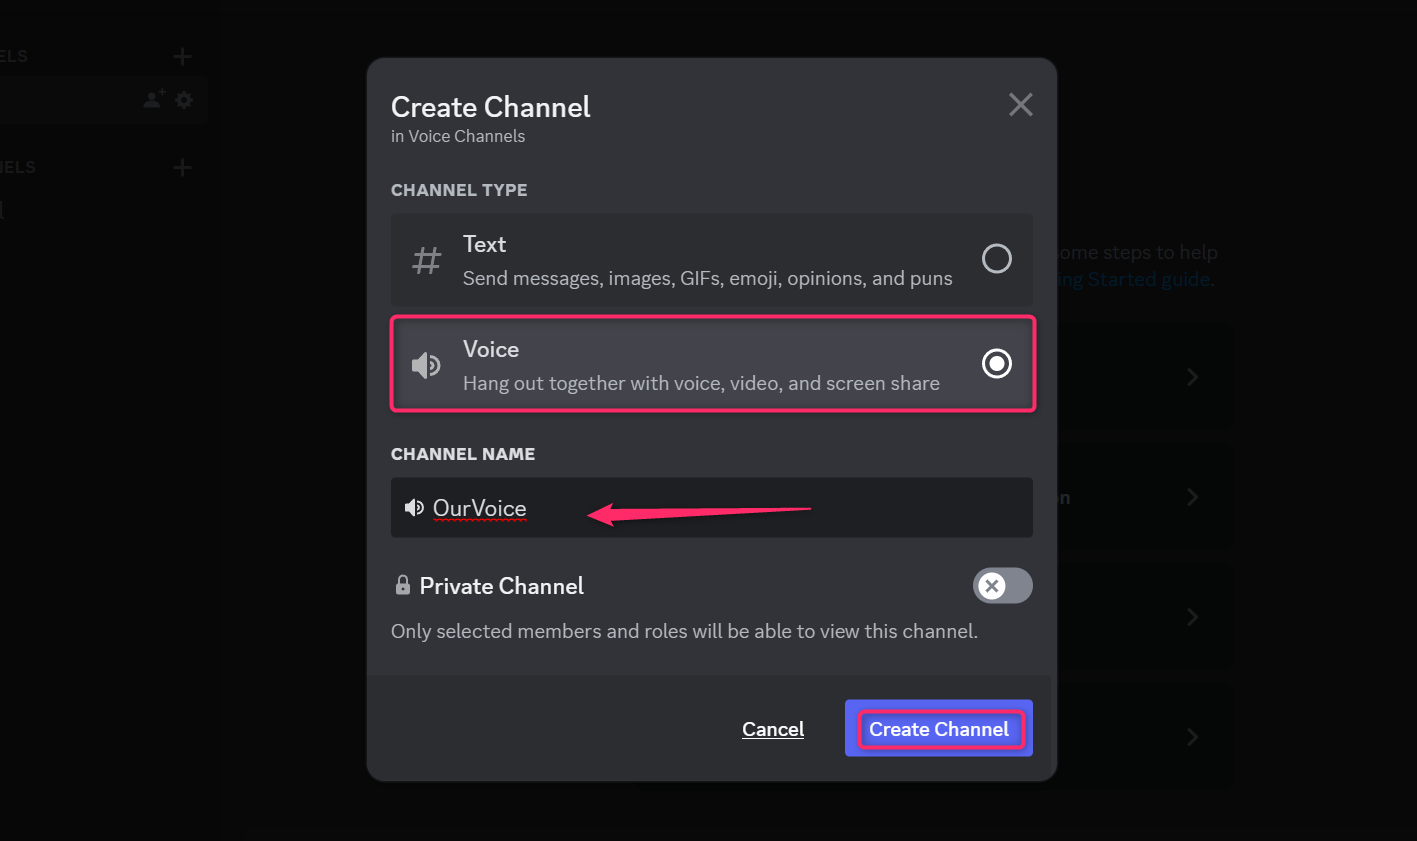
Step 5: Customize Your Voice Channel
Choose Voice and type your desired CHANNEL NAME. Hit Create Channel to create the voice channel successfully:
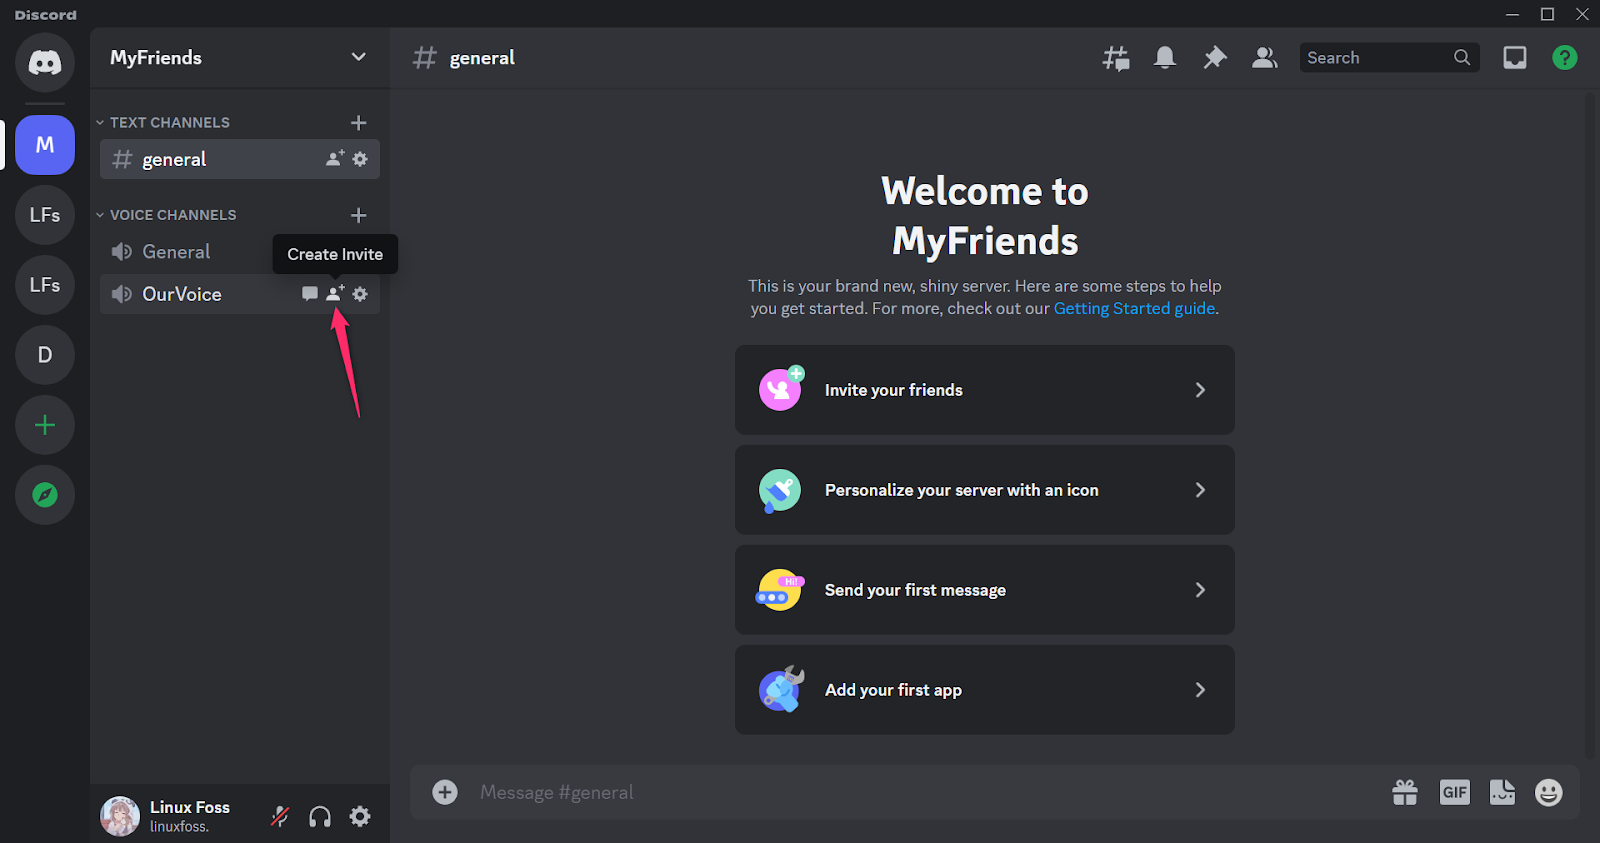
Step 6: Invite Friends
Choose Create Invite as shown in the image below:
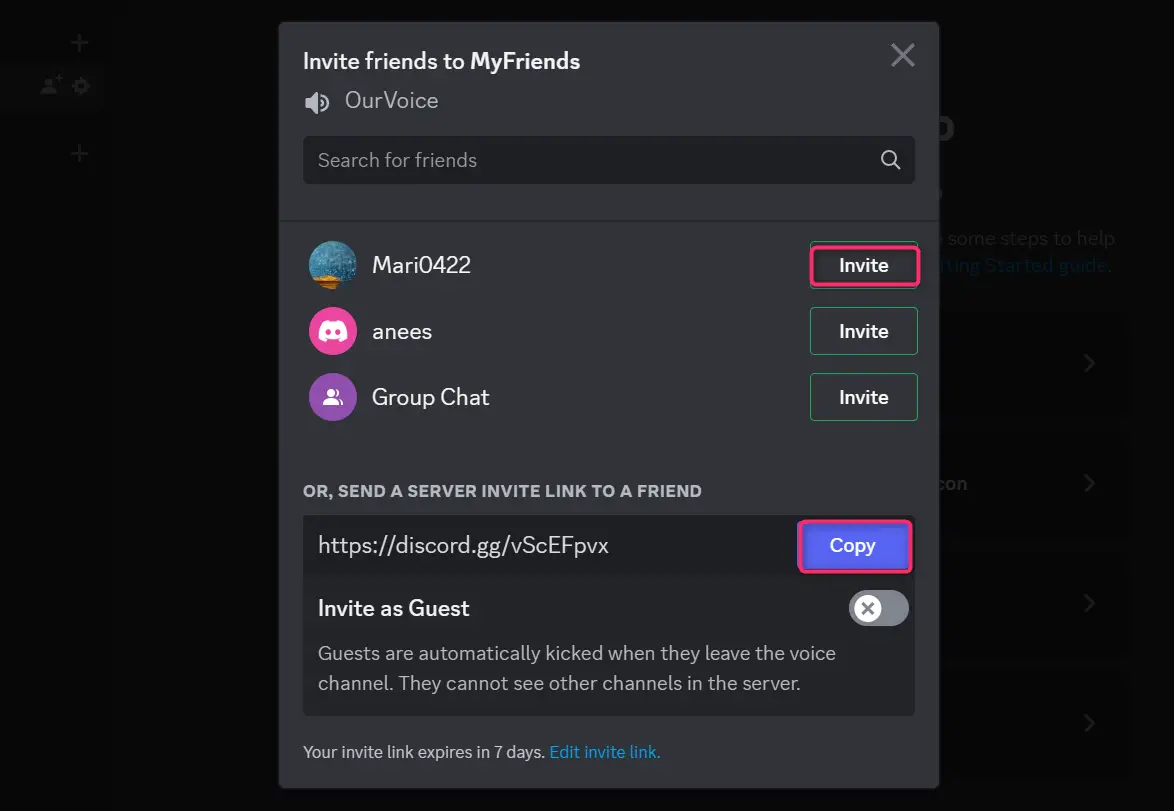
Hit on Invite to send the invitation directly, or choose Copy to copy the link. You can share the copied link with your friends through other social media apps as well:
Step 7: Start Voice Call
Click on the speaker symbol in your created voice channel to make the audio call as shown in the image below. At the bottom left of the screen, you will get notified when the call is connected:
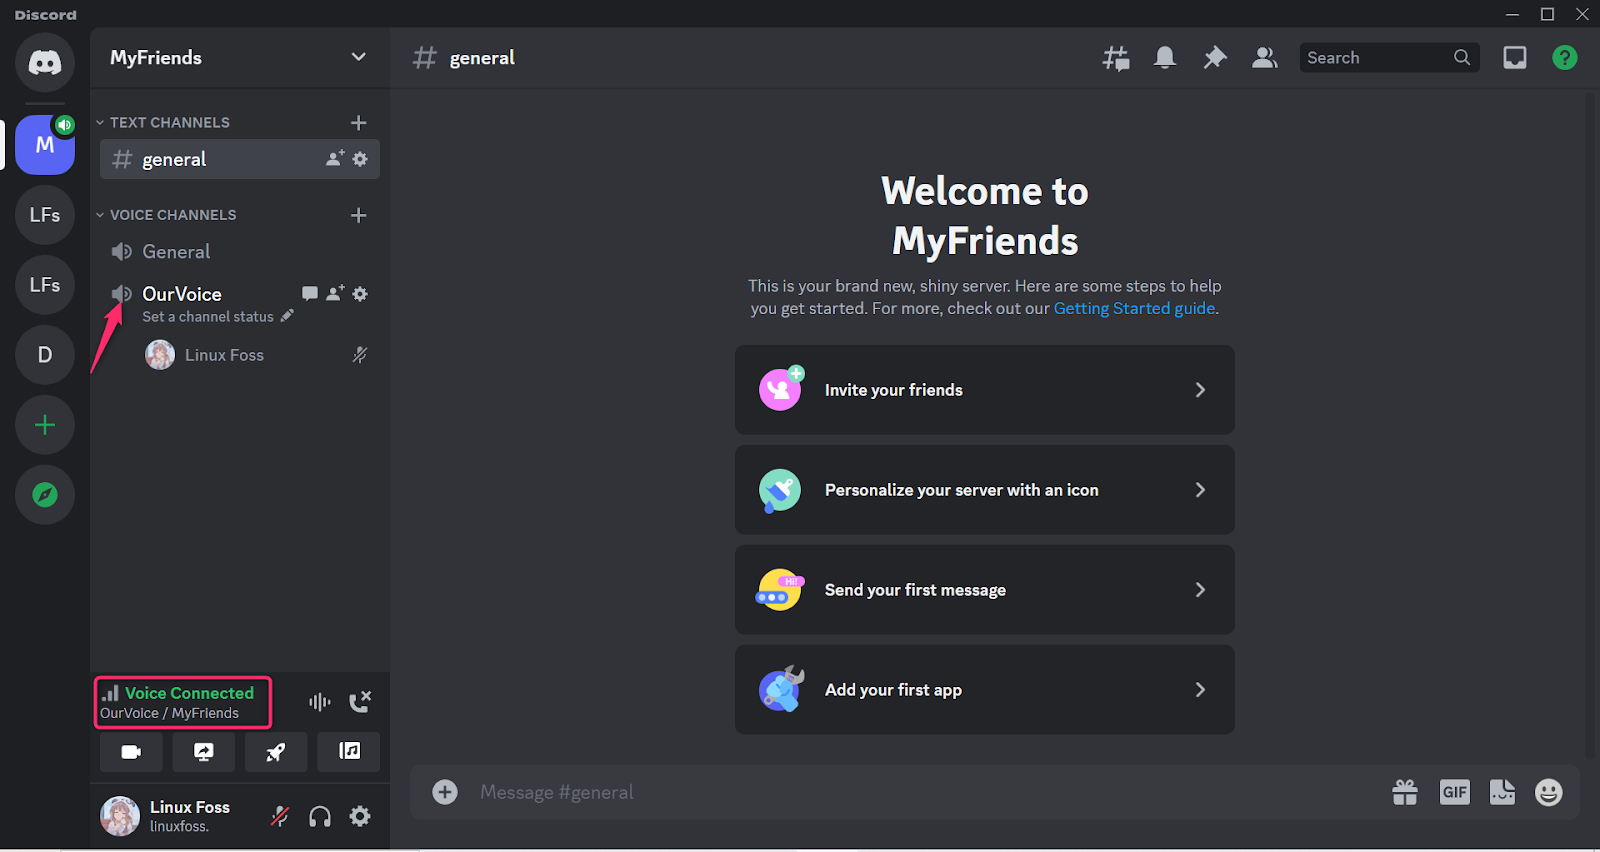
Step 8: Share Your Screen
Choose the Share Your Screen option from the bottom left, as shown in the image below. This is the first step for initiating the screen share:
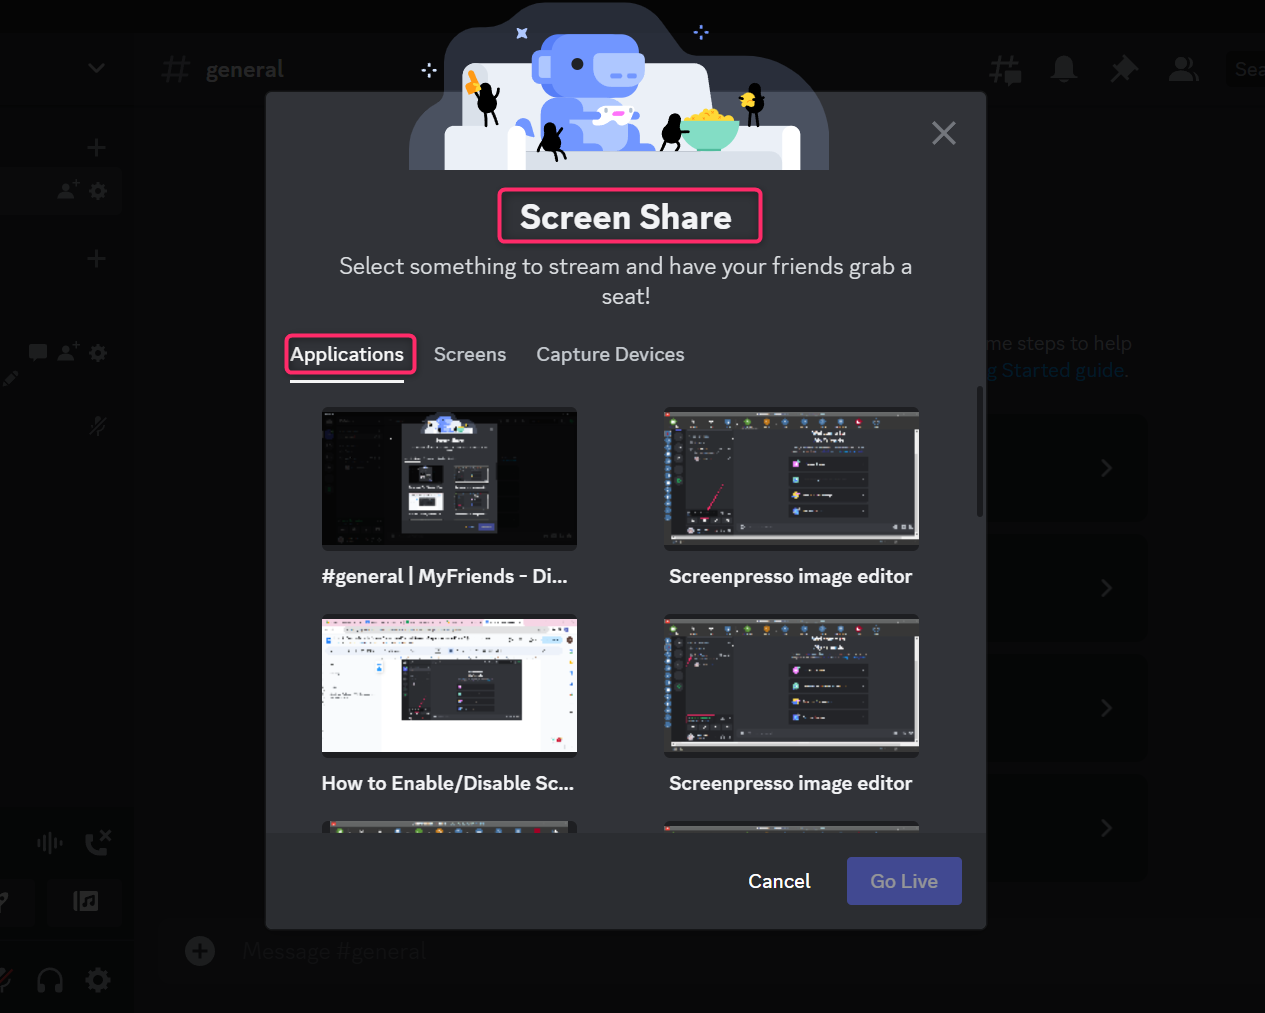
Choose the screen you want to share:
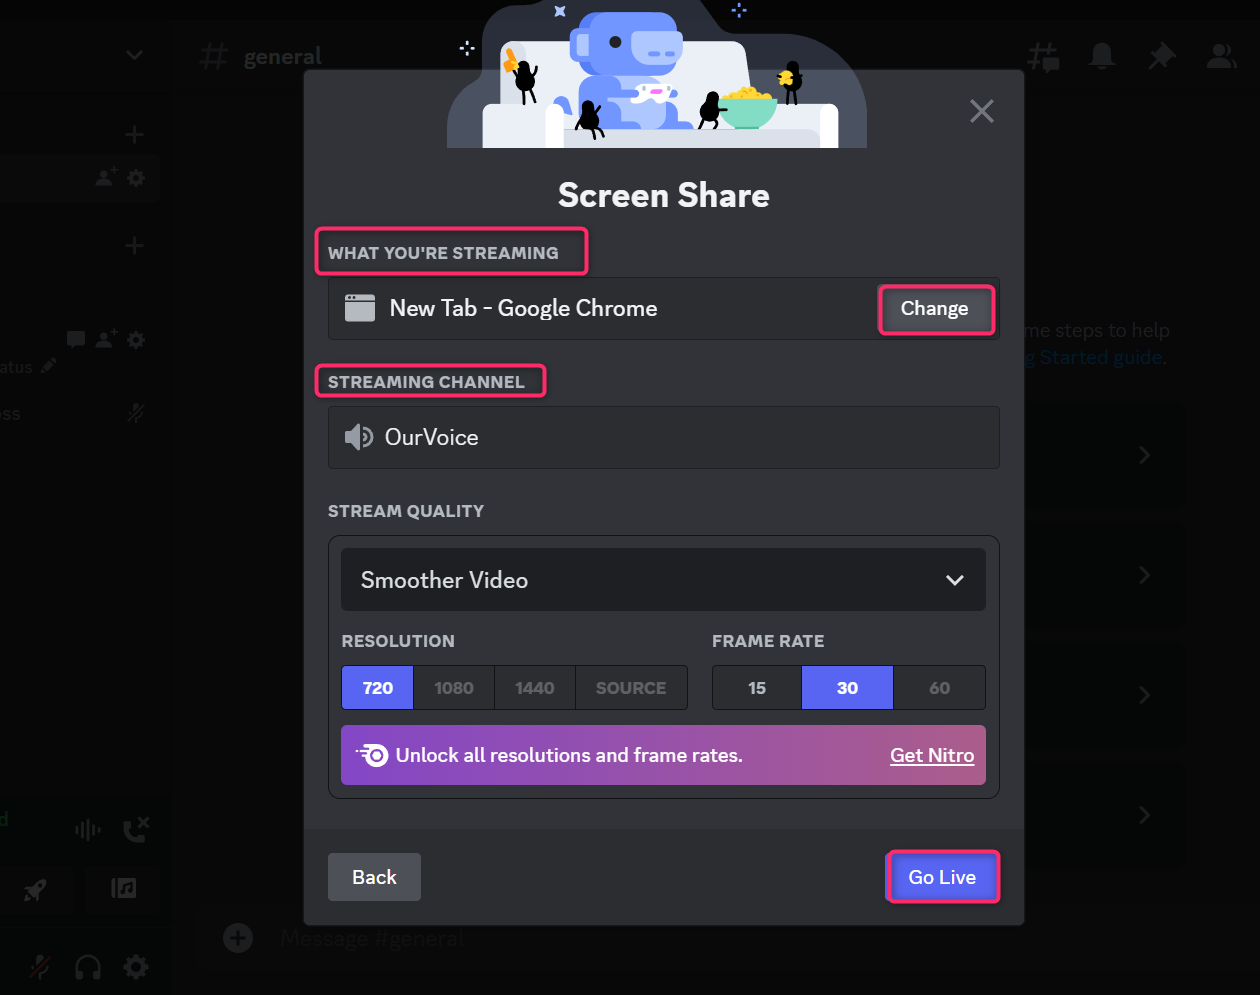
Before going live, preview the screen details you are going to share. You can also change the selected screen from the Change option. Double-check the details and hit Go Live:
Your screen is now shared with your community within the server in Text Channel:
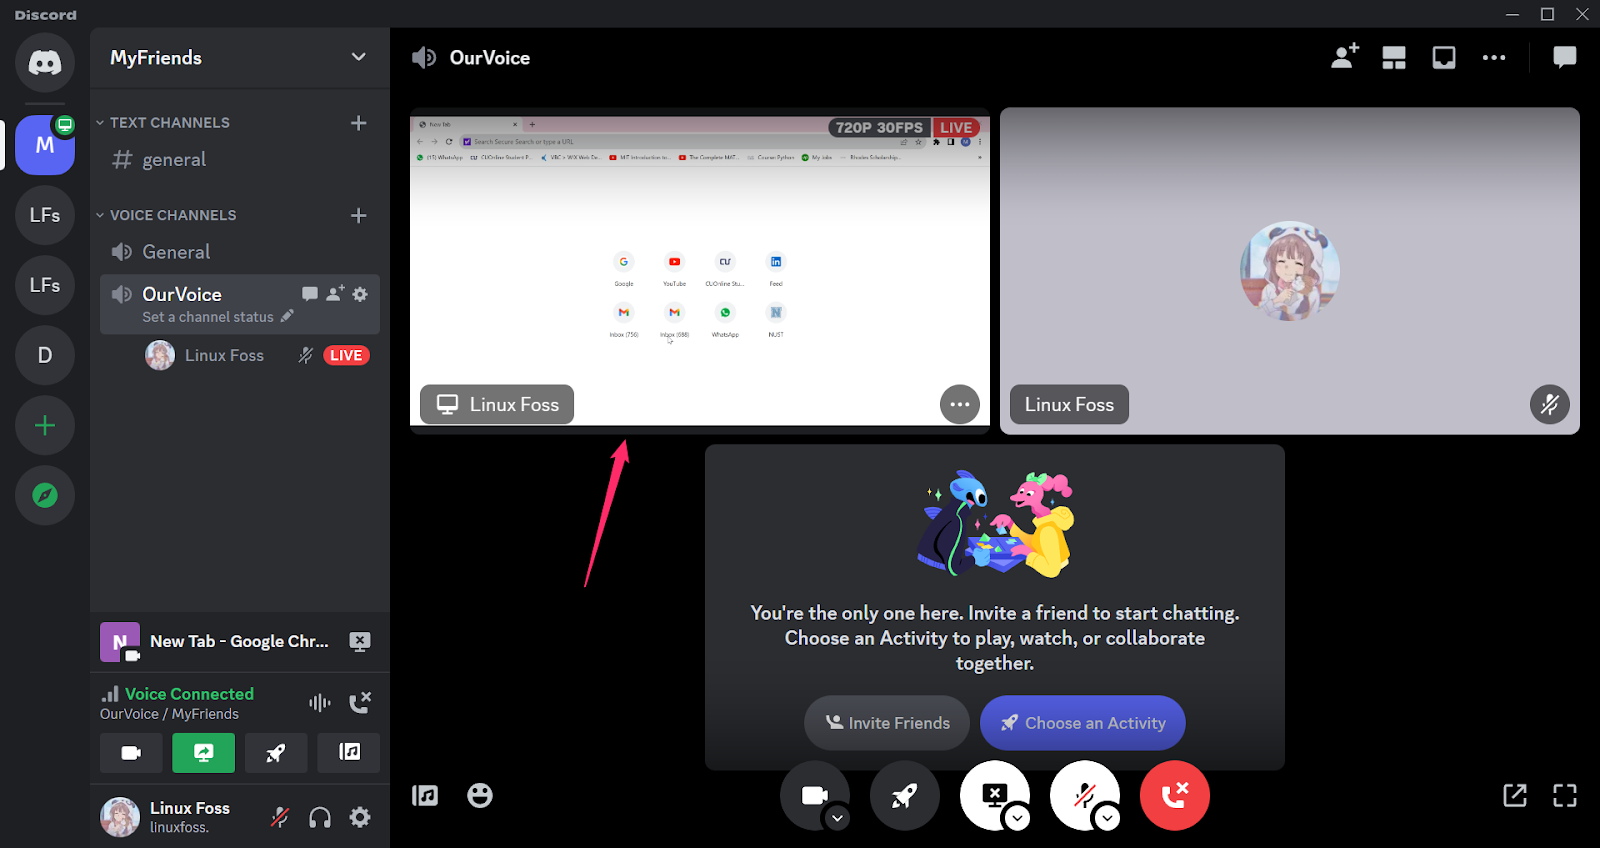
Step 9: Disable Screen Share
To disable screen share when you do not want others to see your screen anymore, click on the option highlighted below. This will end screen share:
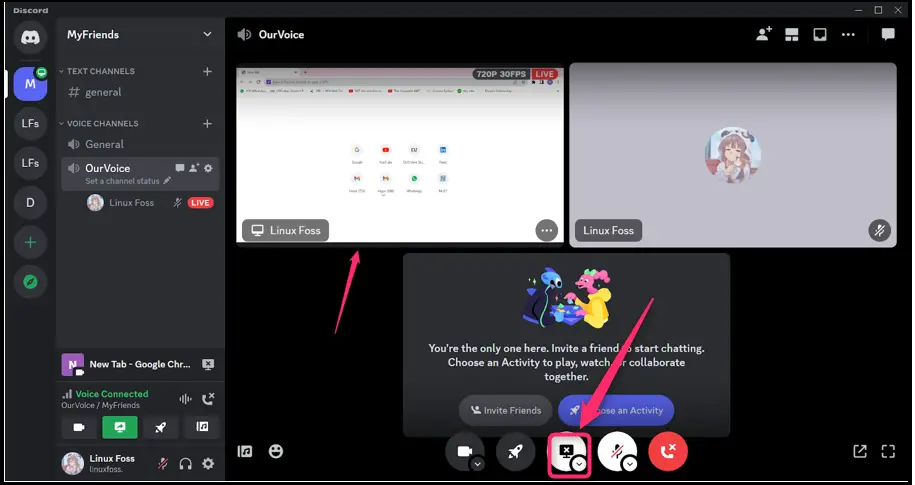
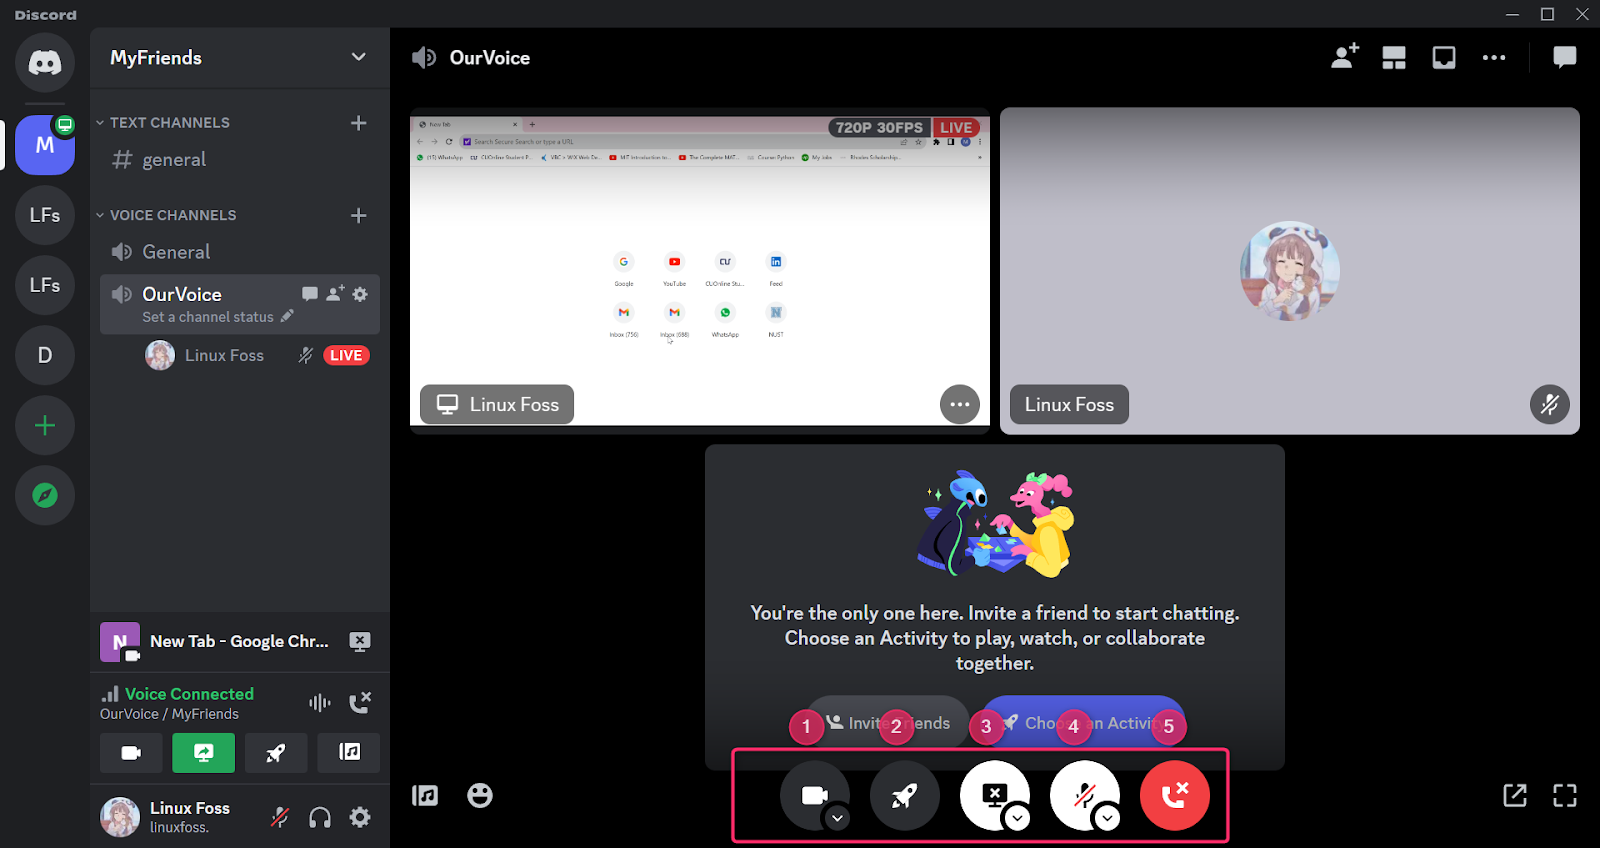
There are multiple other options that appear at the bottom of the screen, which you can use according to your needs:
- This will turn your camera on, and you will be visible to the people who have joined the call.
- This suggests different activities to do with your community members.
- This option disables the screen share.
- This is the microphone, you can choose to mute or unmute your microphone from here.
- This option ends the screen share and disconnects you.
How to Enable/Disable Screen Share on a Discord Server on iPhone
The Discord app is compatible with both Desktops and mobile phones, as well as the web. You have the choice to use the same account on desktop and mobile. You can not only choose a single window from your phone to share, rather your whole screen will be visible to others, including notifications popping up on your screen. It is a good approach to mute your notifications in case of privacy concerns. Here is a guide to enable and disable the screen share on an iPhone, the steps are the same for Android too:
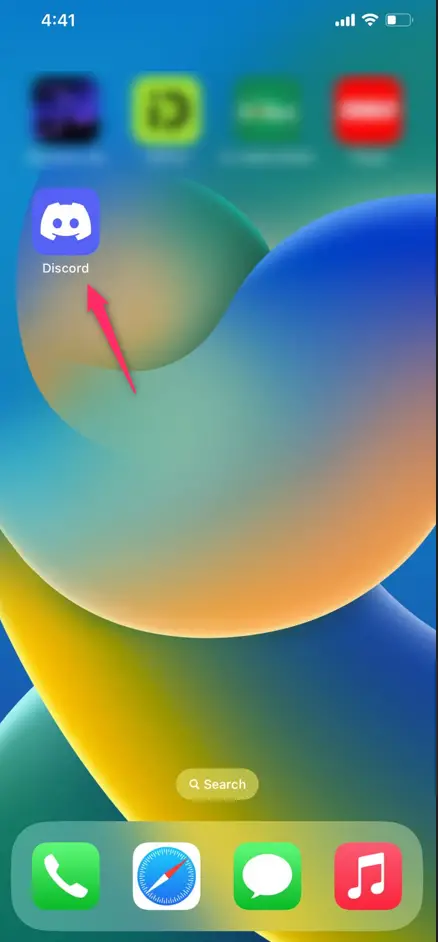
Step 1: Launch Your Discord App
Locate your Discord app on your home screen and tap to open:
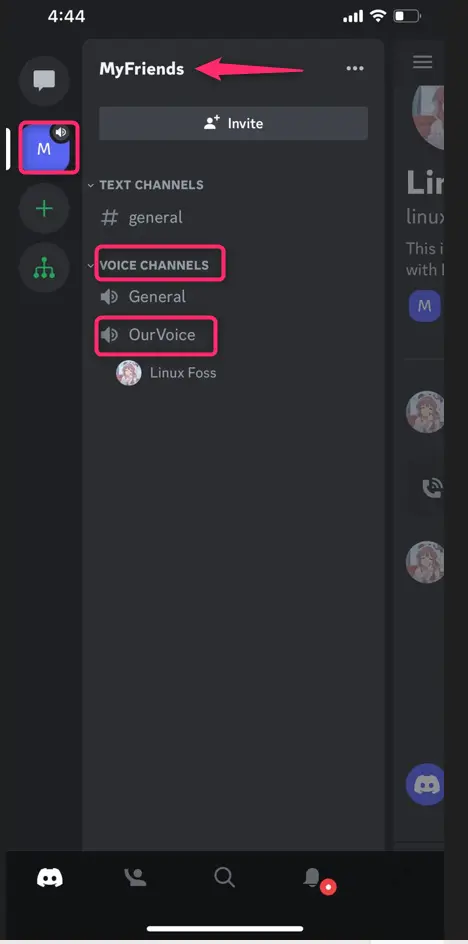
Step 2: Open Server
Open the server of your choice and click on the speaker icon below the text channel:
Step 3: Join the Call
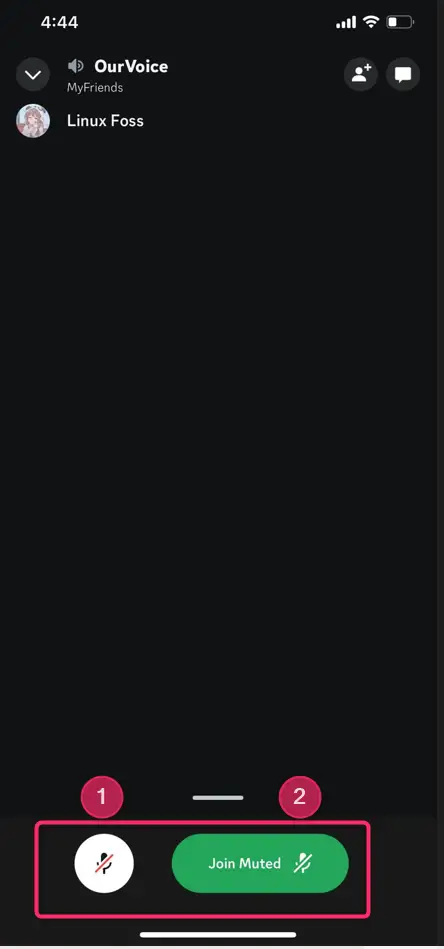
Click on the join with your microphone from the mic option as highlighted and marked as 1 or click on 2 to join with the muted mic as highlighted in the image below:
Step 4: Turn Your Camera On
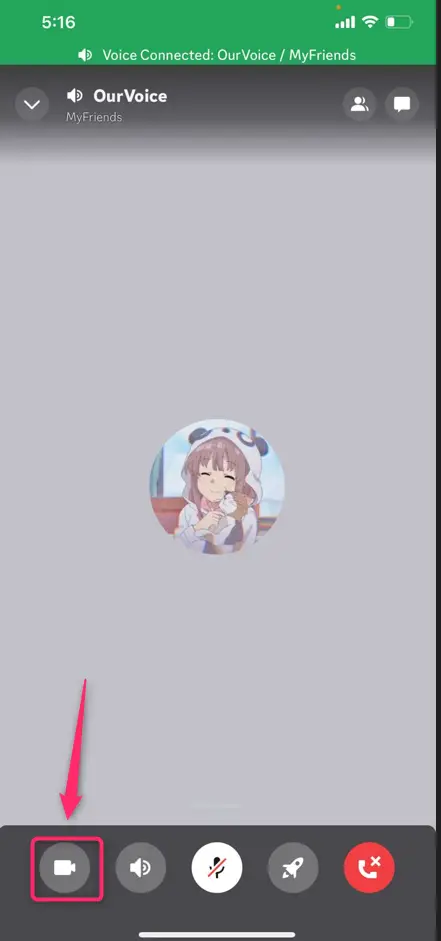
Turn your camera on from the icon highlighted in the image below, it will show the view from your camera to others. This step is necessary before launching screen share:
Step 5: Enable Your Screen Share
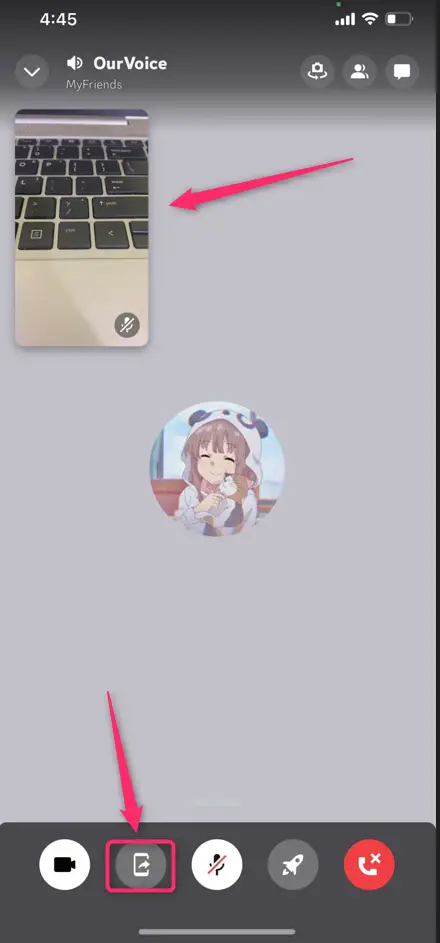
When the video camera is on, tap on the screen share option as highlighted in the image below. This is the first step to share your screen with others:
Step 6: Start Broadcast
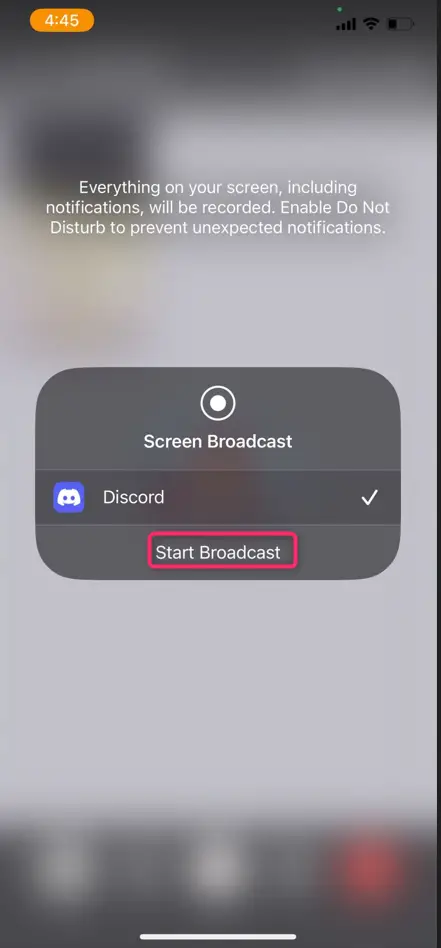
Click on Start Broadcast to confirm the screen share. This is the confirmation step:
Step 7: Disable Screen Share
You have started sharing your screen. If you want to end screen sharing, hit Stop Sharing. This will end broadcasting your screen.
There are multiple options you can choose to adopt, as highlighted in the image below:
- Choose this option to turn off your camera. You can turn your camera on again from the same option, too.
- You can also disable screen share by choosing this option.
- Furthermore, you can mute/unmute your mic from this option.
- This option suggests multiple activities to perform like watching YouTube together etc.
- Choose this option to disconnect the screen share.

That’s all about enabling or disabling screen sharing on a Discord server.
Conclusion
You can enable or disable the screen share on a Discord server within the text channel by making a video call and then choosing the share screen option from the bottom of the window. To disable the screen share, hit on the stop sharing option. This write-up has exhibited a step-by-step guide on enabling or disabling screen sharing on a discord server.

TUTORIALS ON LINUX, PROGRAMMING & TECHNOLOGY