A hanging indent means the first line of text is at the position of the margin, and all the subsequent lines are indented to the right side. It applies to all the paragraph lines except the first line. The hanging indent phenomenon is useful for making different styles of citations or bibliographies of documents, such as Chicago, MLA, APA, etc. The hanging indent enhances the readability of citations by separating author names and document titles. In this guide, we will provide an insight into the methods to do a hanging indent in Google Docs:
Let’s explore the first method:
Method 1: Using Indentation Options to do a Hanging Indent
The method comprises various steps to apply the indentation option after selecting the text in Google Docs. The method briefly explains how to implement the indentation options in Google Docs.
Step 1: Open Doc File
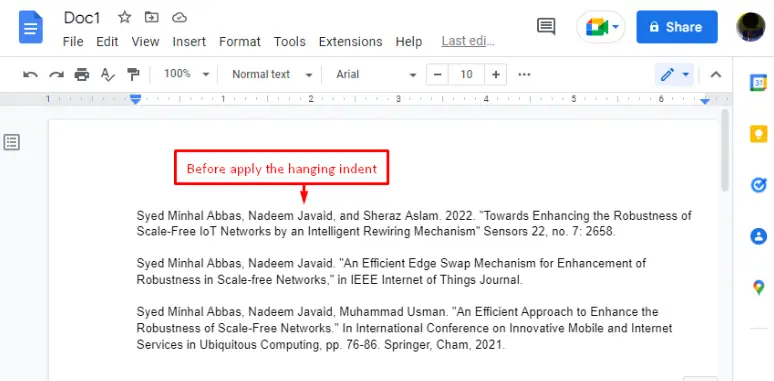
Open a new/existing Doc file as we did here. The document without hanging indentation looks like this:
Step 2: Choose the Hanging Indentation Option
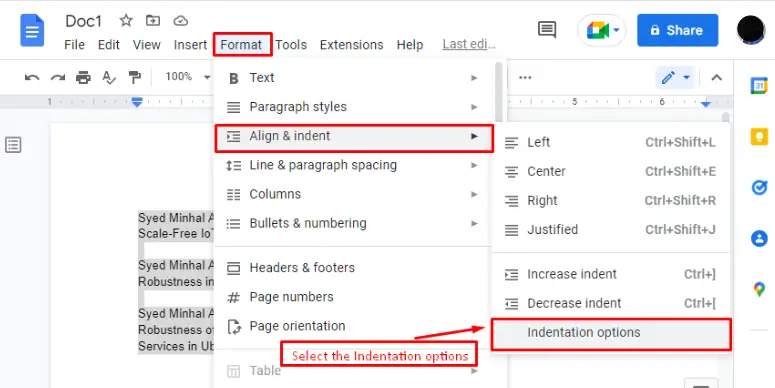
Select the text for hanging indentation. Click on the “Format” tab that generates the dropdown list. In this list, hover over “Align & Indent” and select the “Indentation option”:
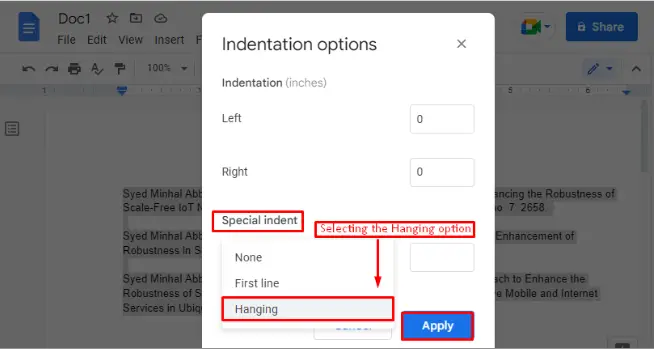
Among Indentation options, select the “Hanging” option and press the “Apply” button:
Step 3: Customize the Hanging Indent Options
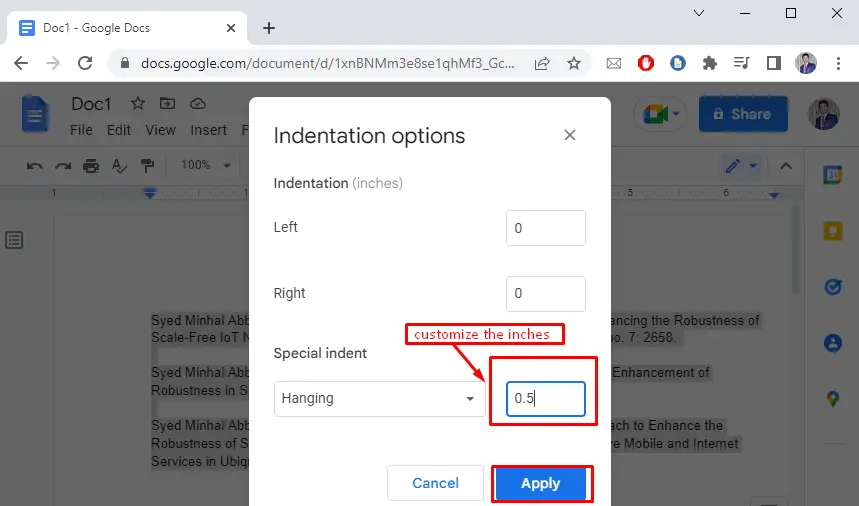
Moreover, users can manually adjust the hanging indent value in “inches” format. By default, the hanging indent value is set to “0.5”:
After applying the “Hanging Indent”, the selected text looks like this as shown below:
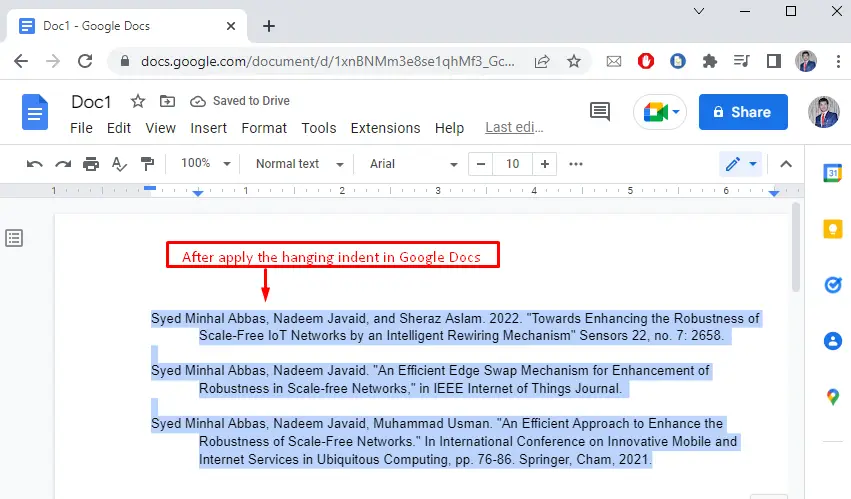
The formatted text indicates that the first line of each citation is as per the margin. However, the other lines are indented towards the right side by “0.5” inches.
Method 2: Using Ruler to do a Hanging Indent
In this method, the ruler is utilized to indent the text according to the needs of Google Docs. The ruler icon consists of two main components: “First Line indent” and “Left indent”.Components are employed to apply the hanging indent on the text.
Note: In the ruler, the small triangle represents the “Left indent”, and the small rectangle above the triangle shows the “First Line indent”.
The following steps use these components to do hanging indentation.
Step 1: Set the Left Indent
The “Left Indent” is utilized for indenting the paragraph lines from the left margin at a particular space. You can set the “Left Indent” according to their needs:
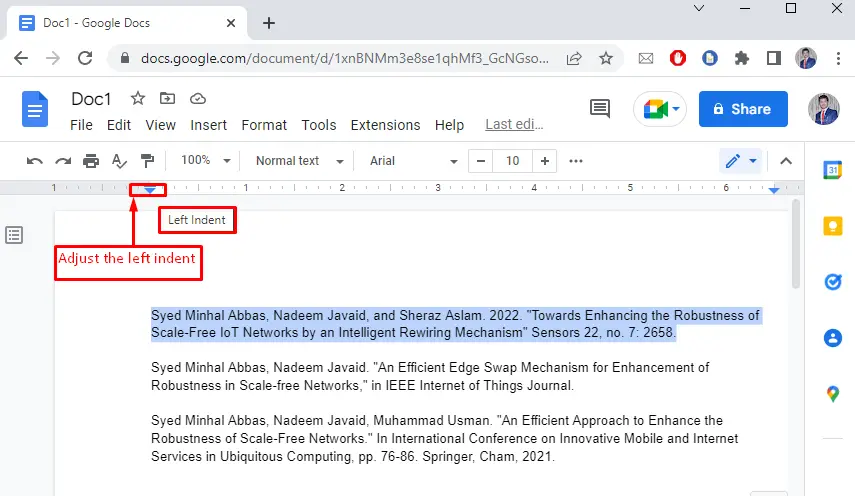
Step 2: Set the First Line Indent
The “First Line Indent” is used by pressing the icon and moving it towards the left side of the first line of the paragraph only:
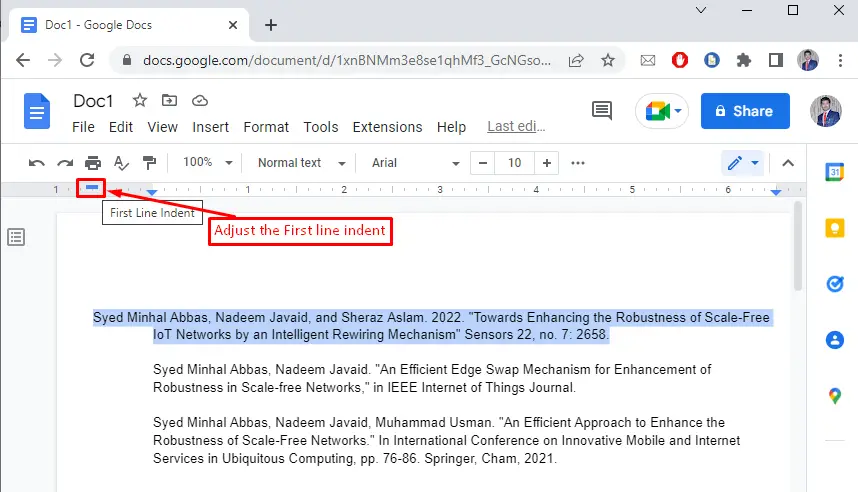
That’s it! You have now learned to do a hanging indent on Google Docs.
Conclusion
The “Indentation options” and the “ruler adjustment” can be used to carry out the hanging indent phenomenon in Google Docs. Users can select the “Indentation options” from the “Format” tab and apply them to the selected text. Furthermore, the “First Line indent” part of the ruler is exercised to do a hanging indent on a selected text. This post has pictorially demonstrated all the methods to do a hanging indent on Google Docs.

TUTORIALS ON LINUX, PROGRAMMING & TECHNOLOGY