The Kali Linux is the Debian-based Linux distribution that is designed for penetration testing, computer forensics, and many other information security tasks. The Kali Linux was released in March 2013 and is still open source which means any user can download it and use it.
If we talk about the features of the Kali Linux then it should be important to mention here that more than six hundred penetration testing tools are included in the Kali Linux, which allows its user to locate the binaries and files easily. Moreover, it has the support of both ARMHF and ARMEL, which means it can also be installed on single-board computers like the Raspberry Pi having the ARMHF architecture.
In this write-up, we will explore the method of downloading and installing the Kali Linux on the Virtual box.
How to download the Kali Linux
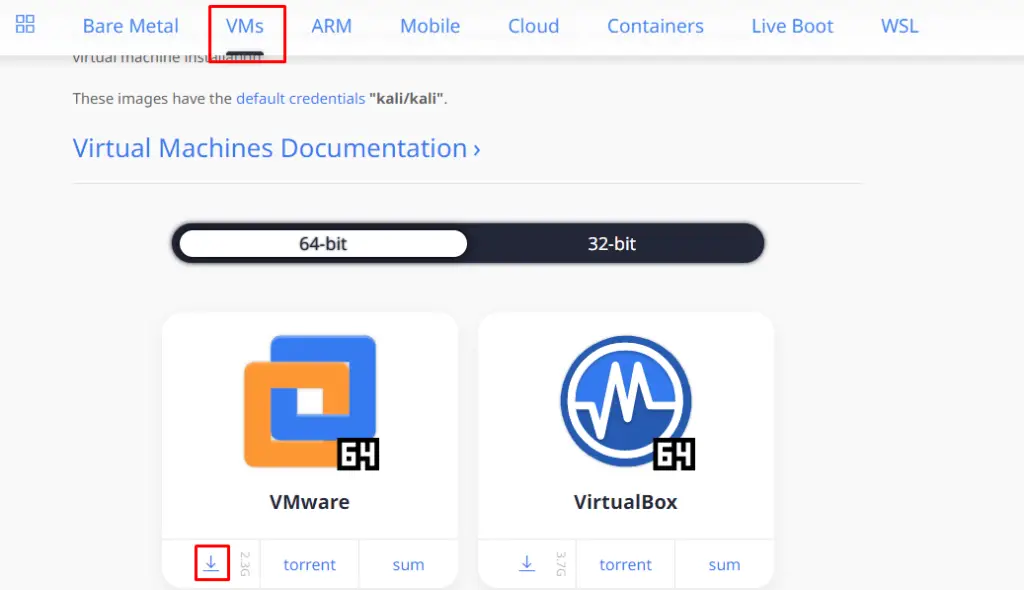
To download the ISO file of the Kali Linux, we will visit the official website of the “Kali Linux” and click on the “Download” button available on the home screen:

Click on the “VMs” as we are supposed to download it for the virtual box and then click on the download icon according to your requirement of 64-bit or 32-bit operating system:
It will take some time to download depending on the speed of your internet connection.
How to create the Kali Linux machine on the VirtualBox
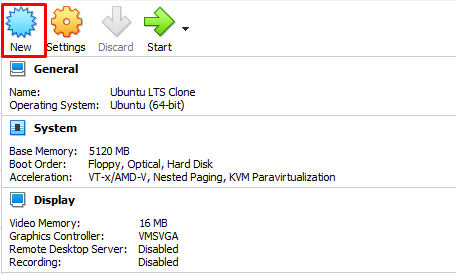
Launch the VirtualBox and if you do not have the VirtualBox installed, you can download it from its official website and install it by running its exe file. When the VirtualBox is launched, click on the “New” to make a new machine:
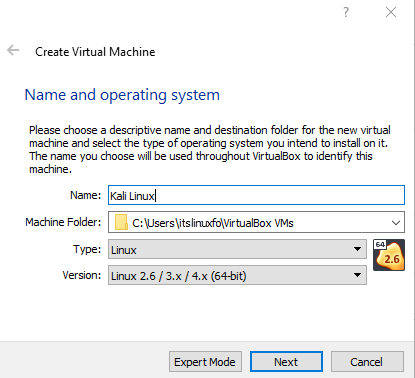
Assign a name to the machine, in our case, we are naming it with the “Kali Linux”:
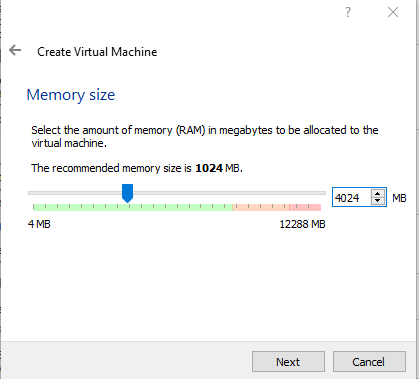
Assign the RAM memory to the machine, we have assigned it 4024 MB, you can assign it according to your wish:
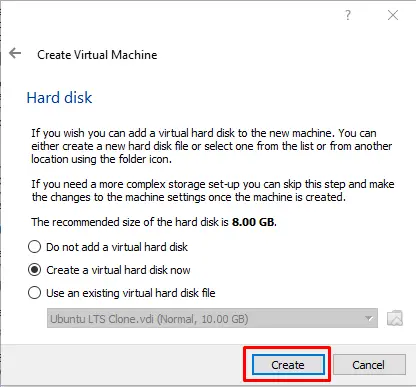
Now we will create a hard disk, for this, we will recommend you to go with the option of “Create a virtual hard disk now”:
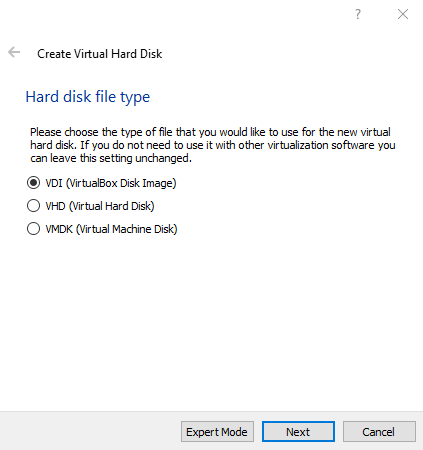
Choose the Hard disk type, we have chosen the “VDI”:
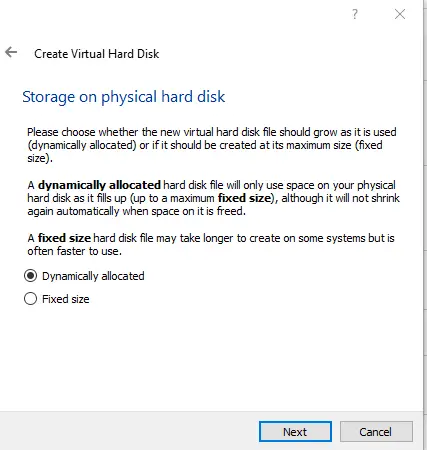
Choose the “Dynamically allocated” and click on the “Next” button:
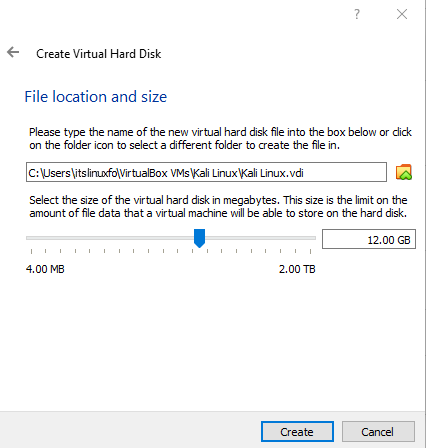
Now assign the storage memory, minimum 8 GB is recommended but you can assign more than it well:
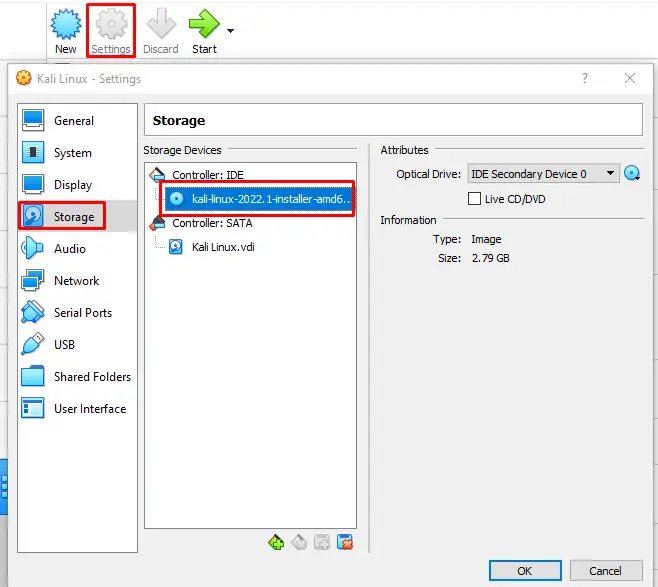
Click on the “Create” button to create a machine and then click on the “Settings”, a menu will be appeared, choose the “Storage” and attached the iso file of the Kali Linux, and then click on the “OK” button:
How to install the Kali Linux on the VirtualBox
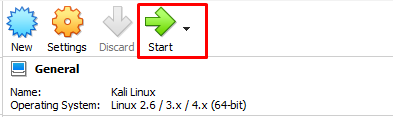
When the machine is created successfully, click on the “Start” icon to start the machine:
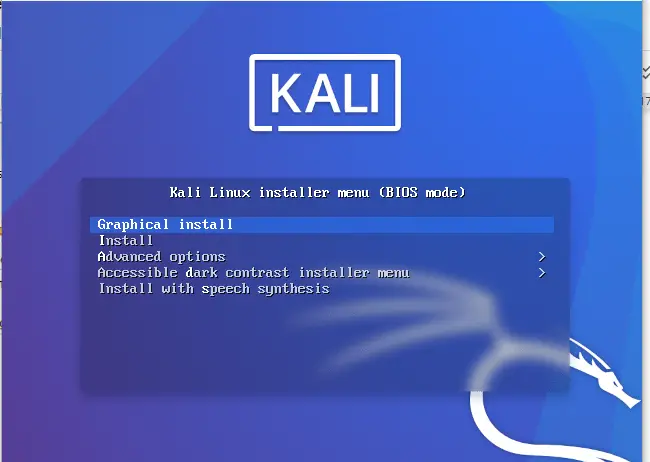
Choose the “Graphical install” from the options of the installation:
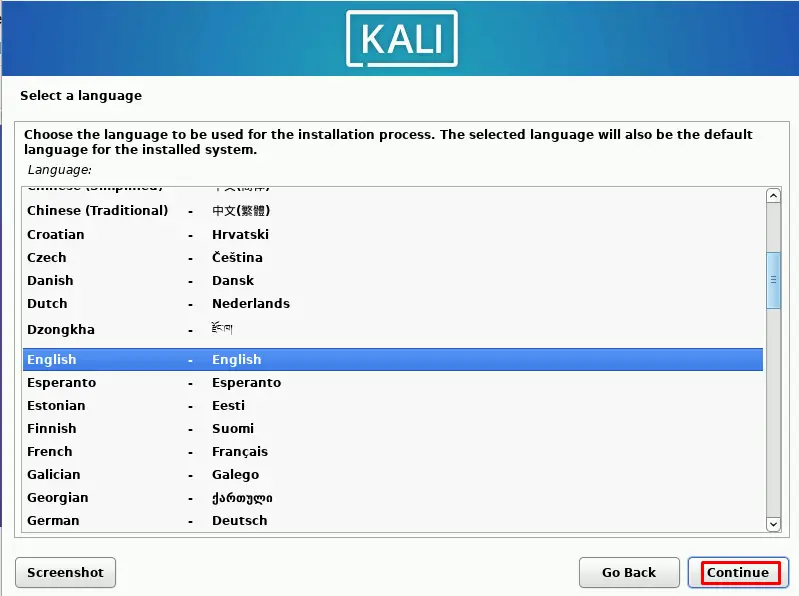
Select the language for the installation process, we are going to choose the “English” language:
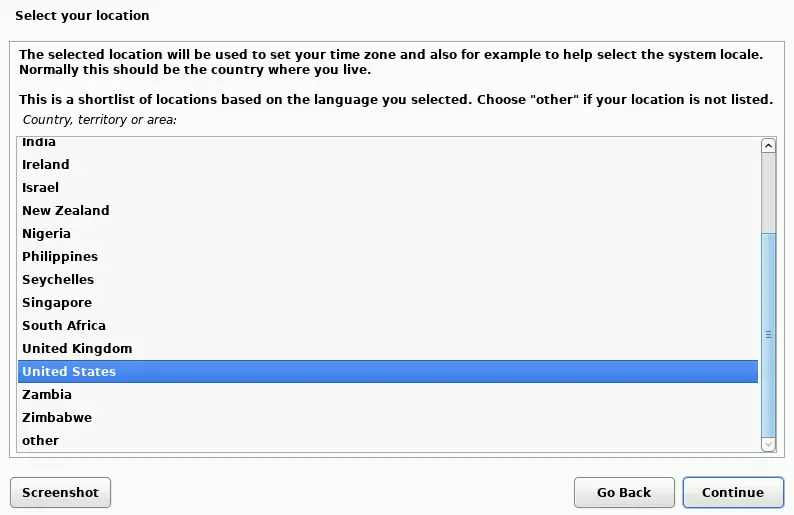
Select the location where you are living and installing the Kali Linux, in our case, we have chosen the “United States”:
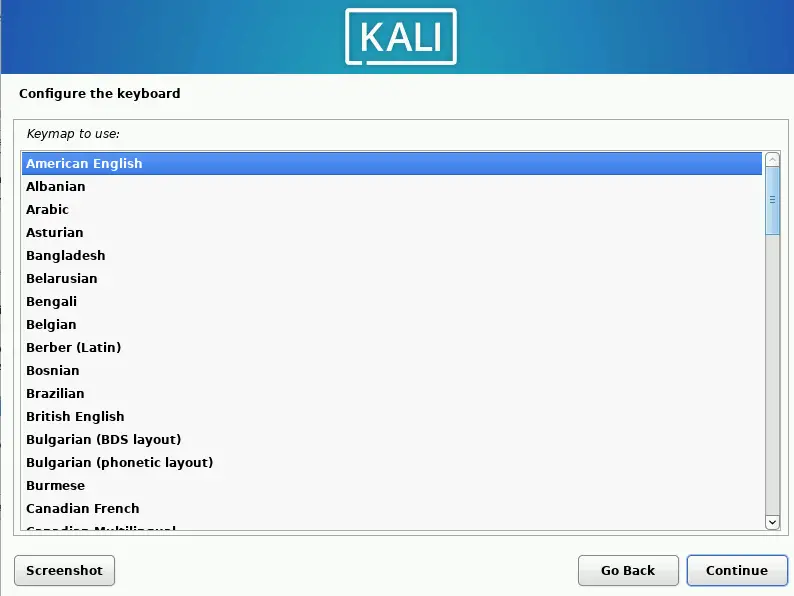
Choose the configuration layout of the keyboard you are using:
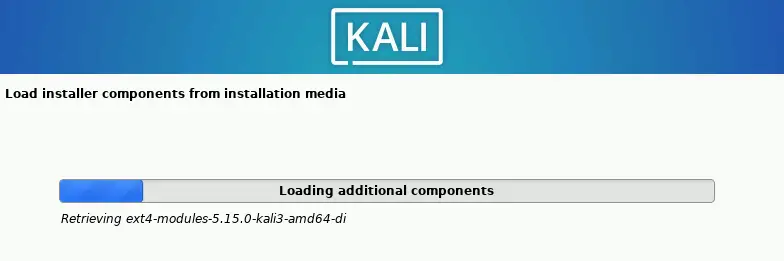
The installation will begins to start:
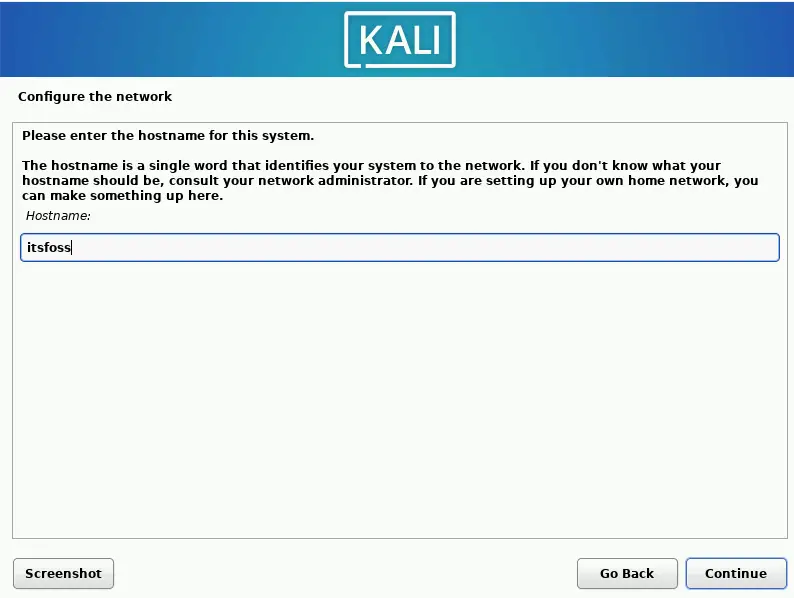
it will ask you to assign a hostname, we have assigned “itsfoss”, you can choose any other of your choice:
Add the user, provide its name:
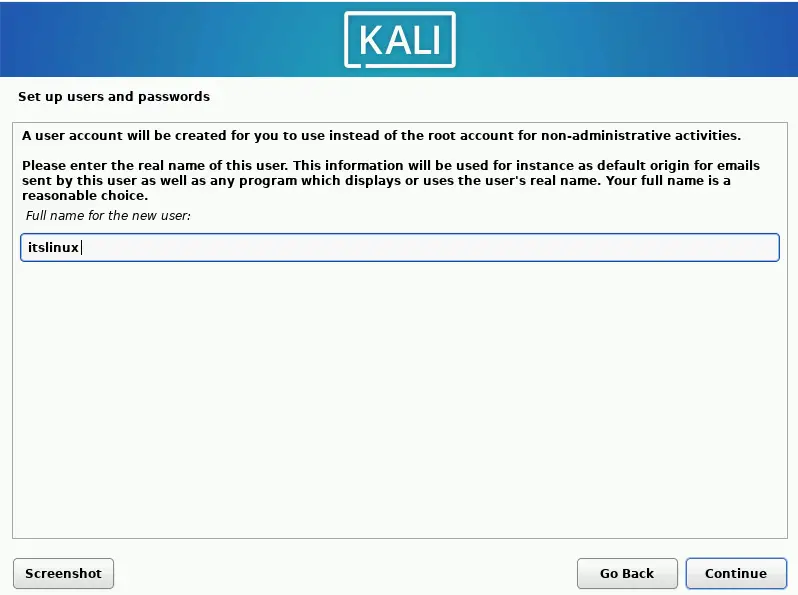
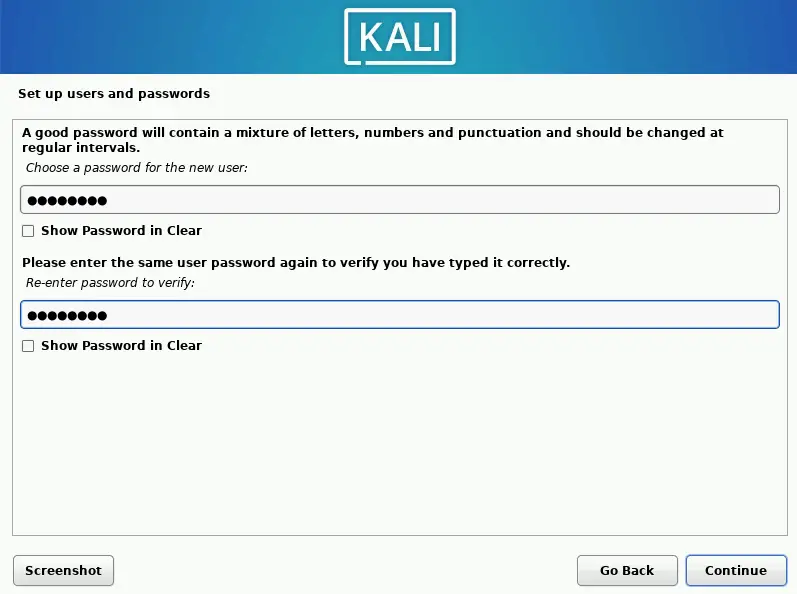
Then set the password for the newly created user “itslinux”:
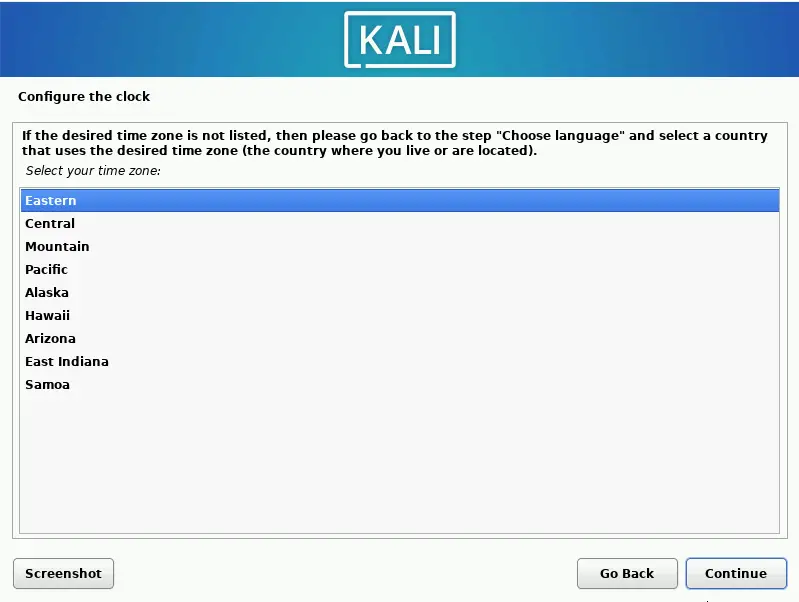
Choose the timezone of your region for the configuration of the clock:
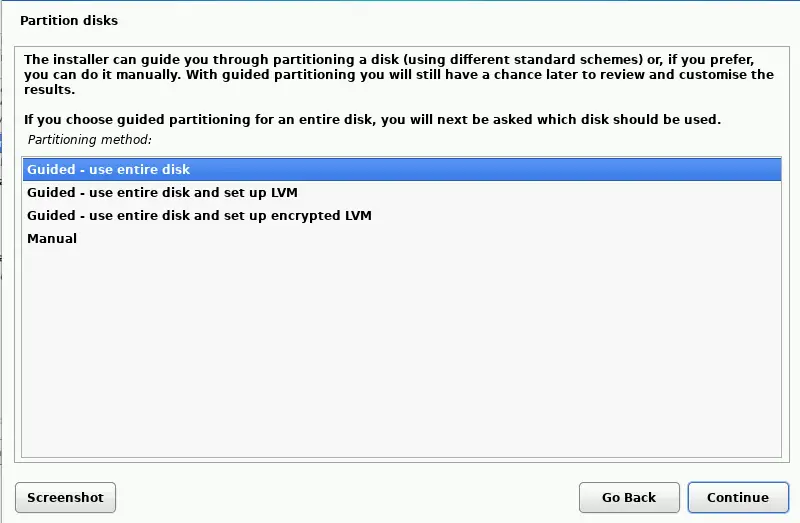
Choose the “Guided – use entire disk” from the Partition Disks option:
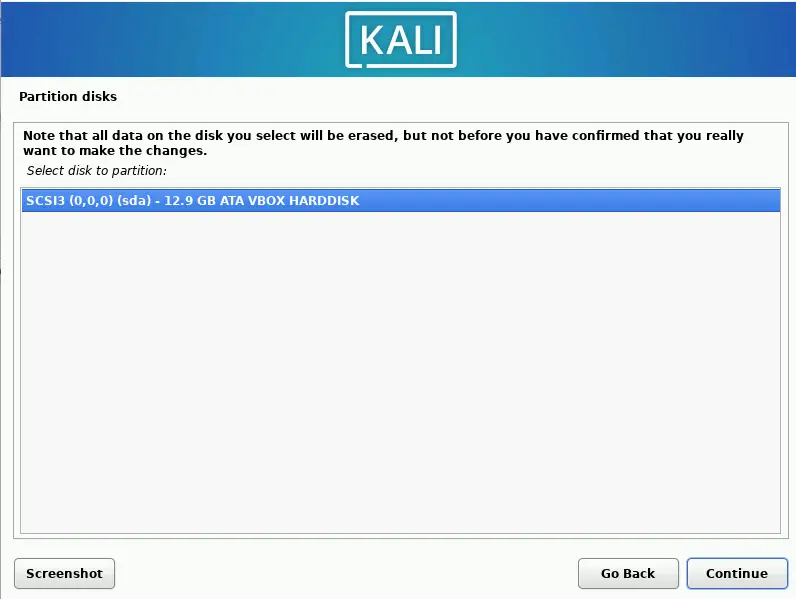
Choose the partition where you want to install the Kali Linux and click on the “Continue” button:
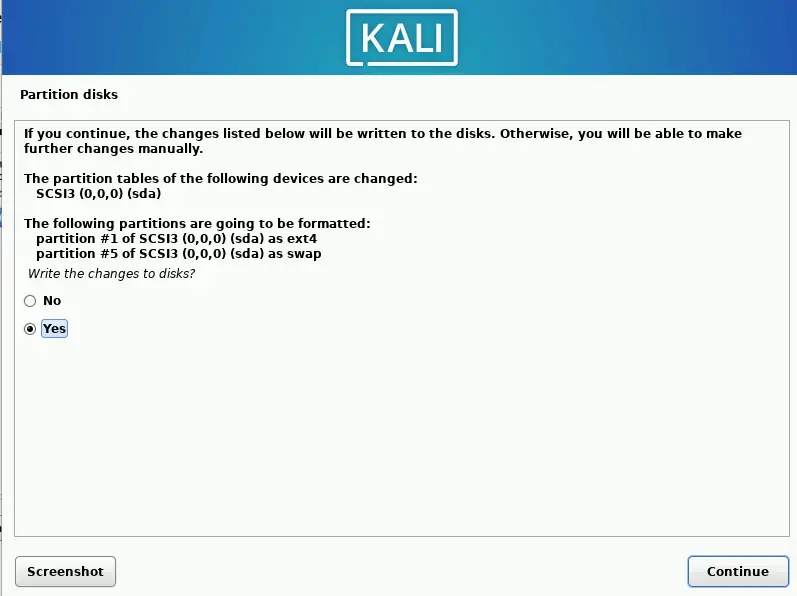
Check the “Yes” to save the new changes and click on the “Continue” button to proceed:
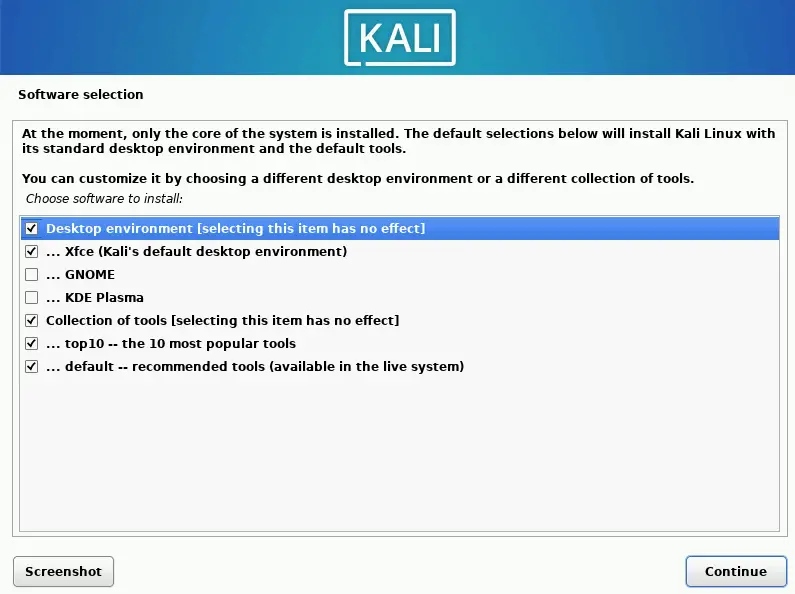
Choose the software you want to install by checking the options:
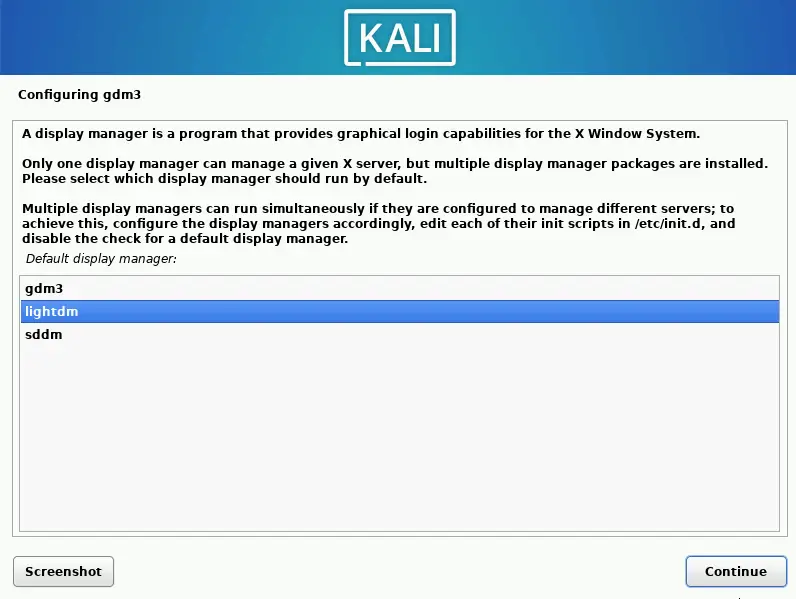
Choose the display manager, we are convenient with lightdm so we are selecting it, but you can choose according to your ease:
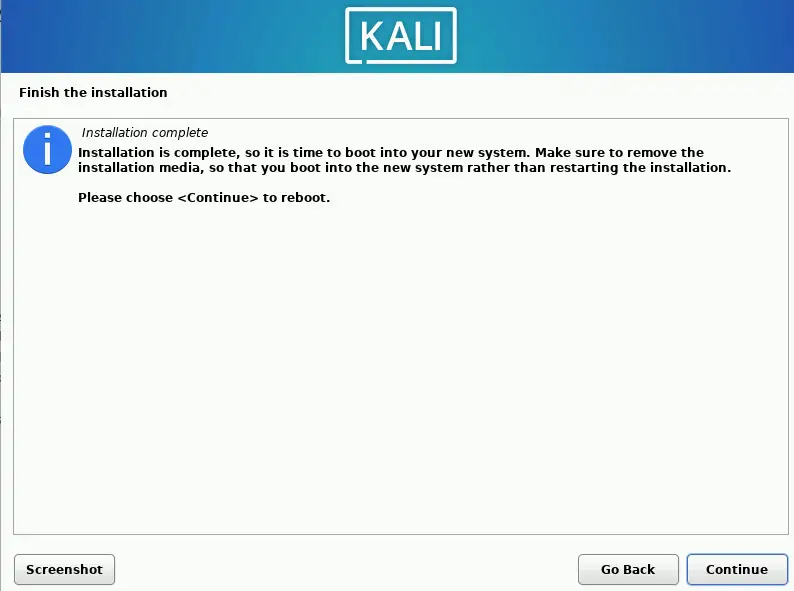
When the installation is complete, a reboot is required which can be achieve by clicking the “Continue” button:
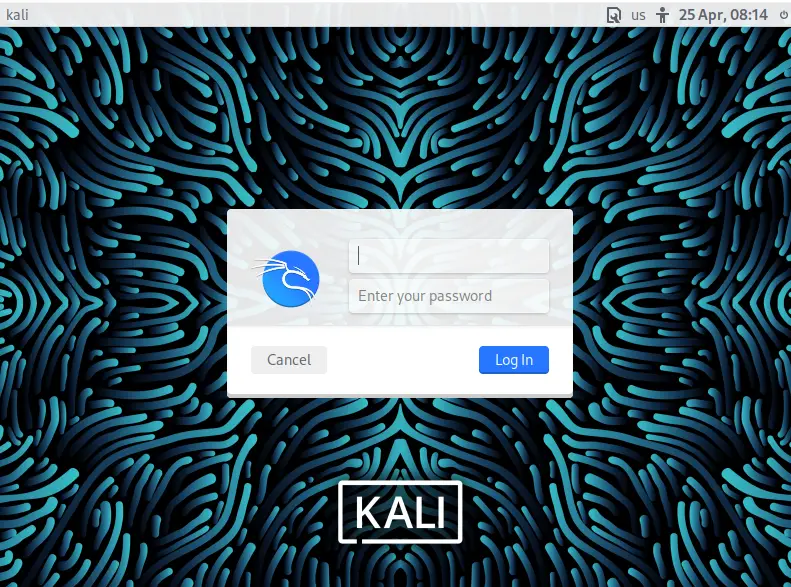
Login it by providing the set password:
You will see a home desktop display of the Kali Linux:

Conclusion
The Kali Linux is an open source Linux distribution developed in a secure environment with the application of the information security tasks. In this write-up, we have discussed the downloading and installation of the Kali Linux on the VirtualMachine.

Saryia is a technology entrepreneur and digital publisher specializing in Linux, open-source technologies, and developer education.