
VMware is a platform that allows the user to create and run a virtual machine with a variety of different operating systems. There exist another feature within this software known as the VMware tools which allow additional features and customization for the virtual environments. Oftentimes, this VMWare tools option is greyed out (unable to click or use).
This article will demonstrate how the user can install these VMware tools on the platform when the option is greyed out in the platform.
How to Install the VMware Tools When the Option is Greyed Out?
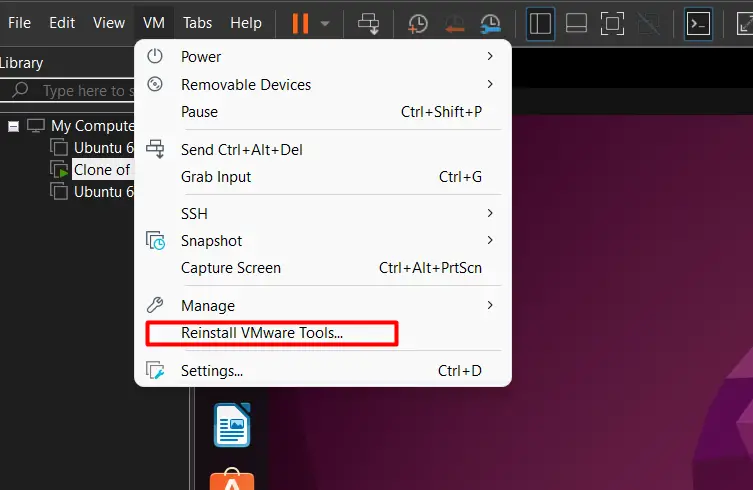
In the newer versions of VMware Workstation, click on the “VM” tab from the menu bar and the option “Install VMware Tools…” is displayed which is currently greyed out as shown below:
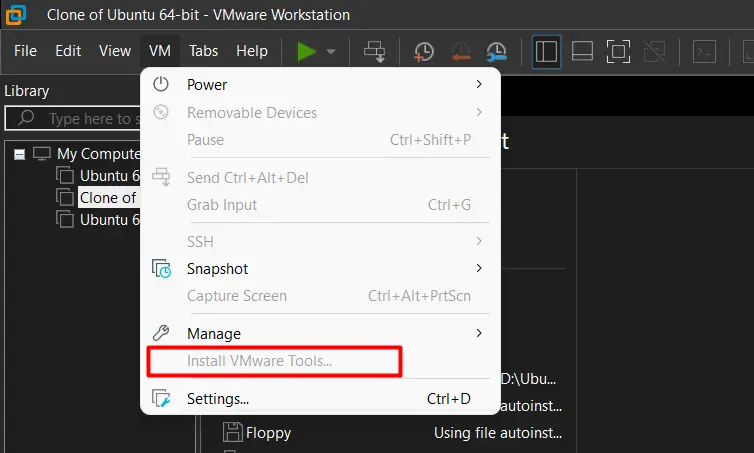
Note: In the older versions of VMware workstations, this option can be seen from the “Manage” option in the “VM” tab.
Solution 1: Use the Physical Drive
To use the CD/DVD as a physical drive, follow these steps:
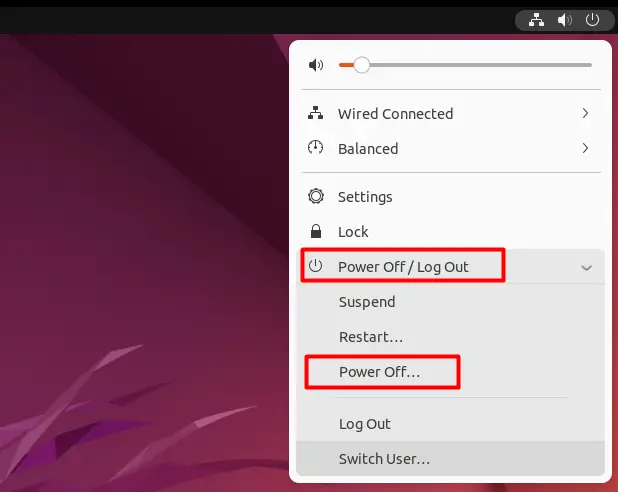
Firstly turn off your guest system (preferably, all the virtual machines must be turned off):

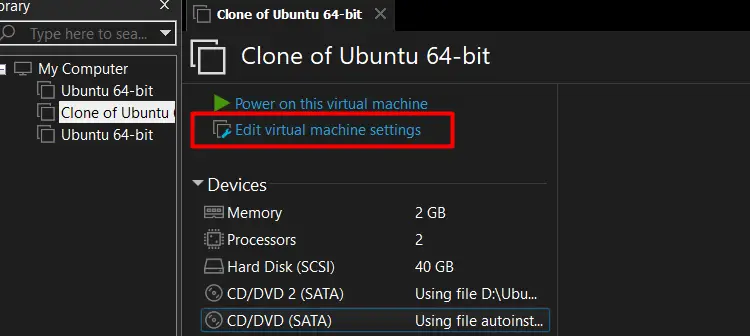
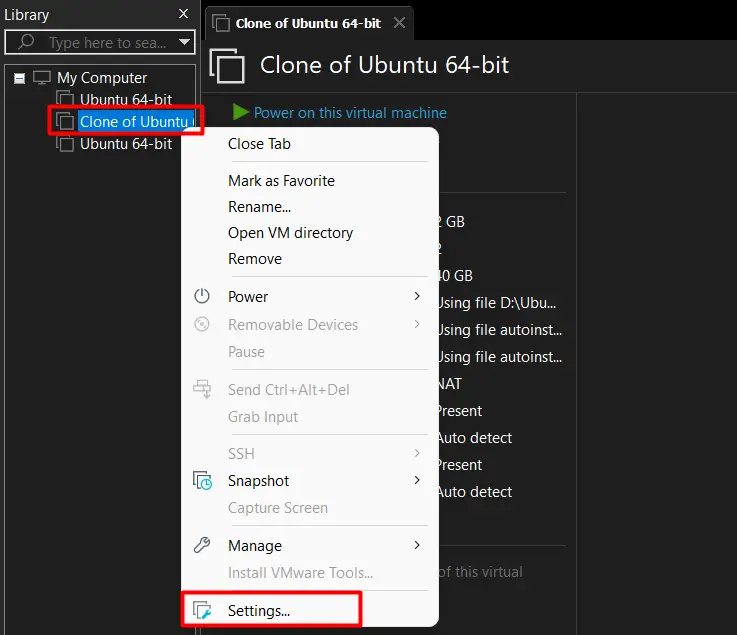
The next step is to open the settings for the virtual machine by clicking on the “edit this virtual machine” option as shown below:
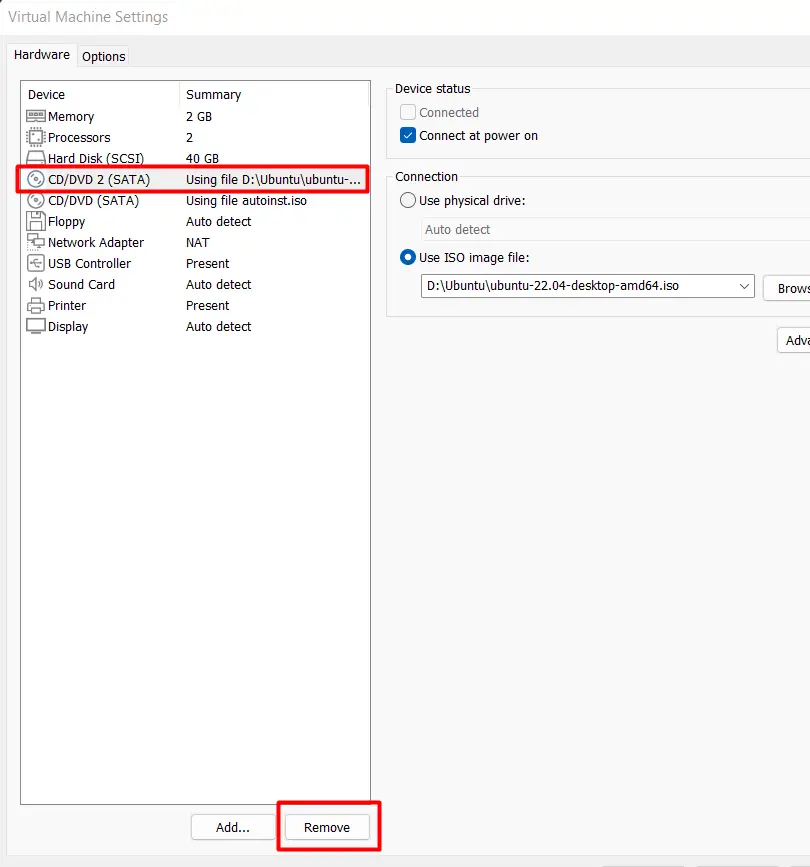
In the “Hardware” tab, click on the CD/DVD, which has the path to the iso file, and then remove that device as demonstrated below:
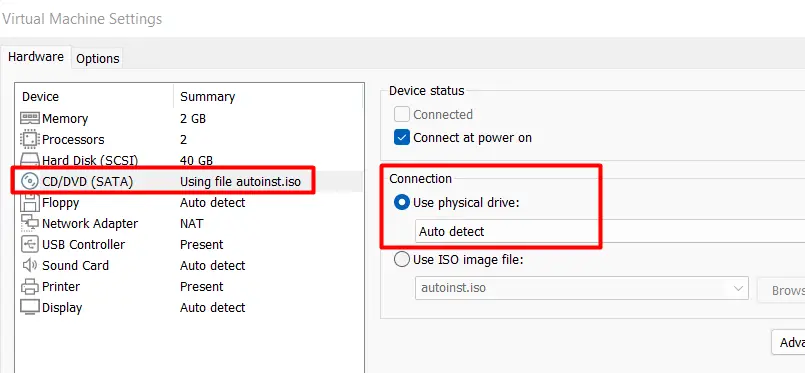
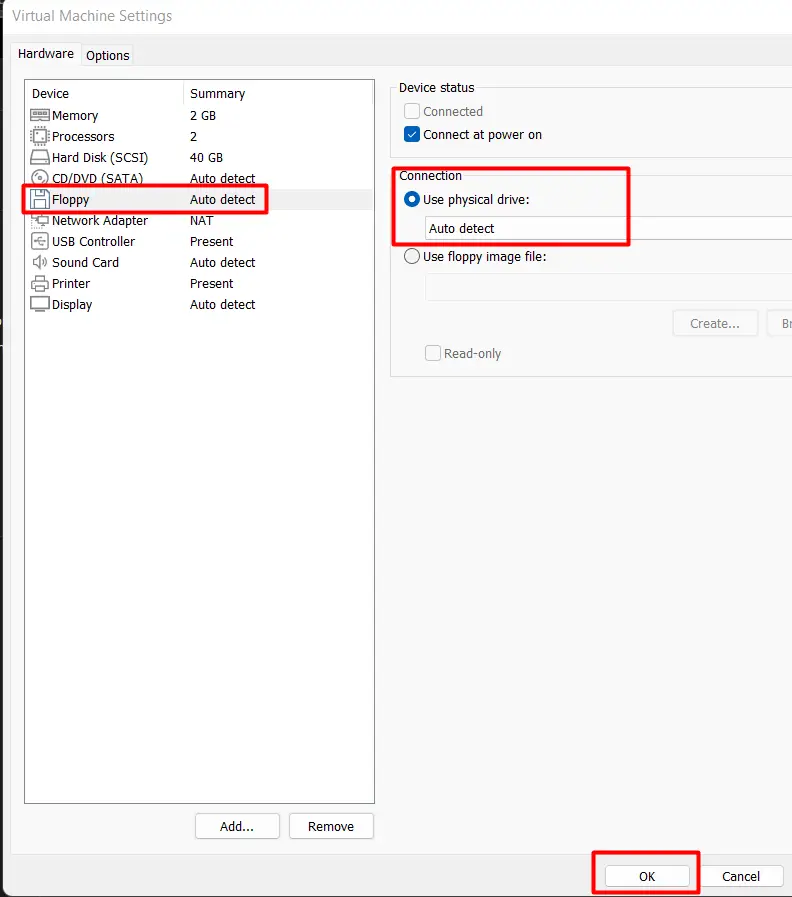
Next, click on the other CD/DVD option and change its connection type to the “Use physical drive” option and then select “Auto detect”, as demonstrated in the snippet below:
Repeat this same step for the “Floppy” as well, and then save these settings:
Once done, turn the virtual machine on and log in. The “install VMware tools” option should no longer be greyed out, as shown below:
Since the system above already have the tools installed, it shows “reinstall” instead of “install”, but this method works in either case.
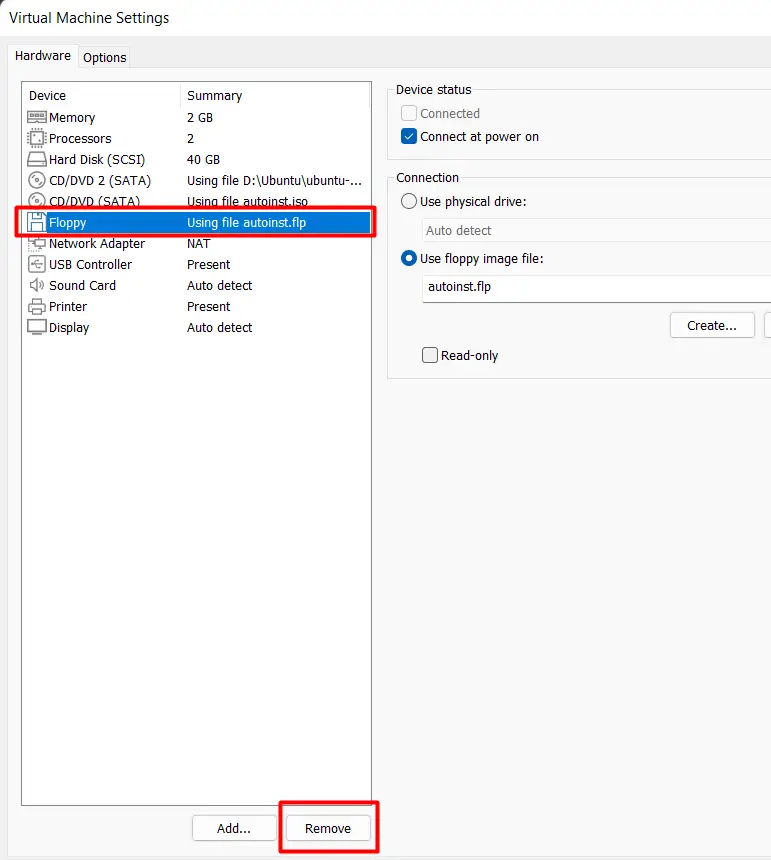
Solution 2: Remove the Floppy Disk
It may seem strange, but removing the Floppy disk from your hardware settings will resolve your problem and allow you to install or reinstall the VMware tools. The first step for this is to power off your guest system as demonstrated:
Once your guest system has been shut down, right-click on the guest system where you want to install the VMware tools and then click the “Settings” option as shown:
Once the settings open, go to the “Hardware” tab and click on the “Floppy” option and then click on the “Remove” button. This will remove the “Floppy Disk” from your guest systems hardware as shown:
Once done, the VMware tools options will be available to use.
That’s it from this informative guide!
Conclusion
The problem with the VMware tool install option being greyed out can be resolved in two distinct methods. The first method is to open the settings and remove the “CD/DVD” which contains the “iso file” path. Then, set the “floppy” disk and the other “CD/DVD” to use “physical drive” and “auto detect” the “connection type”. The other method is to remove the “floppy” disk option from the settings. This article has provided great detail on how both options can be implemented on your system to enable the Vmware tools option.

Saryia is a technology entrepreneur and digital publisher specializing in Linux, open-source technologies, and developer education.