
In Linux distributions, the “netcat(nc)” command is a powerful tool to diagnose networks using TCP or UDP protocols. It monitors traffic flow between systems, including port scanning, client/server connection, transferring files, and many more. This guide will demonstrate the installation and practical usage of the “netcat” command in Linux systems. The content that carried out this article is as follows:
- How to Install netcat in Linux?
- How Does the netcat Command Work in Linux?
- How to Use the netcat Command in Linux?
- Example 1: Test a Specific Port to a Website
- Example 2: Create a Command Line Chat Box
- Example 3: Scanning Multiple Ports
- Example 4: Transferring Files
Let’s start with installation.
How to Install netcat in Linux?
The “netcat” command is quite useful for network admin for troubleshooting the network. To install the “netcat”, the syntaxes for various distributions are listed below:
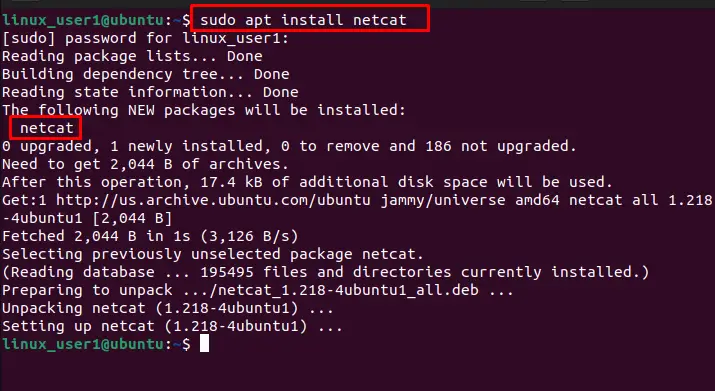
For Debian/Ubuntu Based Distributions:
$ sudo apt install netcat
For installation of “netcat” in other linux distributions, follow the script as mentioned below:
For CentOS/RHEL:
$ sudo yum install nc
For Fedora:
$ sudo dnf install nc
Now, let’s check how the “netcat” command works.
How Does the netcat Command Work in Linux?
The “netcat” command’s working depends on the syntax which is described below:
Syntax:
$ nc [options] host port
In the above syntax, the “host” represents the IP address, and “port” specifies the numeric port number.
The options supported by the “netcat” command are provided below:
| Options | Description |
|---|---|
| -v | The option specifies the verbosity for printing output. |
| -n | It is utilized to skip DNS warnings. |
| -z | It performs scanning without a connection established. |
| -l | This option is used for listening connections. |
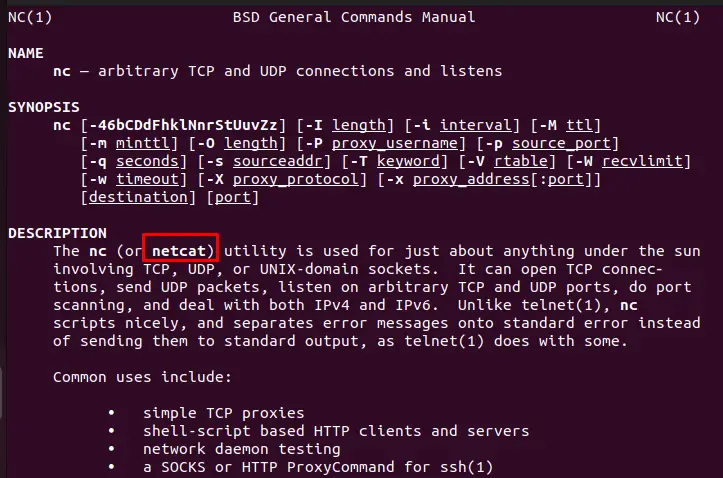
Additionally, you can explore all functionality of “netcat” through the “man netcat”. It displays multiple synopses with their description below:
Let’s explore the usage of the “netcat” command in various scenarios.
How to Use the netcat Command in Linux?
This section briefly demonstrates the “netcat” command through practical examples. Let’s dig into them one by one:
Example 1: Ping a Specific Port to a Website
An example is carried out through the “nc” command to ping a port “443” to the “google.com” site. Additionally, the “-z” flag displays the connection status, and “-v” sets the verbose mode:
$ nc -zv google.com 443
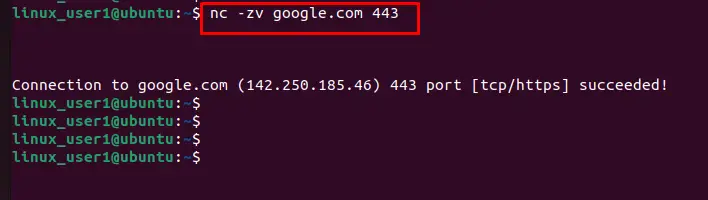
The message shows that the connection is successfully established through the “443” port.
Example 2: Create a Command Line Chat Box
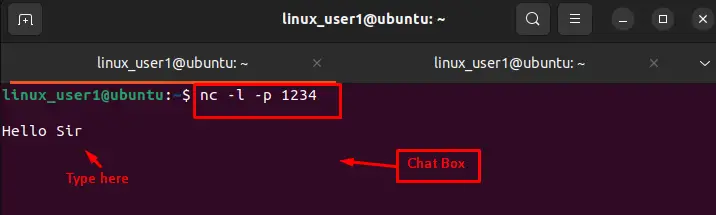
In Linux, the “nc” command assists in creating an environment for sending or receiving messages. For this, “-p” specify the port number as “1234”, and “-l” shows the operation performed in the “listen” mode to send a custom message, i.e., “Hello Sir”:
$ nc -l -p 1234
Keep running the terminal and meanwhile open another terminal. In that new terminal, execute the command “nc localhost port#”. For instance, the following command will connect us to the chat box:
$ nc 127.0.0.1 1234
In the above script, users can target a random IP address such as “127.0.0.1” and port number “1234”.
After executing the script, the messages can be received and sent from the respective terminals.
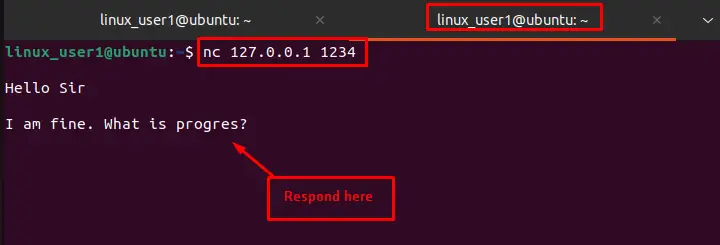
Here you go! The chat box has been created successfully.
Example 3: Scanning Multiple Ports
Port scanning is one of the essential tasks that the “netcat” command does. To scan a specific port, the “nc” command can be used with different port numbers such as “80”, “22”, and “53”:
$ nc -zvn 172.67.209.252 80 22 53
The above syntax is used to scan multiple ports
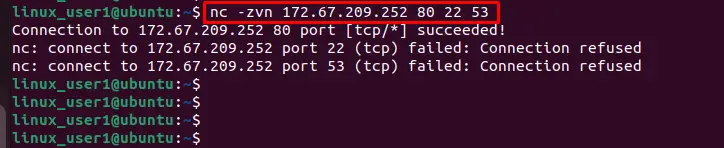
After executing the command, you can verify that a connection has been successfully established through the “80” port.
Moreover, you can specify the range of port numbers as “80-90” to scan multiple ports as below:
$ nc -zvn 172.67.209.252 80-90
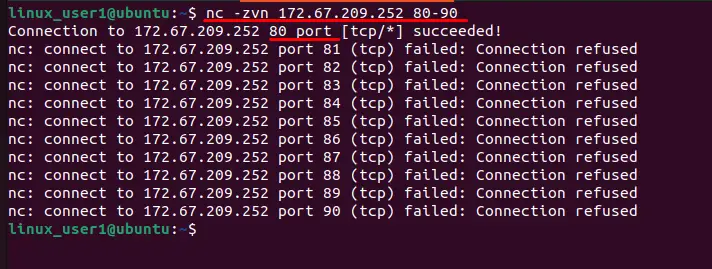
All ports failed to establish connection except the “80” port number.
Let’s explore another “netcat” command usage.
Example 4: Transferring Files
A file can be transferred to different devices using the “netcat” command. To do so, a file “itslinuxfoss.txt” is created and sent through the Linux terminal:
$ nc -l -p 9899 > itslinuxfoss.txt

The “-l” and “-p” represent the listening mode and port number, respectively. Additionally, the “9899” specifies the port number for transferring files.
Now, open another terminal and execute the below script in the home directory that receives the same file as seen below:
$ nc -w 2 192.168.1.102 9899 > itslinuxfoss.txt

In the above execution, the “-w 2” represents the timeout of two seconds, “9899” specifies the port number and a random IP Address “192.168.1.102”.
Finally, you can verify through the “ls” command that the specified file “itslinuxfoss.txt” has been successfully transferred to this terminal:

That’s all from this guide.
Conclusion
In Linux, the “netcat” command is utilized to monitor the data across multiple devices within a network. Using this command, you can perform various operations, such as testing a specific port to a website, creating a chat box for bidirectional messages, scanning multiple ports, and transferring files. This guide has explained the practical usage of “netcat” along with installation in the Linux operating system.
