
In Linux, the “tar.gz” is the archive file containing more than one file in a compressed format. A “tar.gz” file may contain simple files, and directories or comprise some installable files. If the “tar.gz” is equipped with some installable files then the users can install this file else the installation is not possible. The root/sudo permissions are compulsory for installing the “.tar.gz” files otherwise, the user permission will be denied.
This post will present the step-by-step procedure to use the sudo command for the installation of “.tar.gz” files in Linux by supporting the below content:
- What is the tar.gz File in Linux?
- Why Need to Install a tar.gz File Using sudo Command in Linux?
- How to Install a tar.gz File Using sudo Command in Linux?
- How to Create/Configure the Tar.gz file in Linux?
- How to Extract/Decompress Tar Files to a Directory in Linux?
- How to Display the Content of a Tar File in Linux?
- How to Untar Files in Linux?
- How to Run the sudo Command Without a Password in Linux?
- How to “Fix: tar not found in the archive” in Linux?
- How to Extract/Unzip the GZ File in Linux?
- How to Resolve/Fix “tar: removing leading `/’ from member names”?
What is the tar.gz File in Linux?
The tar.gz file is the compressed archive file having several files or directories in Linux. It is created by using the tar command with the -z option, which invokes the gzip compression program. A tar.gz file has the extension .tar.gz or .tgz and can be extracted by using the tar command with the -x and -z options.
To explore more about the .tar.gz file, follow our detailed guide on “tar.gz file in Linux”.
Why Need to Install a tar.gz File Using sudo Command in Linux?
The sudo command allows users to execute/run commands as another user, normally the superuser or root. To install a tar.gz file in Linux, users need to extract its contents and run the installation script or executable. This way, you can install a tar.gz file that needs root access without logging in as the root user.
However, some tar.gz files may require root privileges to install, especially if they modify system files or directories. In that case, utilize the sudo command for executing commands as another user/superuser. The sudo command asks users for their password and then executes the script with permissions.
How to Install a tar.gz File Using sudo Command in Linux?
To install the “tar.gz” files in Linux via the sudo command, first, navigate to the downloaded or compressed file and extract the file via the “tar -zxf filename.tar.gz”. Furthermore, the installation of the “tar.gz” files is quite simple in Linux operating systems that is given below:
Prerequisite: Install Dependencies
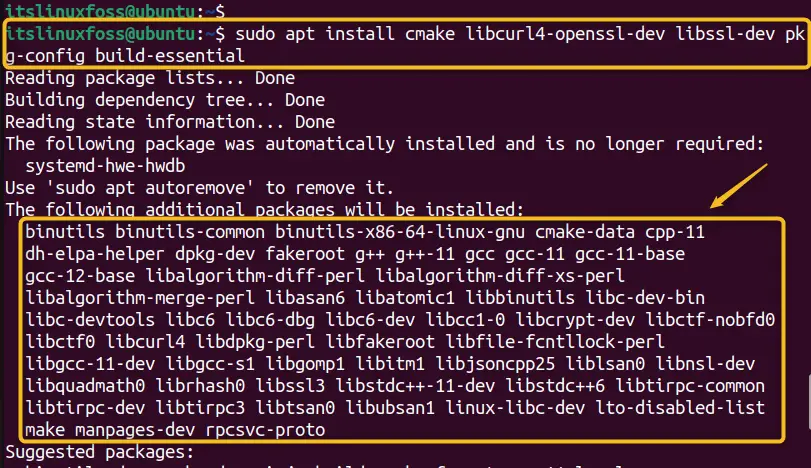
To install the tar.gz file using the sudo command, users must be required to install some dependencies. By doing this, different commands of Linux distributions are given below:
sudo apt install cmake libcurl4-openssl-dev libssl-dev pkg-config build-essential   # Ubuntu/LinuxMint/Debian
sudo pacman -S base-devel   # Arch Linux
sudo dnf install dh-autoreconf curl-devel expat-devel gettext-devel openssl-devel perl-devel zlib-devel gcc curl cmake     # Fedora, RHEL
To install a tar.gz file using the sudo command, just go through the below-mentioned steps to install it:
Step 1: Download the tar.gz File
First, download the tar.gz file from the source website or repository. Also, users can create the .tar.gz file by following our detailed guide on “How to Create the Tar.gz file in Linux”.
Let’s download the file named “git.tar.gz” in the “Downloads” directory:
curl --output git.tar.gz https://mirrors.edge.kernel.org/pub/software/scm/git/git-2.26.2.tar.gz

The output shows that the “git-2.26.2.tar.gz” file has been downloaded with the name of “git.tar.gz” in the “Downloads” directory.
Note: Users can also navigate to the particular directory where they downloaded the file via the “cd” command or view via the “ls” command:

The downloaded file “git.tar.gz” has been confirmed in the home directory.
Step 2: Extract the “.tar.gz” File
To extract the files from the archive, users may need to use the “tar” command along with the “zxf” options. The “-z” flag tells tar to use gzip compression, the “x” flag extracts the tar file contents, and the “-f” flag specifies the archive file name. In this way, these options allow users to forcefully extract the compressed file.
Let’s extract the “git.tar.gz” file using the “tar” command via the following script:
tar -zxf git.tar.gz

The execution of the above command represents the extraction has been performed successfully.
Step 3: Jump Into the Extracted Directory
The next step is to jump into the extracted directory such as the “git-2.26.2” file. In this way, jump to the directory having extracted files, usually with the same name as the archive:
cd git-2.26.2

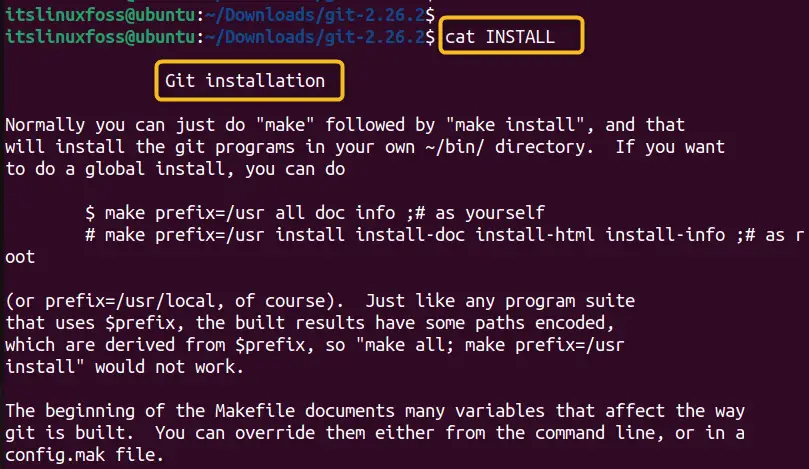
Important Note: Read the “README.md” or “INSTALL” file for specific instructions on how to install the software.
Note: If users find the error “Fix bash: ./configure: No such file or directory”, install the dependencies that are given in the above pre-requisite or navigate to the “Fix “bash: no such file or directory”.
Step 4: Configure the Files
After that, configure all the files in the extracted directory by running the below command:
./configure

In this way, the file has been ready for the configuration process.
Step 5: Compile the Files
Once you have configured all the files, compile them using the “make” command in the terminal. The make command gives directions to perform successful execution and builds the software packages:
make
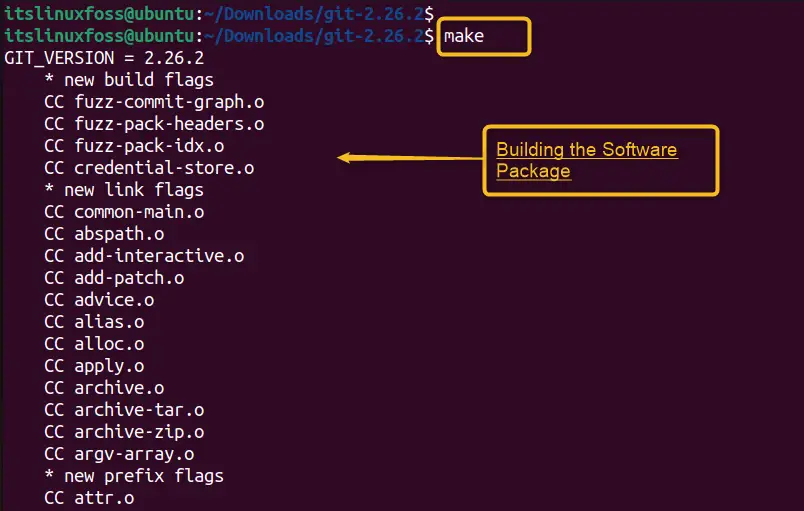
This process will take some time and files will be compiled.
Step 6: Install the Files
Finally, install the compiled files using the “sudo make” command. For this, the user must require the sudo privileges as the below command:
sudo make install
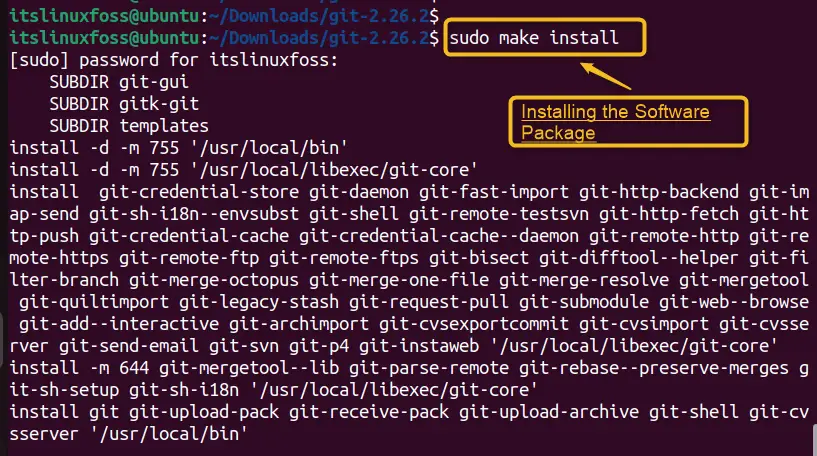
In this way, users can install the packages along with all dependencies by executing the “make install” command.
Verify Results
Let’s verify the installation of the “git” package by checking its version using the below command:
git --version

The output shows that the git version 2.26.2 has been installed in the Linux system.
Note: If users cannot find the installed version, they can restart the system by executing the “reboot” command in the terminal.
That is all the stuff regarding the installation of a .tar.gz compressed file utilizing the sudo command in Linux.
Let’s check out different queries regarding the .tar.gz file in Linux.
How to Create/Configure the Tar.gz file in Linux?
A tar.gz file is a compressed archive having several files. To create a tar.gz file in Linux, users can utilize the tar command with the -zcvf flags. The syntax is:
tar -zcvf archive_name.tar.gz file1 file2
In this syntax, the “-z” option tells tar to use gzip compression, the “-c” option creates a new archive, the “-v” option shows the progress and the “-f” option specifies the name of the archive.
To explore more about the creation of a tar.gz file on the Linux operating system, go to our guide “Create the Tar.gz file in Linux”.
How to Extract/Decompress Tar Files to a Directory in Linux?
To extract tar files to a particular directory in Linux, use the -C option of the tar command. The syntax is “tar -xf archive.tar -C /path/to/directory”. It extracts the archive.tar contents to the particular directory.
To read the guide in detail, follow our topic on “Extract tar Files to Specific Directory in Linux”.
How to Display the Content of a Tar File in Linux?
To display the content of a tar file in Linux, users can utilize the tar command with the -t flag. It enlists the files as well as directories in a tar file and displays the files and directory names in the terminal.
If users are required to read a comprehensive guide, follow this “View Content of Tar File”.
How to Untar Files in Linux?
To untar files in Linux, utilize the tar command with the options. The tar command can create as well as extract compressed files that store multiple files and folders. The tar command extracts an archive file, by using the -x flag, along with the name of the archive file.
For further details, move to the guide on “untar-files-Linux”.
How to Run the sudo Command Without a Password in Linux?
The sudo command permits users to execute the script as another user, normally, superuser or root. By default, sudo needs users to enter a password before executing a command. There are situations where users may want to run sudo without a password, such as in scripts or automation tasks.
Users can read our detailed guide on this topic by navigating to the “Run sudo Command Without a Password”.
How to “Fix: tar not found in the archive” in Linux?
If users encounter the error message “tar not found in the archive” when trying to extract a tar file in Linux, it means that the file is not a valid tar archive or is corrupted.
To fix the error, verify the file type, if the file type is not a tar archive, rename it or use a different tool to extract it, depending on its actual format. Also, check its integrity, repair the archive, download the file again, or contact the source of the file for assistance.
To catch the information regarding the error, check out our guide on “Fix: tar not found in the archive”.
How to Extract/Unzip the GZ File in Linux?
To unzip or extract a GZ file in Linux, utilize the “gunzip” command. It creates a new file containing the same name but without the .gz extension. Users can also utilize the “gzip” command with the “-d” option to decompress the file.
Users can navigate to the detailed guide by following “Unzip/Extract the GZ File”.
How to Resolve/Fix “tar: removing leading `/’ from member names”?
This error means that tar is stripping the leading slash from the absolute paths of the files or directories in the archive. This is done to prevent tar from overwriting the existing files or directories in the root directory when extracting the archive.
To fix this error, use relative paths instead of absolute paths when creating or extracting an archive.
Also, use the -P or –absolute-names option to preserve the leading slash in the paths, and use the –strip-components option to remove a specified number of leading components from the paths when extracting an archive.
To read the article in detail follow our tutorial named “tar: removing leading `/’ from member names”.
Conclusion
To install the “tar.gz” files in Linux using the sudo command, first, navigate to the downloaded or compressed file and extract the file via the “tar -zxf filename.tar.gz”. Then, jump into the extracted folder through the “cd” command and configure and compile the files via the “./configure” and “make” command. Finally, install the packages through the “sudo make install” command. This write-up has illustrated the step-by-step procedure to install the “tar.gz” file using the sudo command
