In Linux username plays a significant role in the identification of multiple user accounts. It denotes the identity of the specified user while using the system resources and performing different tasks on it. It is not set automatically; however, the user specifies it manually during the creation of the virtual machine. Once it is set, only the root user has permission to modify or update it as per requirements.
Quick Outline
Let’s first start with prerequisites.
Prerequisites: Backup Important Data
It is recommended to create a backup of the important files before changing the username in Linux. This is because if any unexpected issue occurs while performing the desired functionality then the important data of that user will remain safe.
Now, move on to all approaches that change the username in Linux.
How to Change Username in Linux Through GUI?
The graphical user interface(GUI) is a more convenient and easy way to perform different operations on the Linux system as compared to remembering different commands. However, in some situations, it cannot perform the tasks properly as on CLI.
Keeping this in mind, if still someone wants to change the existing username through GUI, then follow the below-stated steps of instructions.
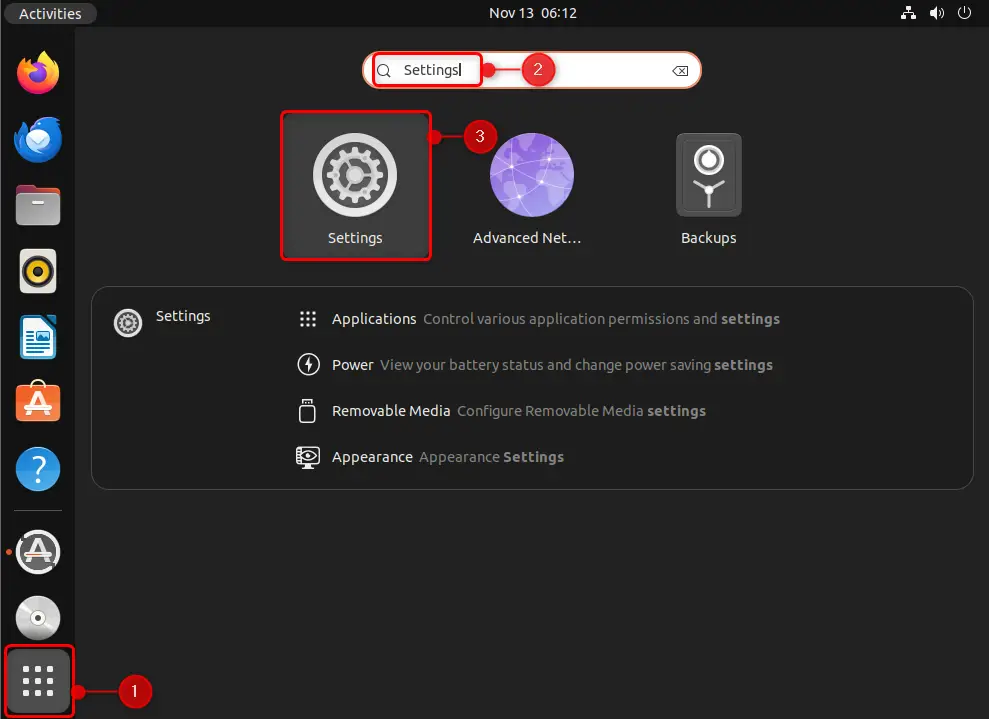
Step 1: Open System Settings
First, open the “Application Menu” and “Search” for the system “Settings” and open it:
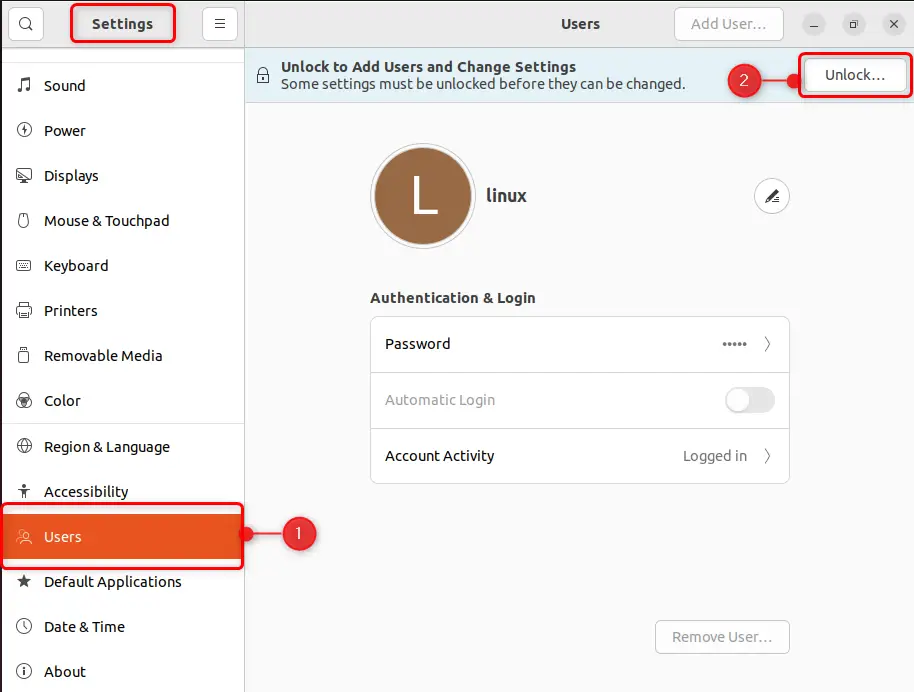
Step 2: Unlock the Users Section
Next from the “Settings” window, navigate to the “Users” section and “Unlock” it to change the existing username:
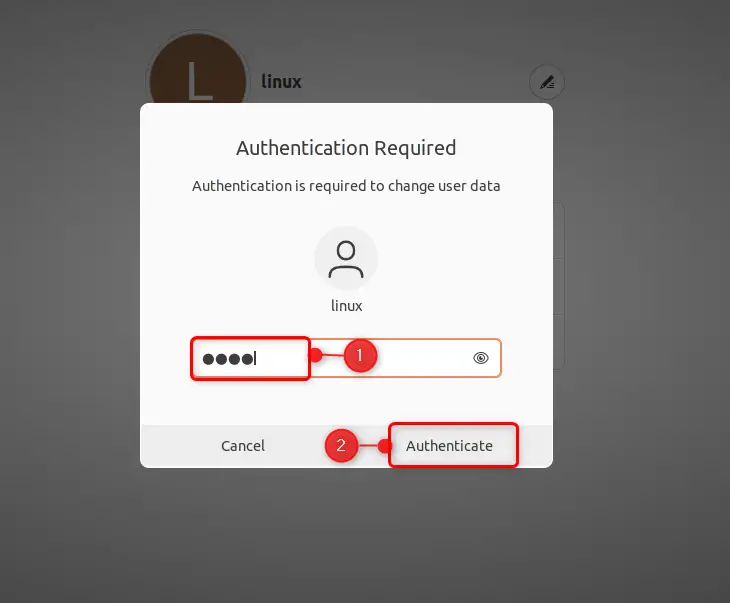
The unlock step requires the system administrator authentication in the form of its “password”. Enter the root user password and “Authenticate” it:
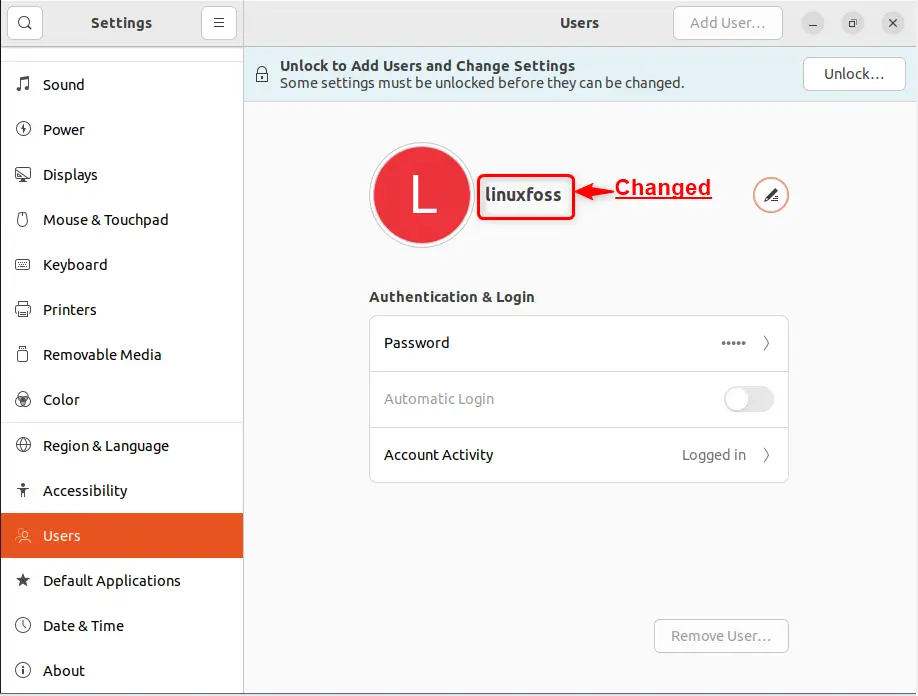
Step 3: Change the Existing Username
Now, click on the “Edit” option and modify the existing username:
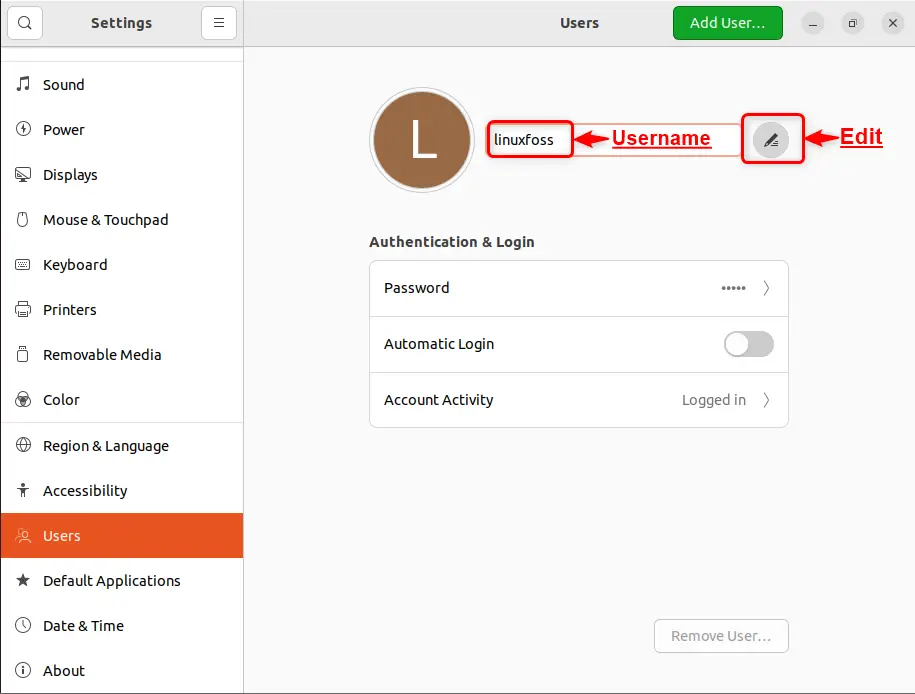
Step 4: Verification
It can be observed that the existing username has been replaced with the new one as per requirement:
Close all the tabs.
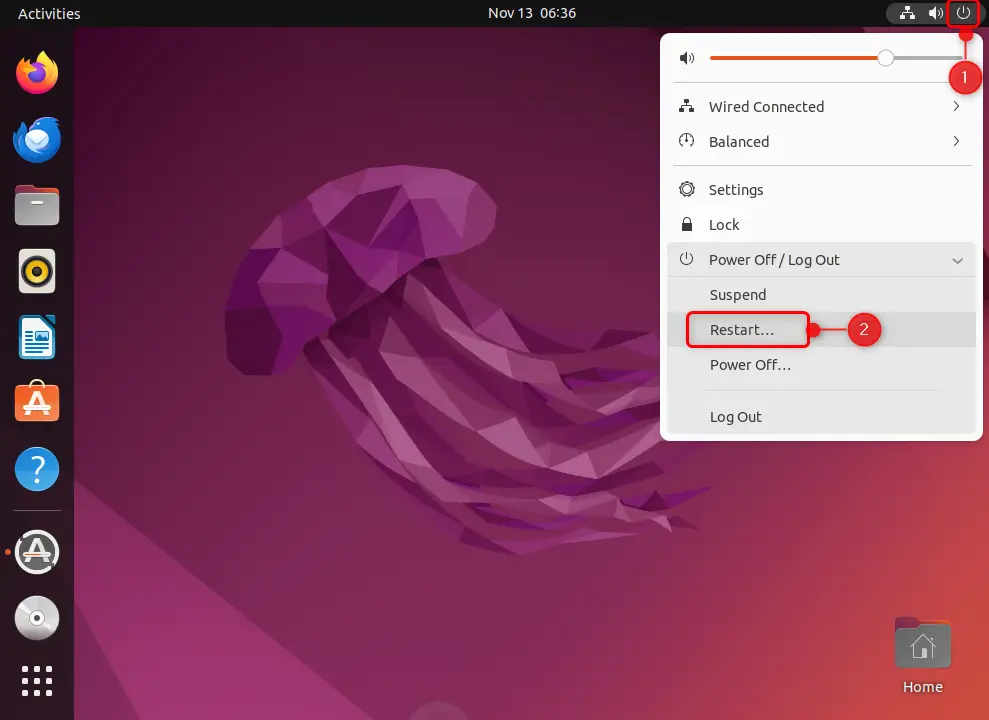
Step 5: Restart the System
For more verification “restart” the system to make the changes effective. To do so, click on the “shutdown” button and select the “Restart” option from its dropdown menu:
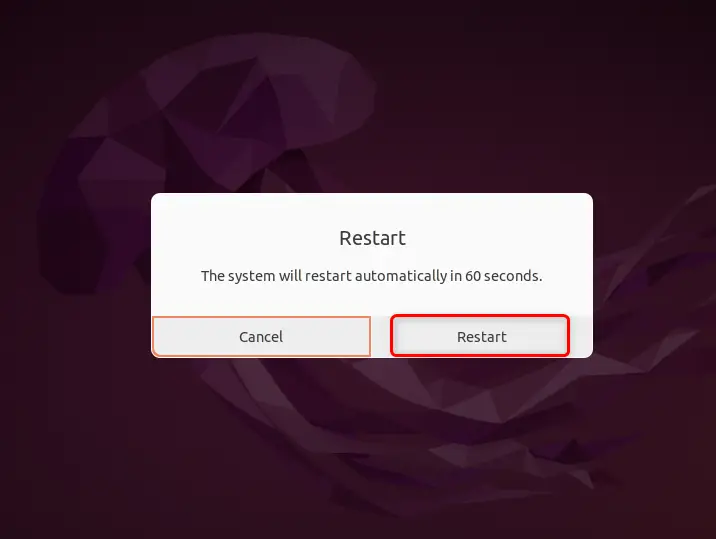
After that, a dialogue box will pop up that informs the system will automatically restart after “60” seconds. To do this immediately, click on the “Restart” option:
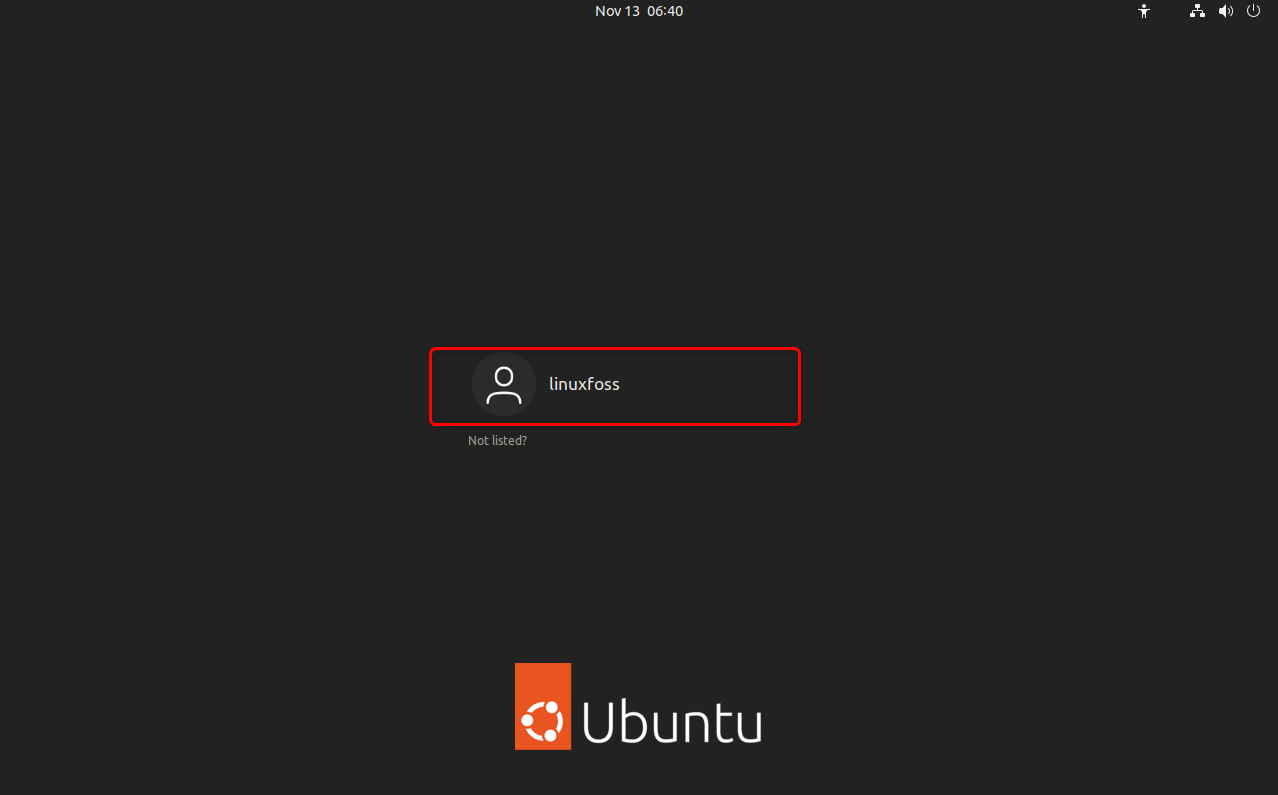
The restarting process pops up the login screen that shows the new modified username. Enter the password to use the current system with the updated username:
Step 6: Check the Update Username Home Directory
The GUI method cannot change the home directory of the updated user. To verify this, execute the “pwd” command in the terminal(Ctrl+Alt+T):
pwd
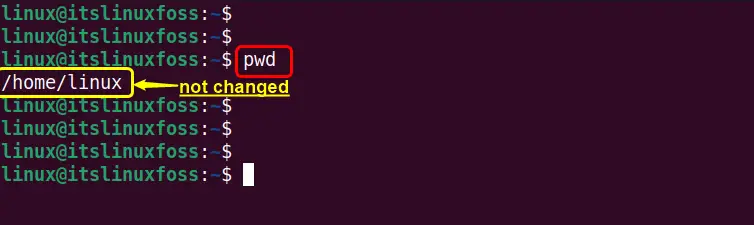
That is all about changing the username in Linux.
Note: The GUI method is not recommended for changing the username on Linux as it only makes changes temporarily. Moreover, it cannot change the home directory of the existing user.
How to Change Username in Linux Through CLI?
Linux “CLI(Command Line Interface)” allows the users to manage the Linux system completely through commands. These commands may be built-in or external and can be used to change file/directory permissions, edit files, create file/directory, start server, and many other operations in Linux.
This section carries out the practical implementation of the following preinstalled command and other possible ways that can be used to change the username in Linux:
- Method 1: Change Username Using “usermod” Command
- Method 2: Change Username Using Linux File System
Let’s first start with the “usermod” command.
Method 1: Change Username Using “usermod” Command
The “usermod” command line utility allows the system administrators to change the existing account information/properties of a user. This information includes username, passwords, User ID, group ID, login shell, home directory, and much more. The “usermod” command takes this information from the “/etc/passwd” and “/etc/shadow” files of the Linux systems.
In this section, this command changes the username of the particular user by following the below-stated steps of instructions.
Step 1: Check the Existing Username
First, check out the existing username with the help of the Linux “whoami” command in this way:
whoami
Output
It shows the existing username on the terminal which is currently logged in:

In addition, the complete information of the existing user can also be retrieved from the “/etc/passwd” file by executing the given combination of the cat and grep commands:
cat /etc/passwd | grep linux
In the above command, the “|(Pipe)” character combines the “cat” and the “grep” command.
Output
Now the output contains the complete details of the specified user including its username, encrypted password, user ID, group ID, GECOS field(additional information), home directory, and default shell.

Furthermore, the account details of specific users can also be retrieved from the “/etc/passwd/” file via the more or less command.
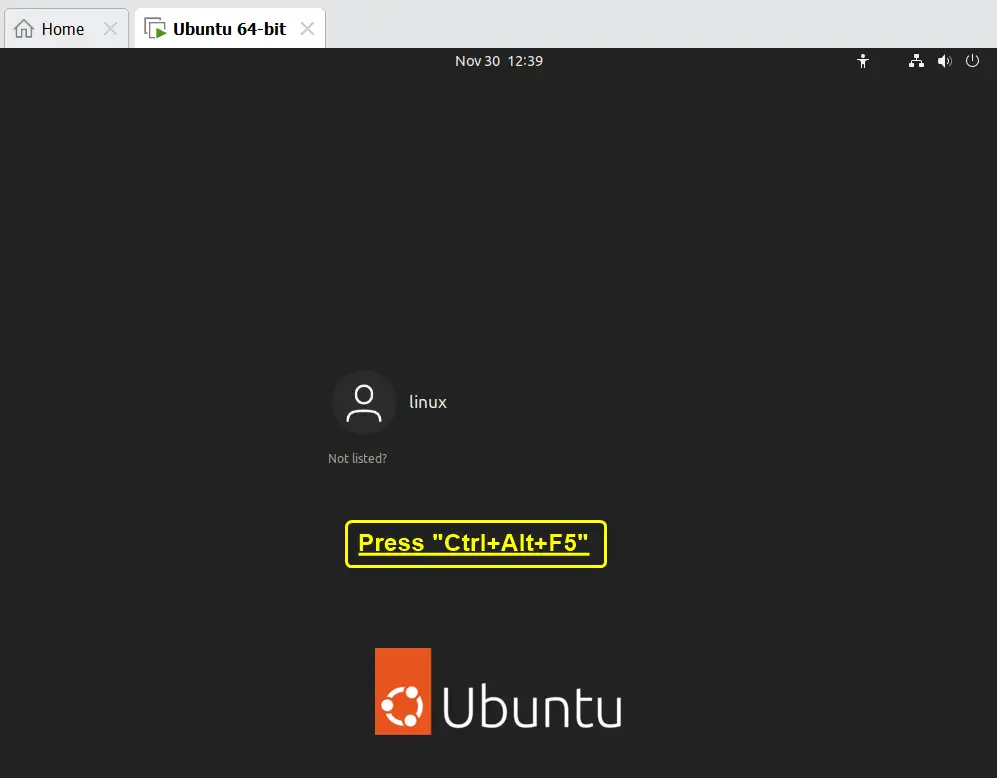
Step 2: Logout and Open the tty
Next, log out from the currently logged-in user and press the “Ctrl+Alt+F5” shortcut key on the login screen to open the tty session:
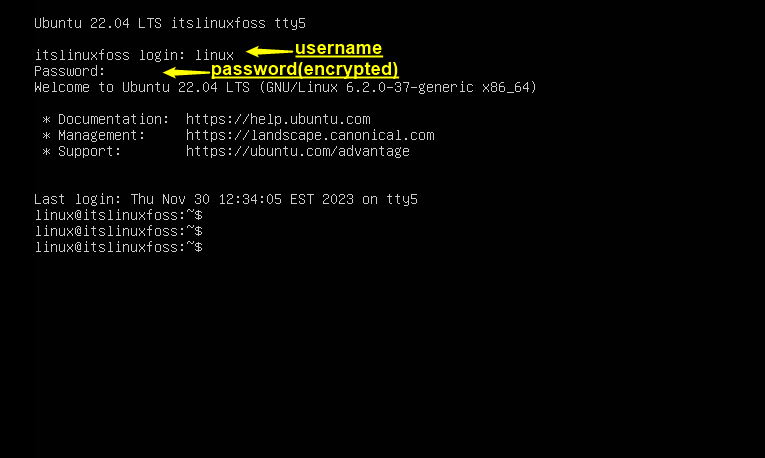
Step 3: Login in as a Root User
After opening the tty session, enter the existing user login credentials that include username and its password:
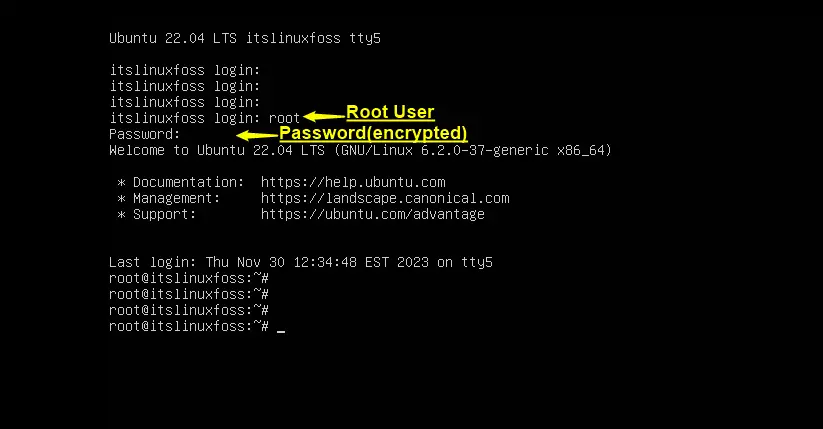
Next, exit the current working shell with the help of the “exit” command in this way:

Now, in the new shell log in as the “root user” by entering the “root” keyword as a command. Once done, enter its password to start changing the username process in Linux:
Step 4: Change the Username
Once the error user is logged in successfully, then follow the generalized syntax of the “usermod” command to change the existing username:
usermod -l new_username old_username
In the above syntax the “-l” flag of the “usermod” command displays the updated username as a new login value of the existing user.
Replace the “new_username” with the desired one and the “old_username” with the existing username in the above “usermod” command:
usermod -l johnson linux
Output
The below output shows the successful execution of the “usermod” command:
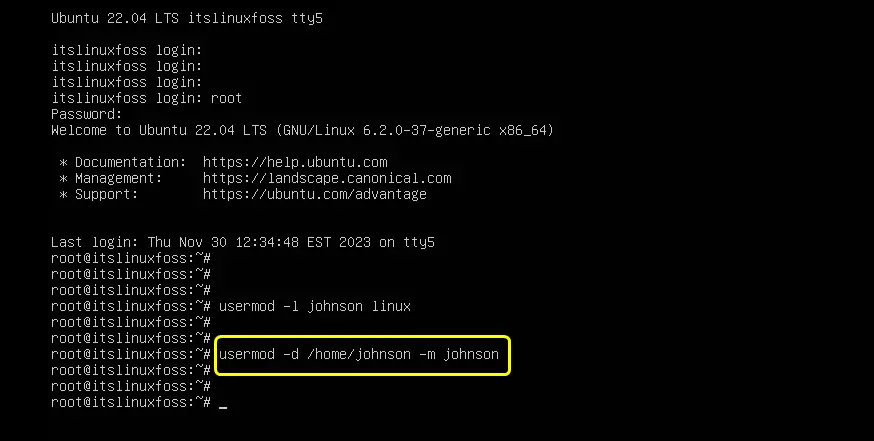
Step 5: Change the User Home Directory
After changing the existing username, a “home” directory is automatically created containing all the personal files and folders of the new user. It is essential to change the location of that home directory according to the new user.
To achieve this functionality, use the below-stated “usermod” command:
usermod -d /home/johnson -m johnson
In the above command:
- The “-d” flag changes the location of the home directory.
- The “-m” flag moves the content of the existing home directory to the home directory of the new user.
- The “johnson” denotes the new username the user can replace it as per choice.
Output
It can be analysed that the above command executed successfully:
Step 6: Update the Login Name
In Linux, the “login” name is the username that shows on the login screen. To modify it according to the new updated username, use the “chfn” command.
The “chfn” command changes the user account information that contains login name and time, full or real name, idle time, terminal type, office location, and phone number. All of the specified information is provided by the Linux “finger ” command.
Generalized Syntax
chfn -f "FULL NAME" username
In the above syntax of the “chfn” command, the “-f” flag specifies the full or login name of the updated username.
Now, use this syntax according to the current scenario:
chfn -f johnson johnson
Output
It can be seen that changing the login name cis also done successfully:
Step 7: Exit a tty Session
Once all is done execute the “exit” command again to exit the current working shell and after that press the “Ctrl+Alt+F1” key to exit the tty session:
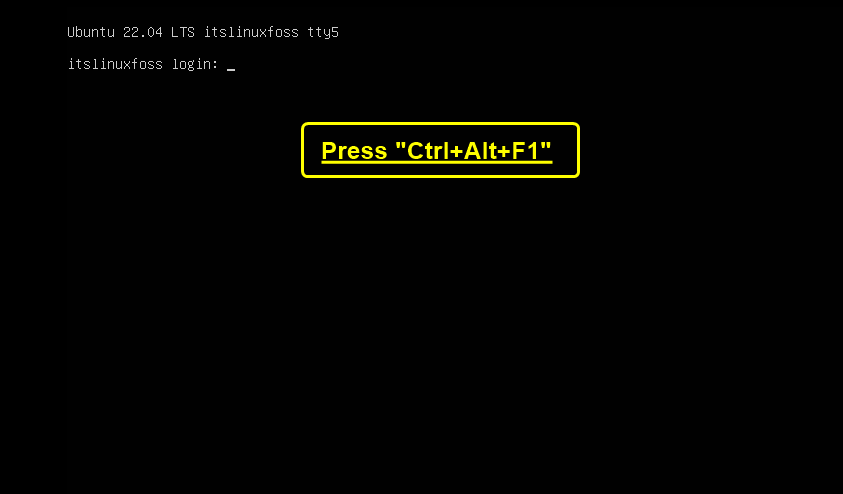
The login screen appears after exiting the tty session, which shows the modified login name according to the newly updated username:
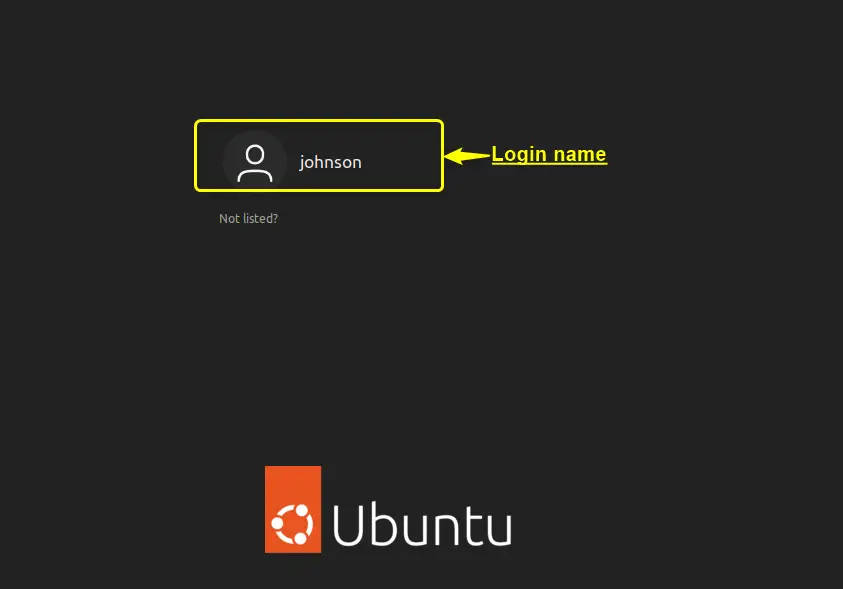
Enter the login credentials.
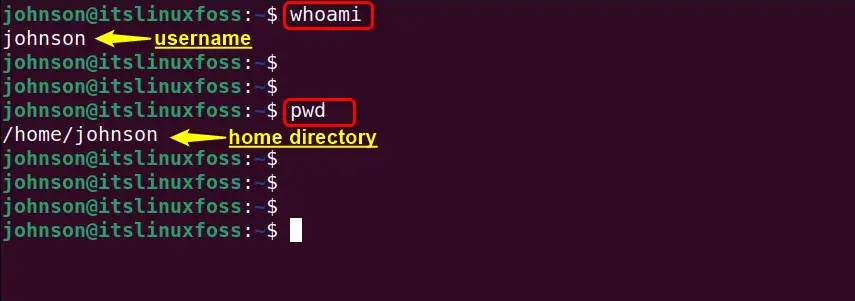
Step 8: Verification
Lastly, after successful login via the updated login name, run the “whoami” command to verify the username and the “pwd ” command to confirm its home directory:
whoami
pwd
Output
It can be observed that both the username and its home directory has been updated successfully:
That is all from the tty session.
Method 2: Change Username Using Linux File System
Linux is a file-based system that stores everything in files. Among these files there is a “/etc/passwd” text file that keeps the record of all user accounts. The normal user can only read or view it. Only the system administrator has the privilege to edit this file in a way of modifying the existing details and adding or removing the user.
This section modifies this file to change the existing username by following the below-stated steps of instructions.
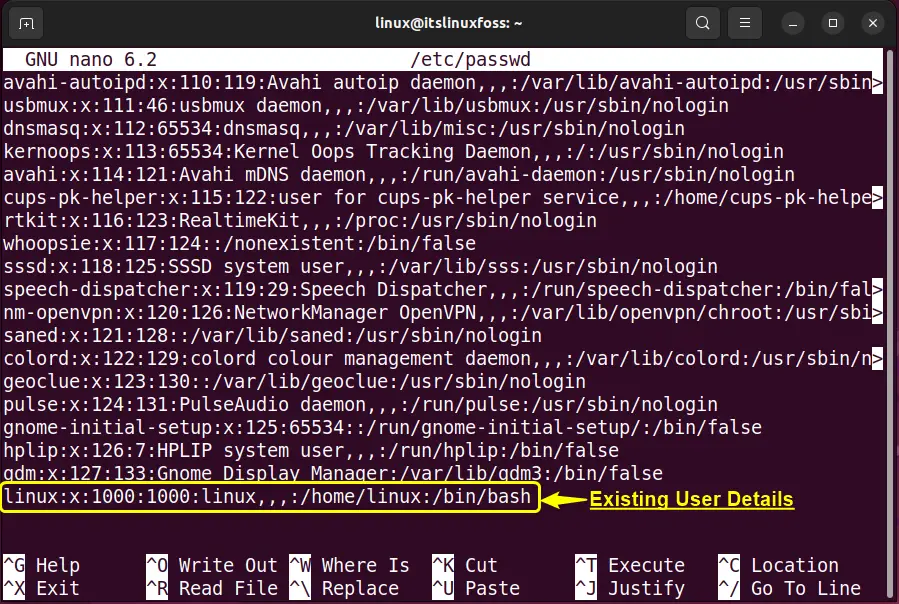
Step 1: Existing User Details Before Modification in “/etc/passwd” File
First, execute the “grep” command to filter out the specified user information from the “/etc/passwd” file:
grep linux /etc/passwd
Output
The retrieved information includes the specified user real name, encrypted password, user ID, group ID, GECOS field(additional information), home directory, and default shell:

Step 2: Modify “/etc/passwd” File
Next, open the “/etc/passwd” file in the default “nano” editor having root user privileges to modify it. Once it is opened, scroll down its content and navigate to its end:
sudo nano /etc/passwd
Output
Here, the below output contains the existing user account details:
Now rename the “existing username” field with the new one and modify the “home directory” as well:
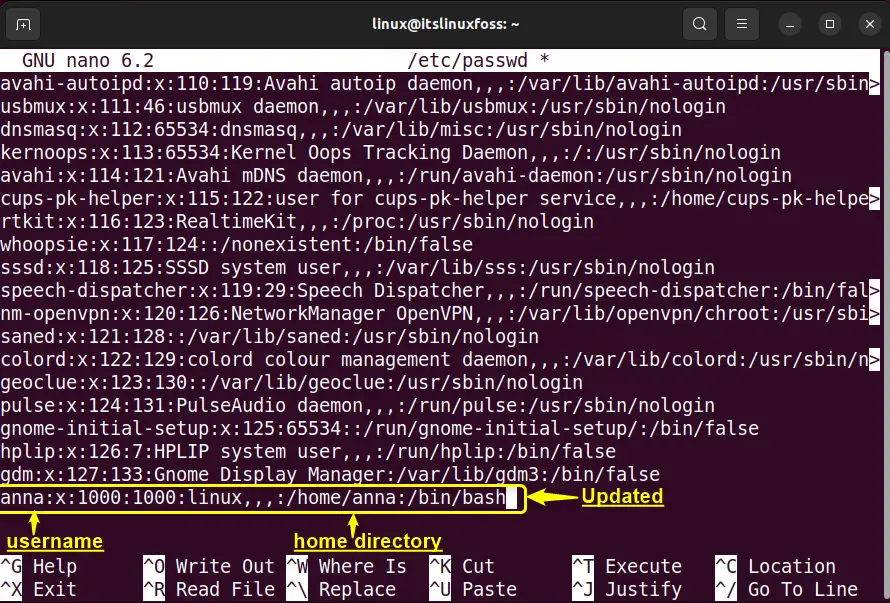
Press “Ctrl+S” to save the changes and “Ctrl+X” to exit the file from the terminal.
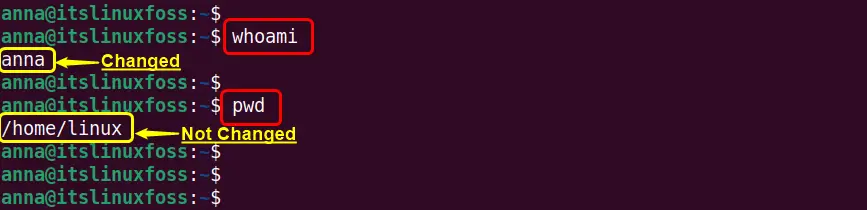
Step 3: Verification of New Username
Now, execute the “whoami” and the “pwd” commands to verify the new username and check its home directory:
whoami
pwd
Output
It can be observed that only the username is modified, not the home directory. This is because the Linux file system exclusively changes the username temporarily not the home directory:
Note: If the user wants to change the location of the home directory, then use the “usermod” command as discussed in the method.
Important Tip: Reset the Existing User Password
After changing the existing username by modifying the “/etc/passwd” file, the password will be disabled automatically. This is because the already set encrypted password is for an existing user not for the modified one.
If the user reboots the system or performs any operation that requires the existing user password that is not changed based on the new username then the following authentication error will be generated:
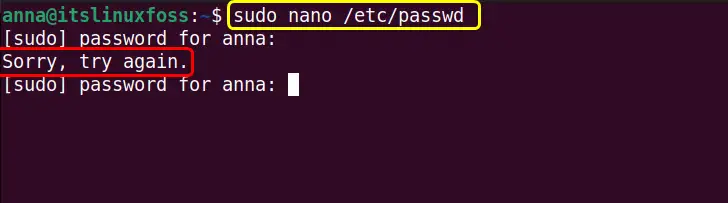
Hence it is recommended to reset the existing user password by following the detailed guide on reset password in Linux.
Conclusion
In Linux, the existing username can be changed with the built-in “usermod” command. It specifies the new username and then the existing one to perform this task on the terminal. Furthermore, the above-defined operation can also be performed by modifying the “/etc/passwd” file that contains the user’s account details.
However, this method is not mostly preferred because it changes only the username temporarily, not the home directory. In addition, It also disables the existing user password automatically. Like this, the GUI method is also not recommended because it has the same disadvantages as in the Linux file system. This post has practically demonstrated all approaches to changing the username in Linux.
