Ubuntu is the most commonly used simple and straightforward Linux distribution. It provides a user-friendly GNOME interface and command line utilities to access and manage the whole system completely. It’s default package managers and snap store comes with a large list of applications by default. However, if the user needs any other external application in Ubuntu then it can also be installed easily.
This guide pens down all possible aspects to installing applications in Ubuntu having the following outlines:
- Using “apt” Package Manager
- Using “snap” Package Manager
- Using “FlatPak” Package Manager
- Using “dpkg” Package Manager
- Using a “third party” Repository
- Using Ubuntu Software Center (GUI)
Method 1: Install Applications in Ubuntu Using “apt”
An “apt” is the default package manager of Ubuntu to install, remove, upgrade, and update the applications (if available). Follow these steps to install desired applications in ubuntu.
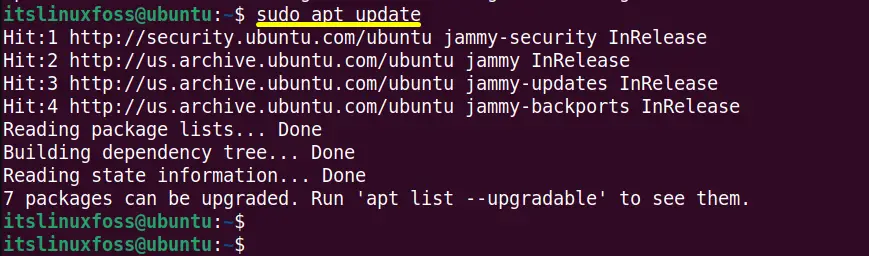
Step 1: Update Software Packages
It is recommended to update the Ubuntu system packages using “apt” before any software installation for getting the newest releases:
$ sudo apt update
Step 2: Install “Youtube-dl” Application
Simply use the “apt” command to install the “youtube-dl” application in Ubuntu with superuser privileges i.e “sudo”:
$ sudo apt install youtube-dl
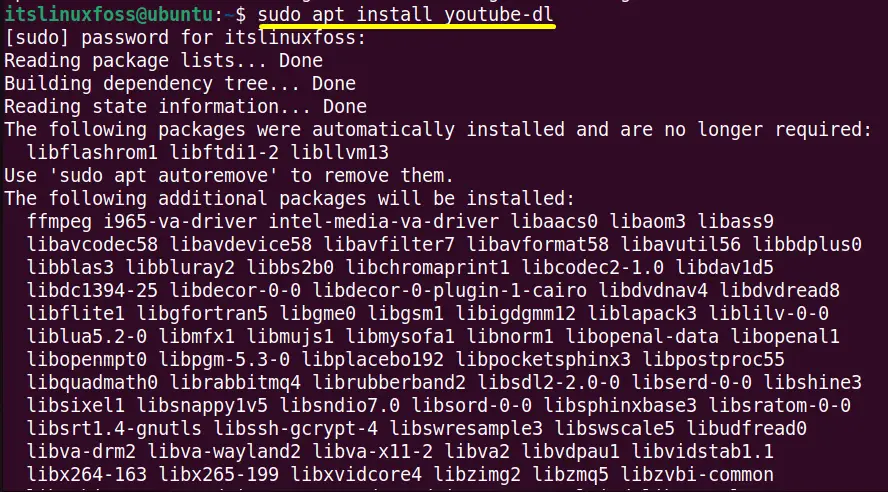
The “youtube-dl” software application has been installed in Ubuntu via “apt”.
Method 2: Install Applications in Ubuntu Using “snap”
The “snap” is another bundle of software applications and their dependencies. It allows the user to install more than one version of an application in the same system along with its dependencies. Follow some necessary steps to install the application via snap:
Step 1: Install Snapd Package Manager
The “snapd” package comes with the fully installed Ubuntu version. However, it is not available in the Ubuntu minimal version. If you are using a minimal version of Ubuntu then install “snapd” using “apt” as a command:
$ sudo apt install snapd
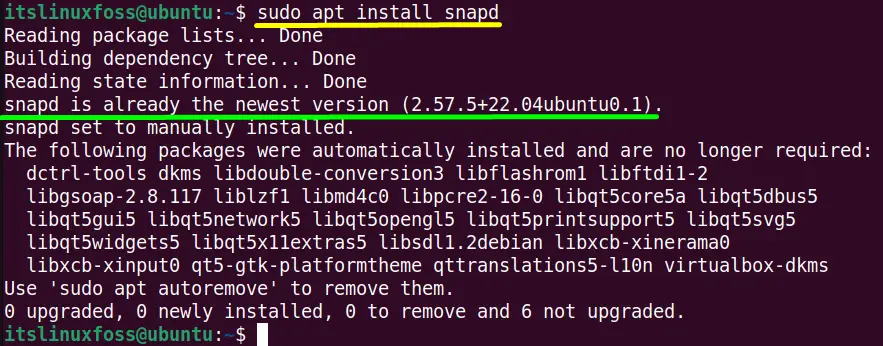
In Ubuntu 22.04 the “snapd” is being installed, having the newest version “2.57”.
Step 2: Install “GIMP” Application
Now use the “snap” package manager for the installation of the “gimp” application in this way:
$ sudo snap install gimp

The “gimp 2.10.30” tool has been successfully installed in Ubuntu via “snap”.
Method 3: Install Applications in Ubuntu Using “Flatpak”
Flatpak is an external package manager that allows Ubuntu users to install applications from multiple “remotes” repositories. This method utilizes the commonly used “Flathub” remote to install applications.
Step 1: Install Flatpak Package Manager
To install “Flatpak” execute the below-typed “apt” command in the terminal:
$ sudo apt install flatpak
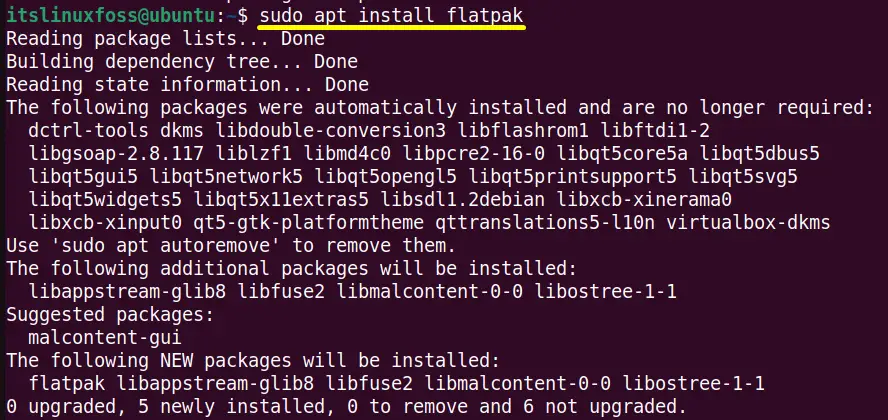
The “Flatpak” has been successfully installed in Ubuntu.
Step 2: Add “Flathub” Repository
The “Flathub” official repo comes with a large list of applications. Add it into Ubuntu in the following way:
$ flatpak remote-add --if-not-exists flathub https://flathub.org/repo/flathub.flatpakrepo

Step 3: Install Application
Here we installed “Arduino IDE” application with the help of flatpack manger and its remote “Flathub” repository:
$ sudo flatpak install flathub cc.arduino.arduinoide
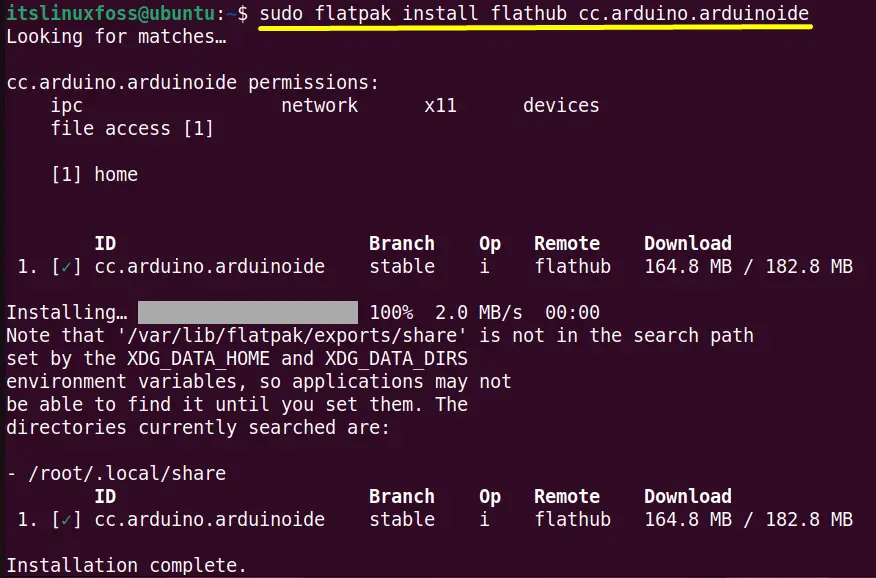
The “Arduino IDE” has been successfully installed via “flatpak”.
Method 4: Install Applications in Ubuntu Using “dpkg”
The “dpkg” is another built-in command line package manager that helps to build, install and remove the Debian packages having the “.deb” extension.
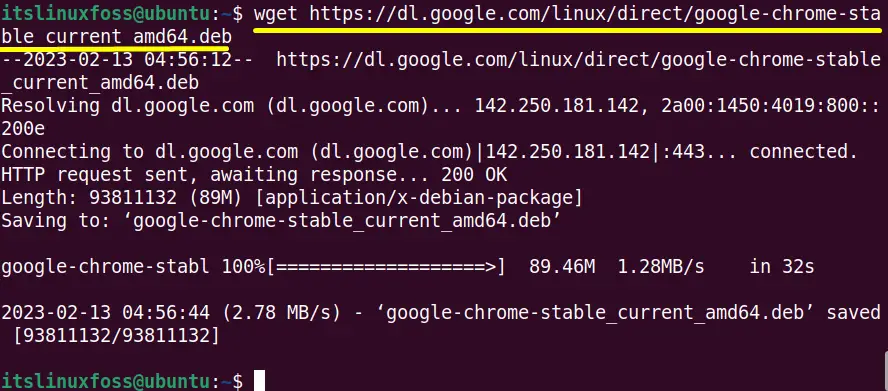
Step 1: Download “.deb” Package
Here the “google-chrome-stable” Debian package is downloaded using the “wget” command in the current working directory:
$ wget https://dl.google.com/linux/direct/google-chrome-stable_current_amd64.deb
Step 2: Install “ Google Chrome” Application
Now execute the “dpkg” command followed by “-i(install)” flag to install the downloaded “google-chrome-stable” “.deb” package:
$ sudo dpkg -i google-chrome-stable_current_amd64.deb
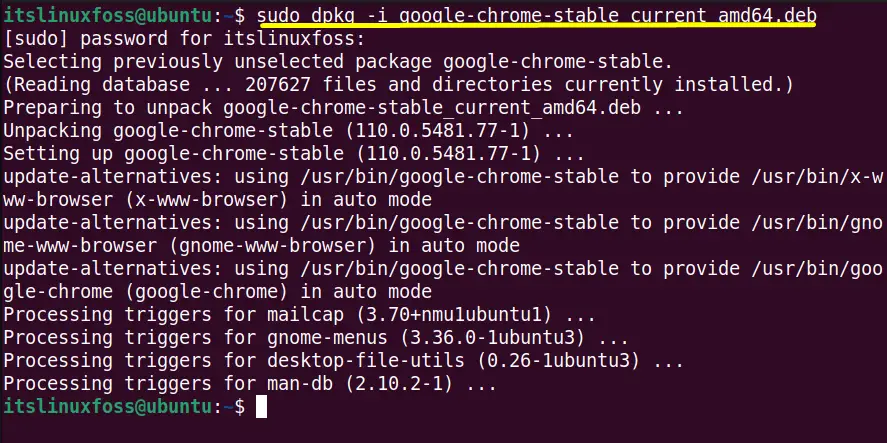
The “Google Chrome” application has been installed via “dpkg”.
Method 5: Install applications in Ubuntu Using the “Third-Party” Repository
Some of the applications are not present in the default Ubuntu repository. These applications require third-party repositories. For this purpose, use the below-defined steps.
Step 1: Add PPA Repository
Execute the “add-apt” command to add the “xtraDeb” PPA repository for the installation of the “FileZilla” application in Ubuntu:
$ sudo add-apt-repository ppa:xtradeb/apps
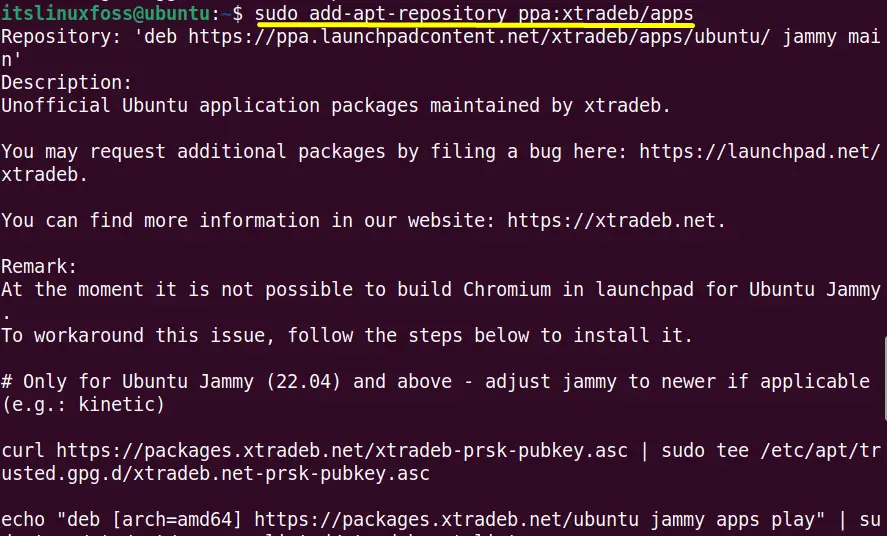
The “xtradeb” has been successfully added in Ubuntu.
Step 2: Install FileZilla Application
Now from the above PPA repository, install the FileZilla application via the “apt” package manager in this way:
$ sudo apt install filezilla
The FileZilla tool has been successfully installed in Ubuntu via the “PPA” repository.
Method 6: Install applications in Ubuntu Using “Ubuntu Software”
The “Ubuntu Software Center” offers multiple applications in its snap store. The user needs to follow the step-by-step instructions to install an application in Ubuntu using GUI.
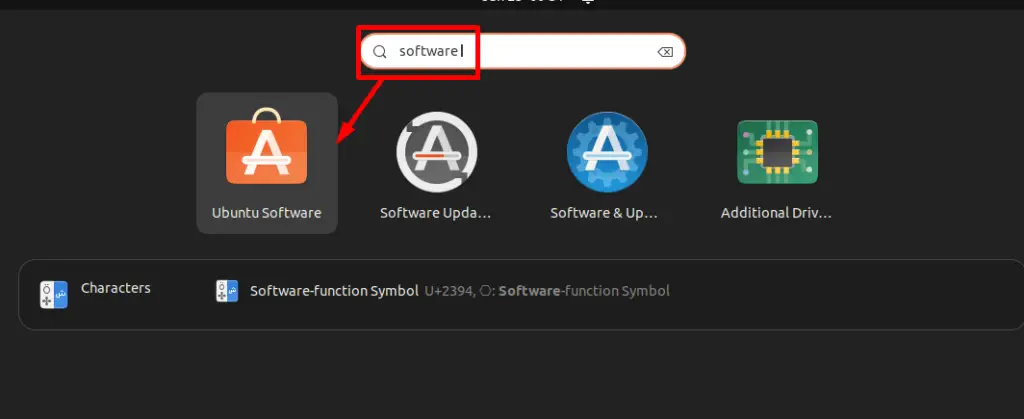
Step 1: Access Software Center
Find out the Ubuntu Software Center in the search bar located in the applications menu and open it:
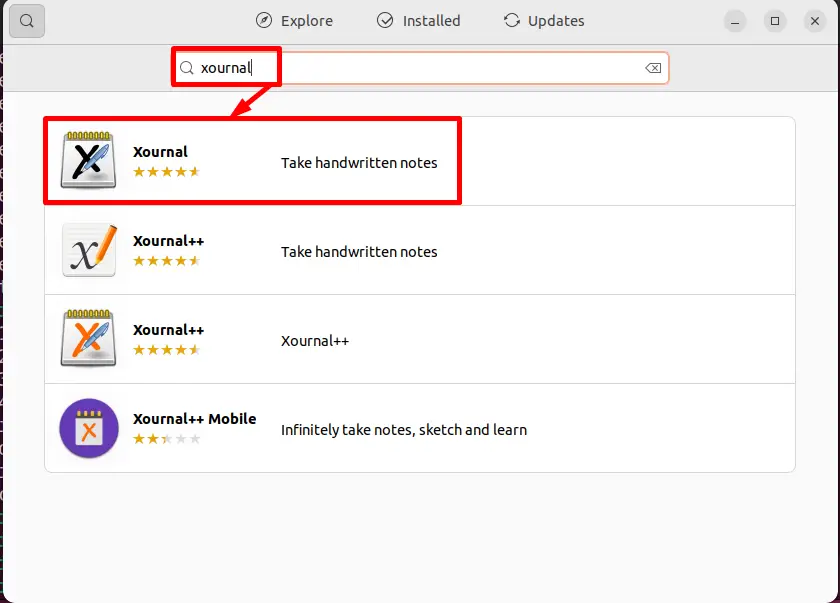
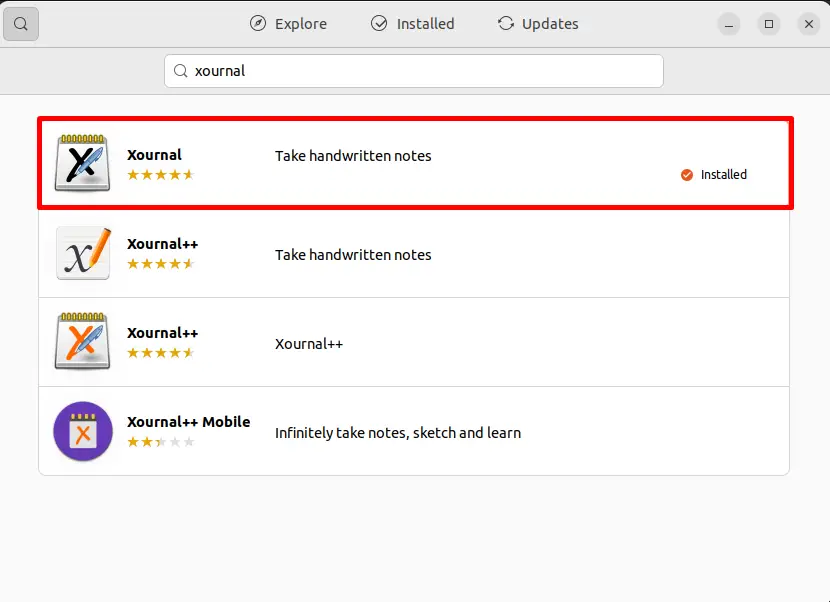
Hit the “Search” icon for searching the targeted application i.e “xournal”. Click on the shown results as shown below:
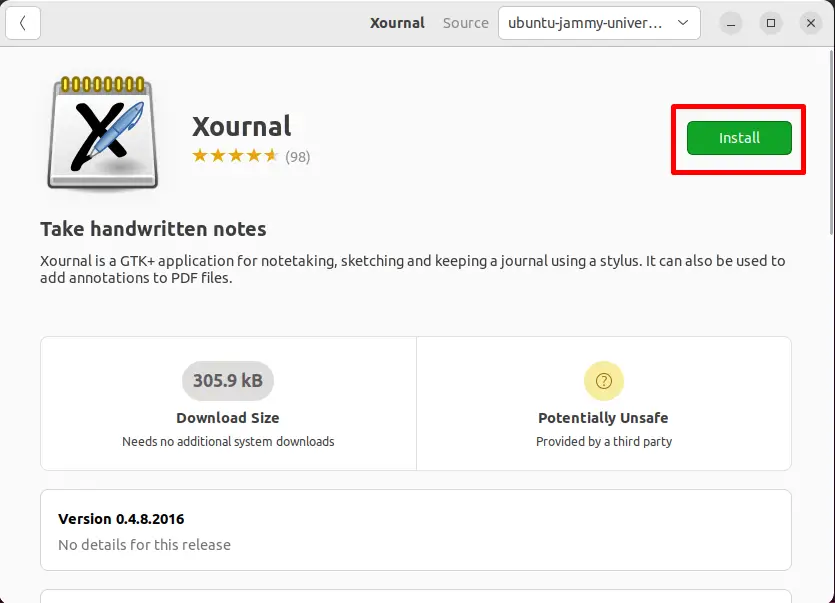
Step 2: Install the “Xournal” Application
Open the “Xournal” application and tap on the highlighted green “Install” button:
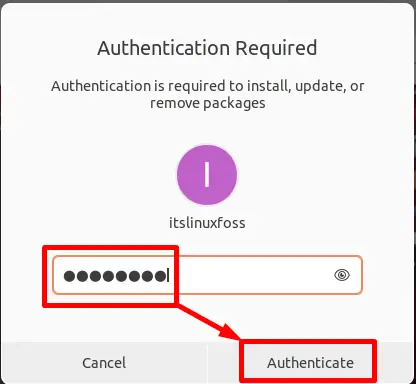
Enter the root user “Password” to “Authenticate” the installation process:
When all steps are done the “Xournal” application will be successfully installed:
Conclusion
In Ubuntu, the user can install applications using the “apt”, “snap”, and “flatpak” package managers. Apart from that this task can also be performed using “dpkg” and “third-party” repositories. The Ubuntu Software Center supports the Snap packages installation. This guide has demonstrated all possible aspects to install applications in Ubuntu.
